

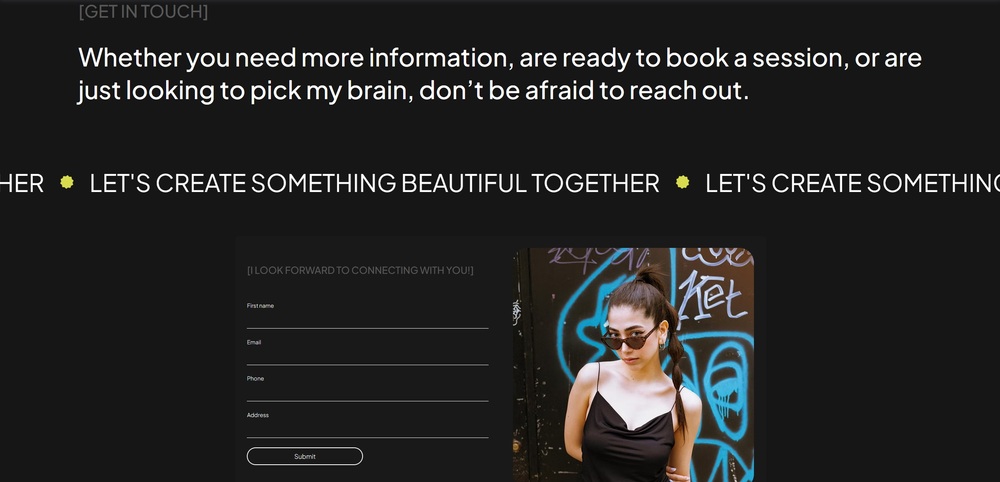
As a general rule, we don’t want to oversaturate the dedicated contact page for any website. This page is merely utilitarian, and for many websites, getting visitors to press “Submit” on the contact button is the ultimate goal. So we don’t want to distract our visitors when they’re so close to the finish line.
Of course, before we start, we’ll have to create a new page and rename it “Contact.” We already know how to do that, so let’s get straight into building the contact form.
4.1 Contact Form

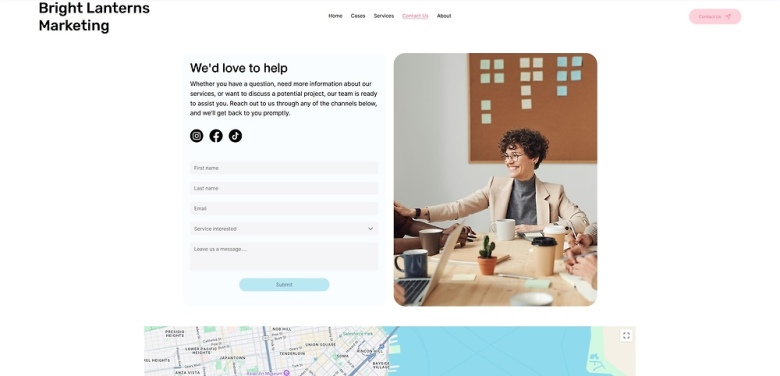
This contact form will be more detailed than the one in the footer. We want to ensure that it’s well-structured so visitors have no trouble navigating it and leaving their specific reasons for contacting our website.
Step 1: Create a new section and apply an advanced CSS grid to it.
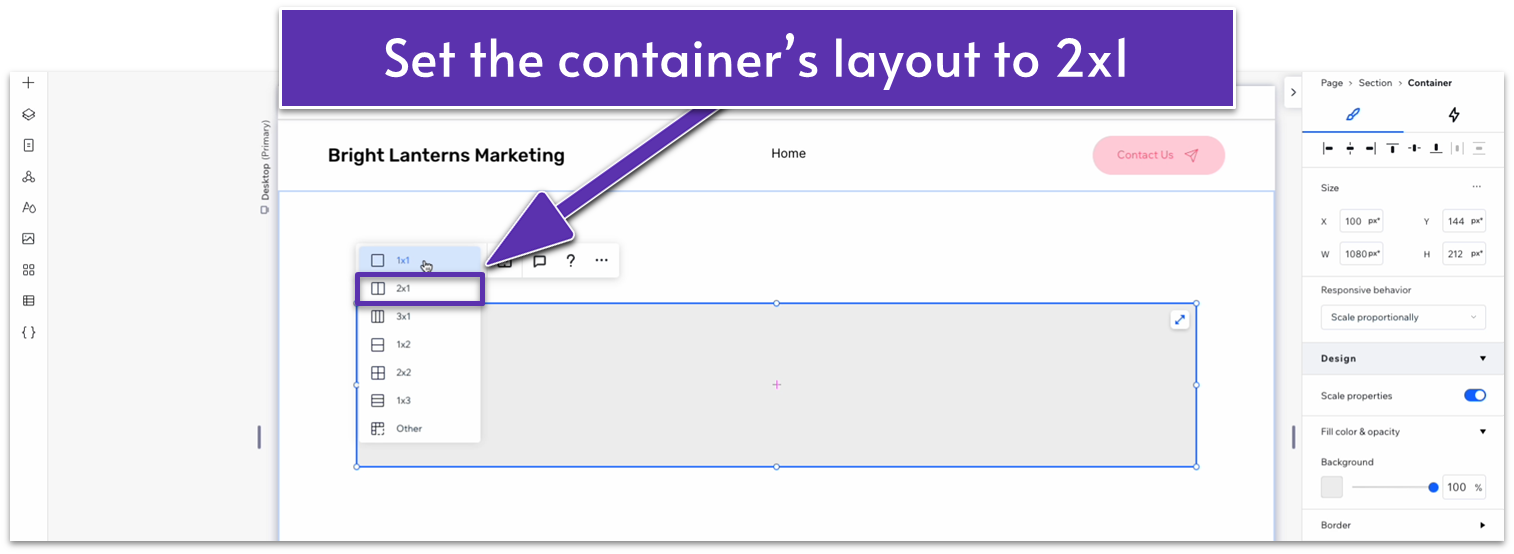
Step 2: Drag a container into the section.
- Undock all margins ( , , , ) from the container and set them to 0.
- Set the container’s width to 1080px.
- Apply an advanced CSS grid to the container.
- Apply a 2×1 ( ) layout to the container.
- Set the horizontal gap ( ) between rows to 20px.
- Remove the background from the container.
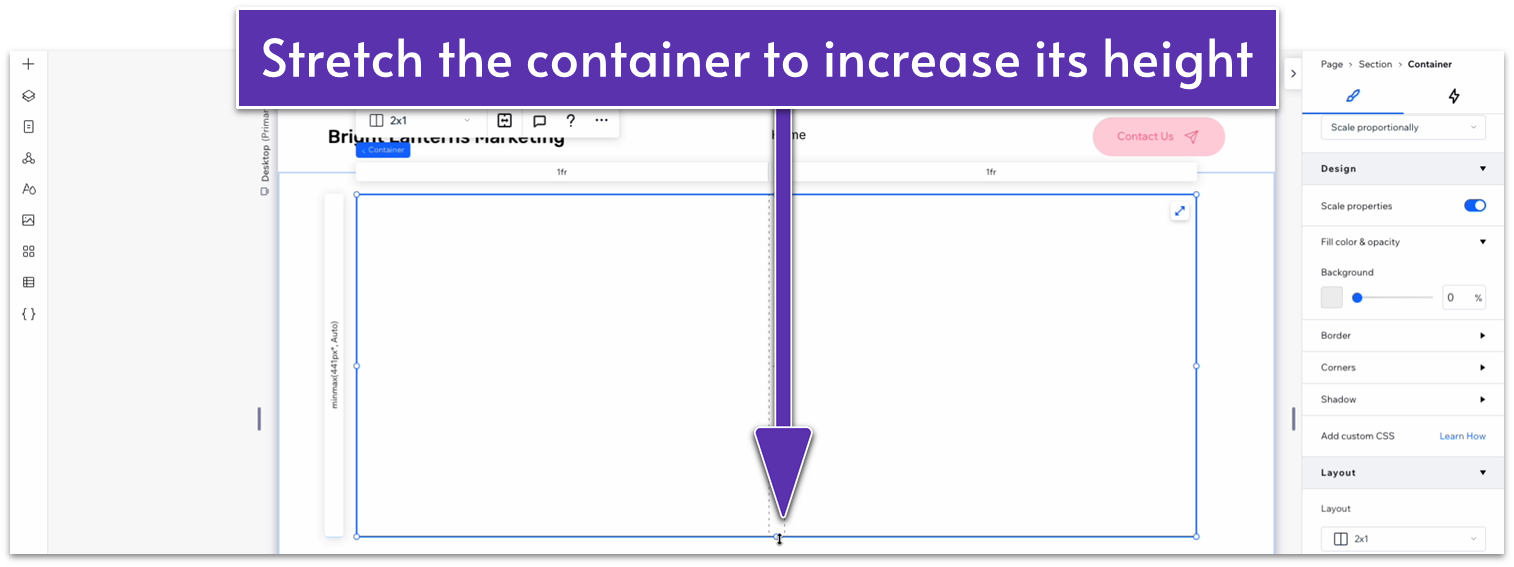
- Stretch the upper and lower sides of the container to 440px.
- Set the section’s behavior to auto ( ).
Step 3: Drag a container into the left-side column.
Once again, I’m fighting the urge to make an Inception reference, but we’ll drag a container into the container. At the moment, I’ll simply refer to the left-side or right-side column of the container as if it’s the entire section and specify when you need to change the overall section.
- Drag a container element into the left-side column.
- Set all margins to 0.
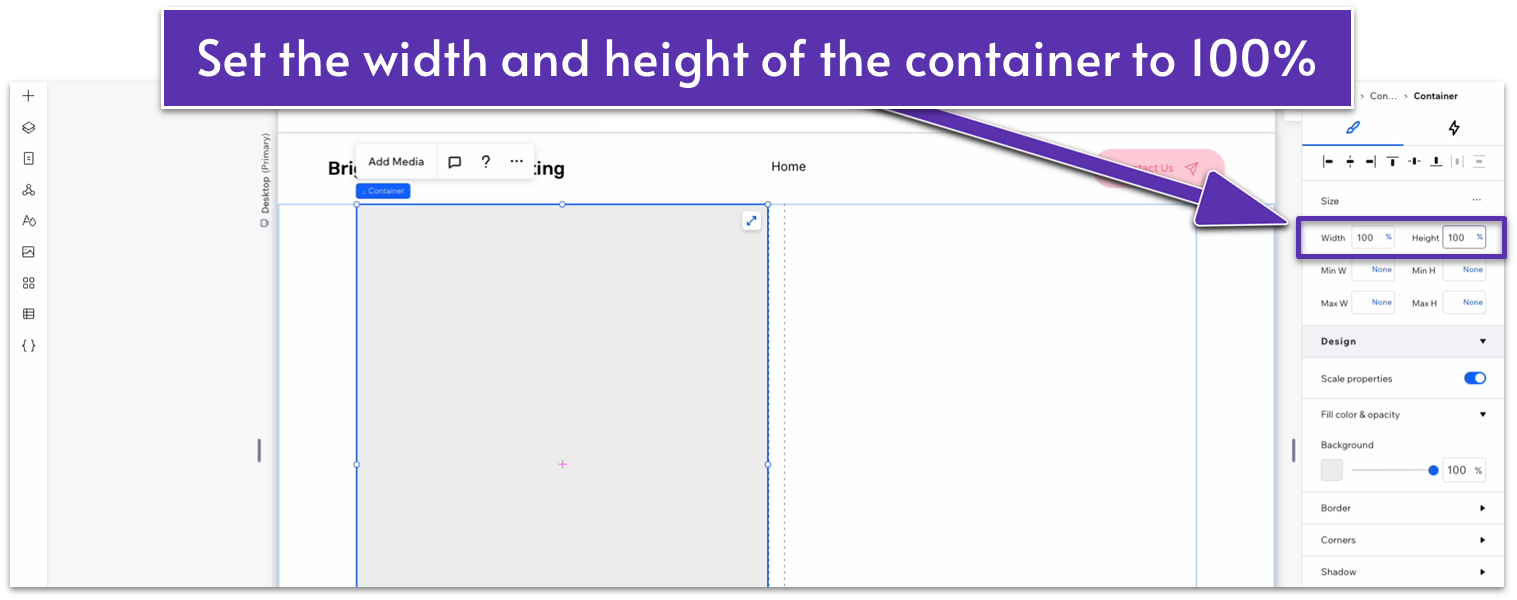
- Set the container’s width and height to 100%.
- Set the container’s background color to a soft blue (#F9FDFF HEX).
- Set the corner radius to 20px.
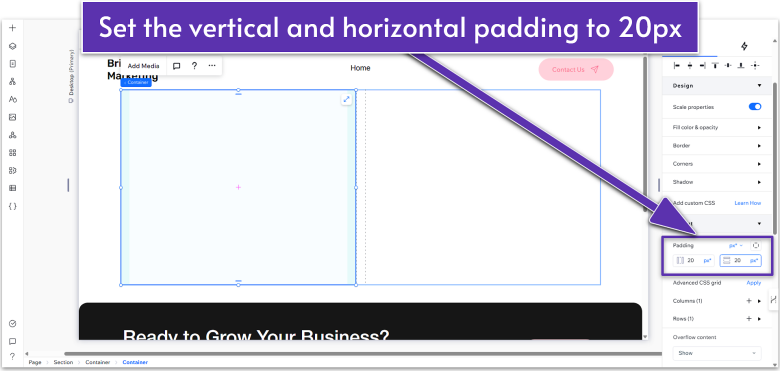
- Set the vertical ( ) and horizontal ( ) padding for the container to 20px.
Step 4: Drag an image into the right-side column.
- Set all margins to 0.
- Set the image’s width and height to 100%.
Step 5: Change the section’s padding.
- Set the top padding ( ) for the overall section to a 50px scale.
Step 6: Copy the text stack from the “About” page and paste it into the left-side column.
- Go back to the “About” page and copy the text stack from the hero section.
- Paste the text stack into the left-side column.
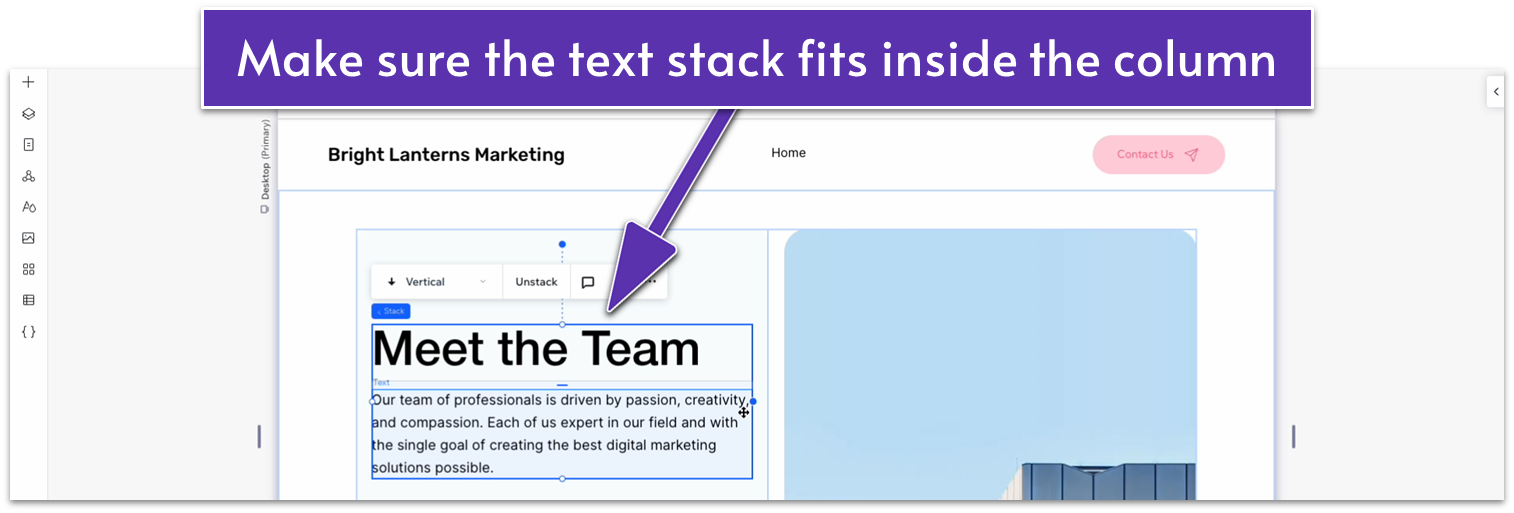
- Drag the edges of the text stack so it fits inside the column.
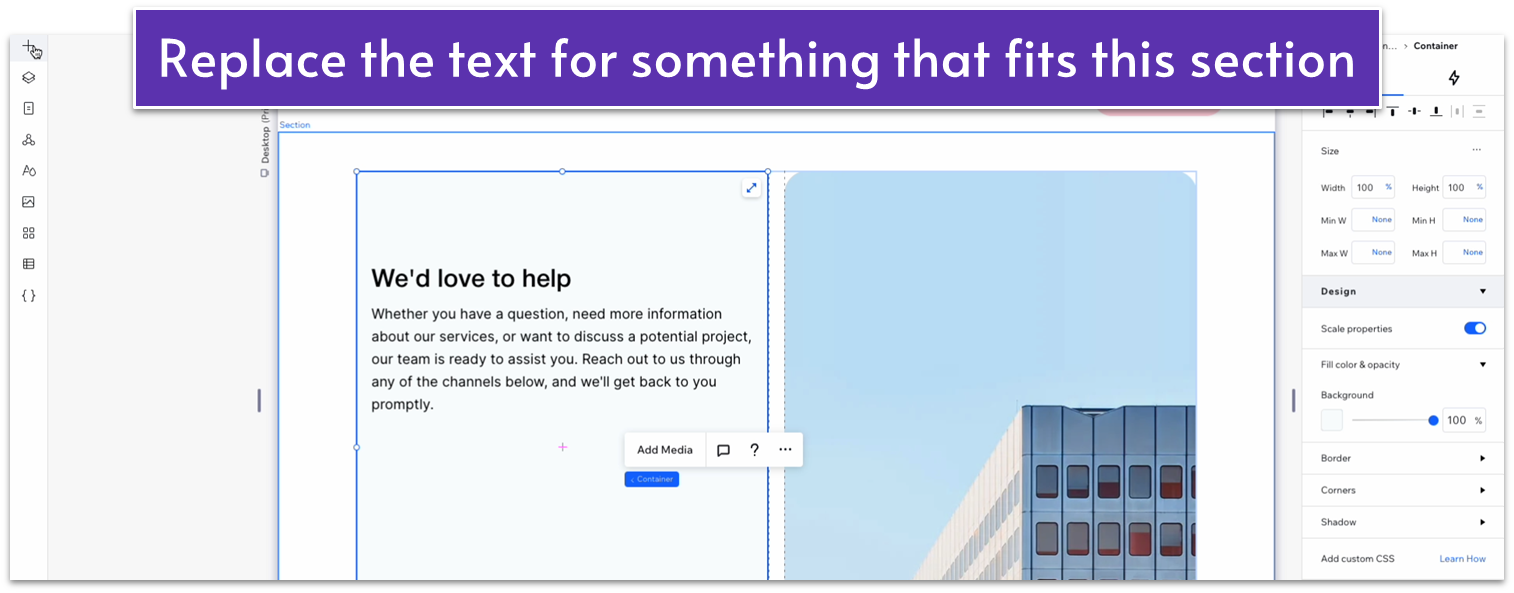
- Set the font size of the heading to 32px.
- Set the font size of the paragraph to 16px.
- Replace the text with a heading and brief intro for this contact form.
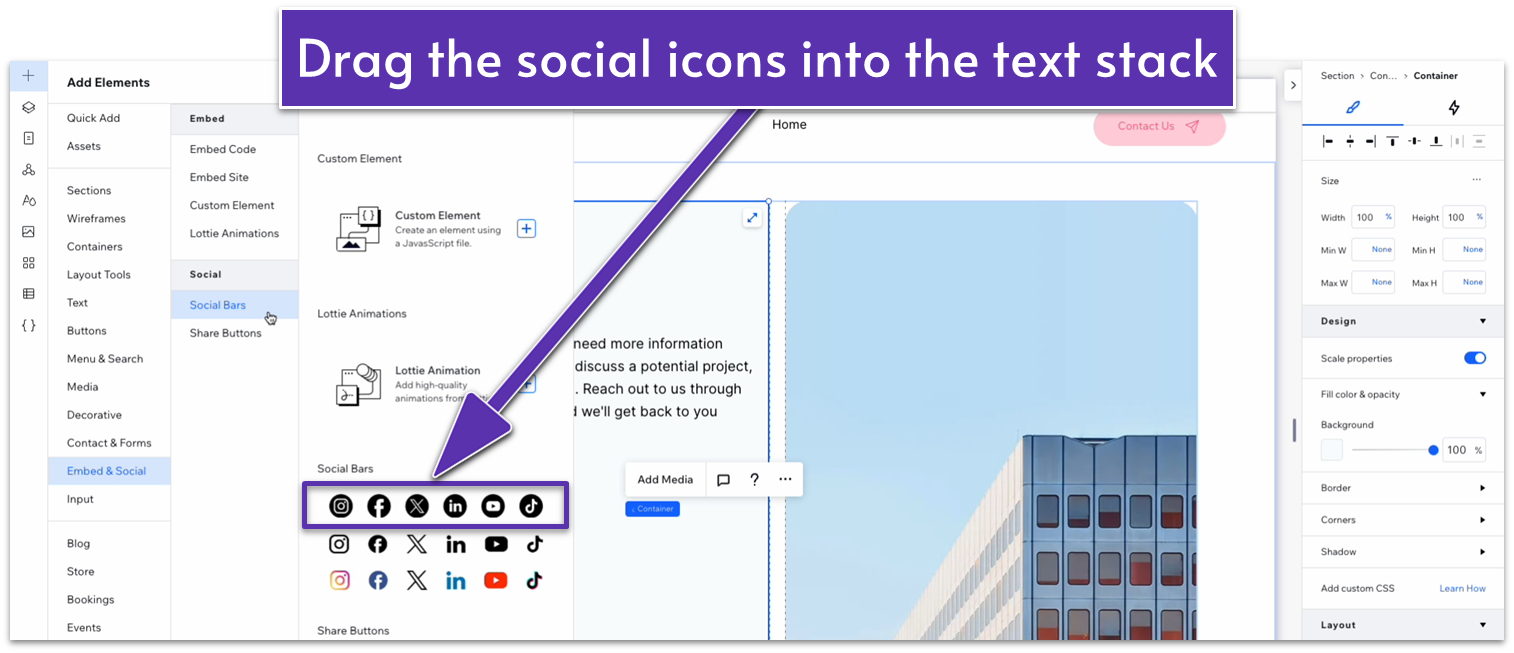
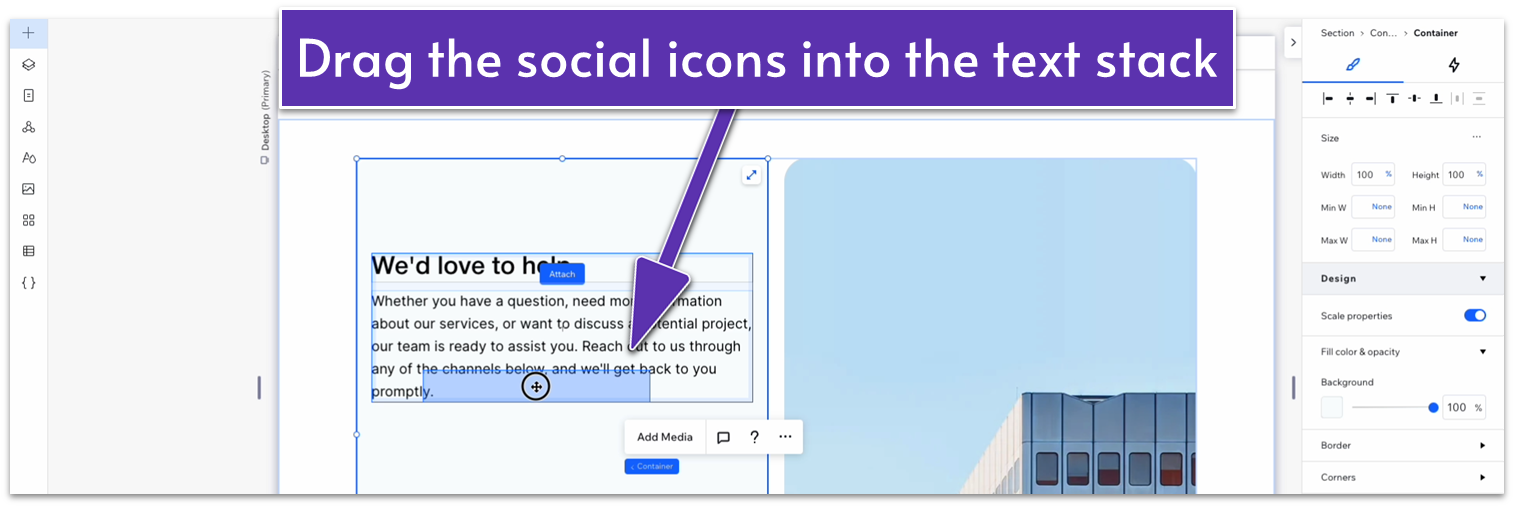
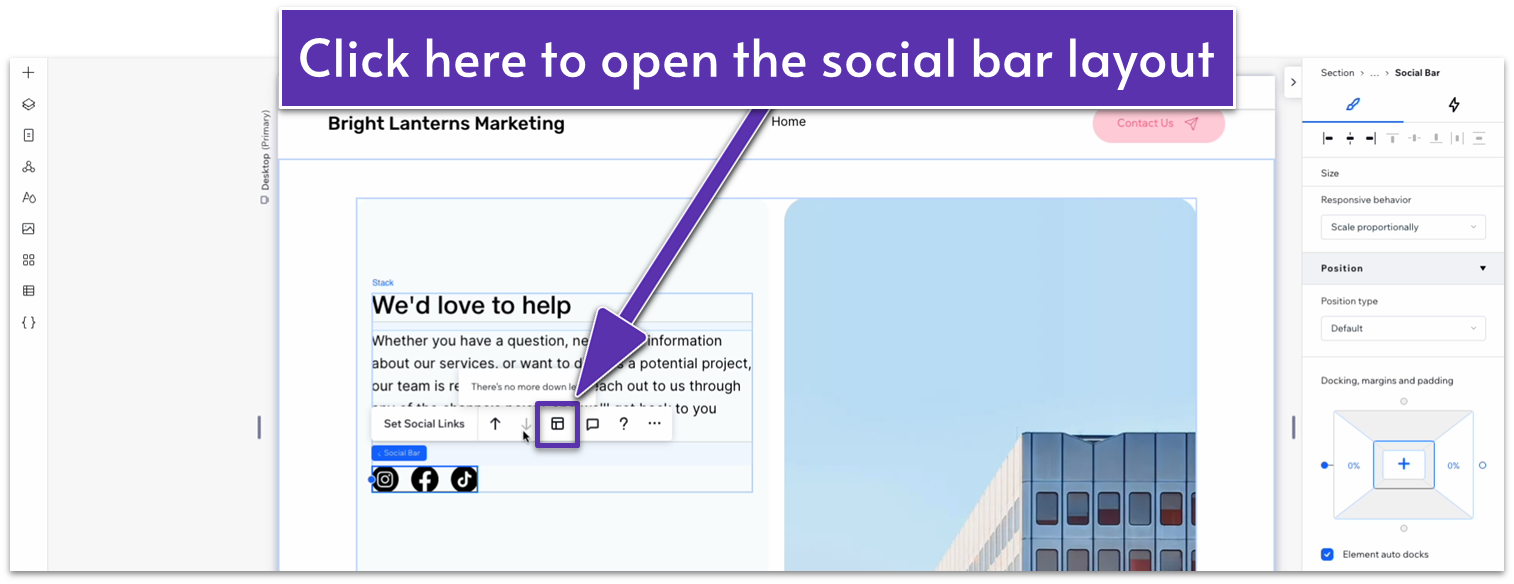
Step 7: Add social icons below the text stack
- Go to the “Add Elements” menu ( ), then “Embed & Social,” and “Social Bars.” Drag one of the available social bars inside the text stack
- Set the bottom margin ( ) for the paragraph text below the header to a 30px scale.
- Click on the social bar and select “Set Social Links” in the pop-up menu.
- Change the link below each icon to your social media profile.
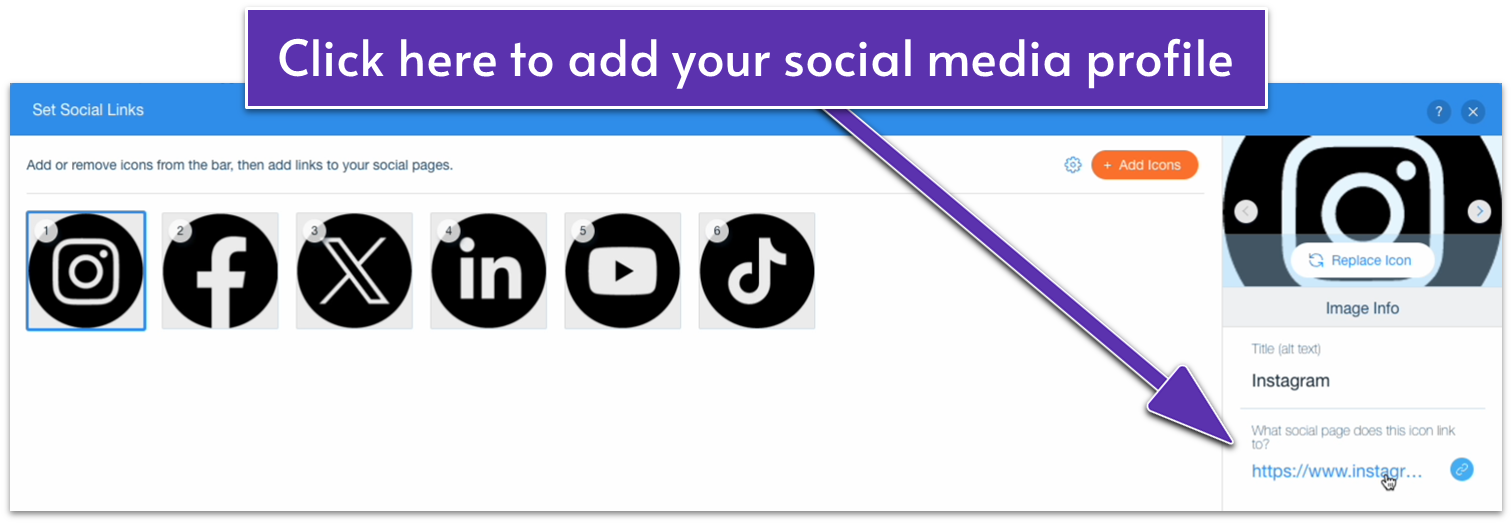
- Remove any social links you don’t want to include.

- Click on the “done” button once you’ve included all the social links you want.
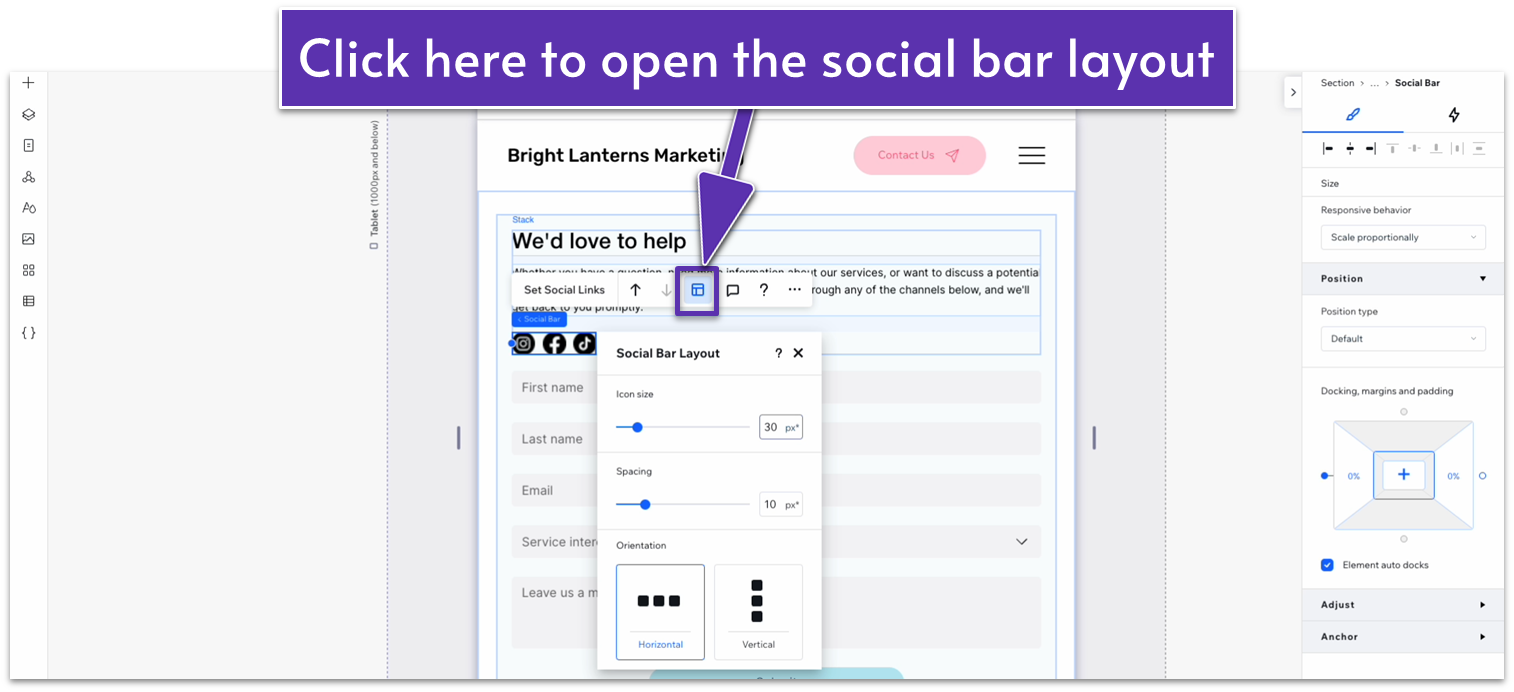
- If you want to change the icons’ size and spacing, click on the social icons and then on the segmented page icon on the pop-up menu to open the “Social Bar Layout” menu ( ). We left them as is.
Step 8: Move the entire stack to the top of the column.
Step 9: Change the left-side container’s layout to 1×2 ( ).
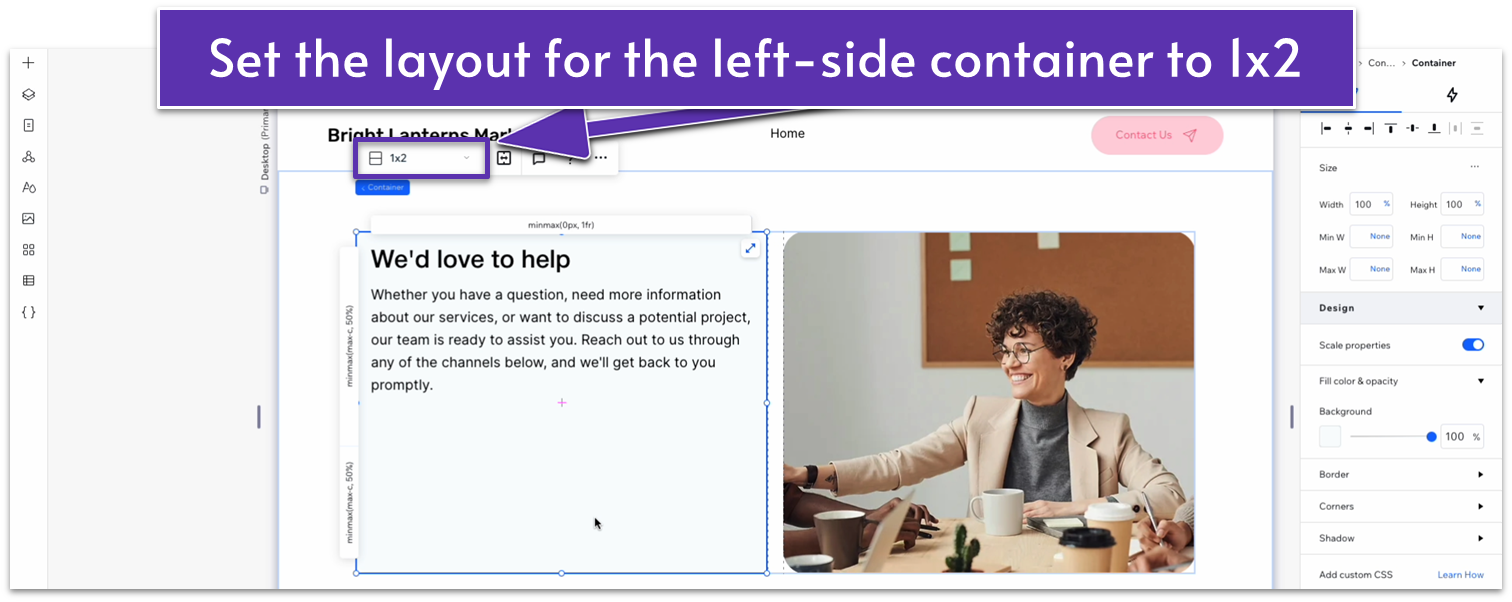
- Set the vertical gap ( ) for the container to 30px.
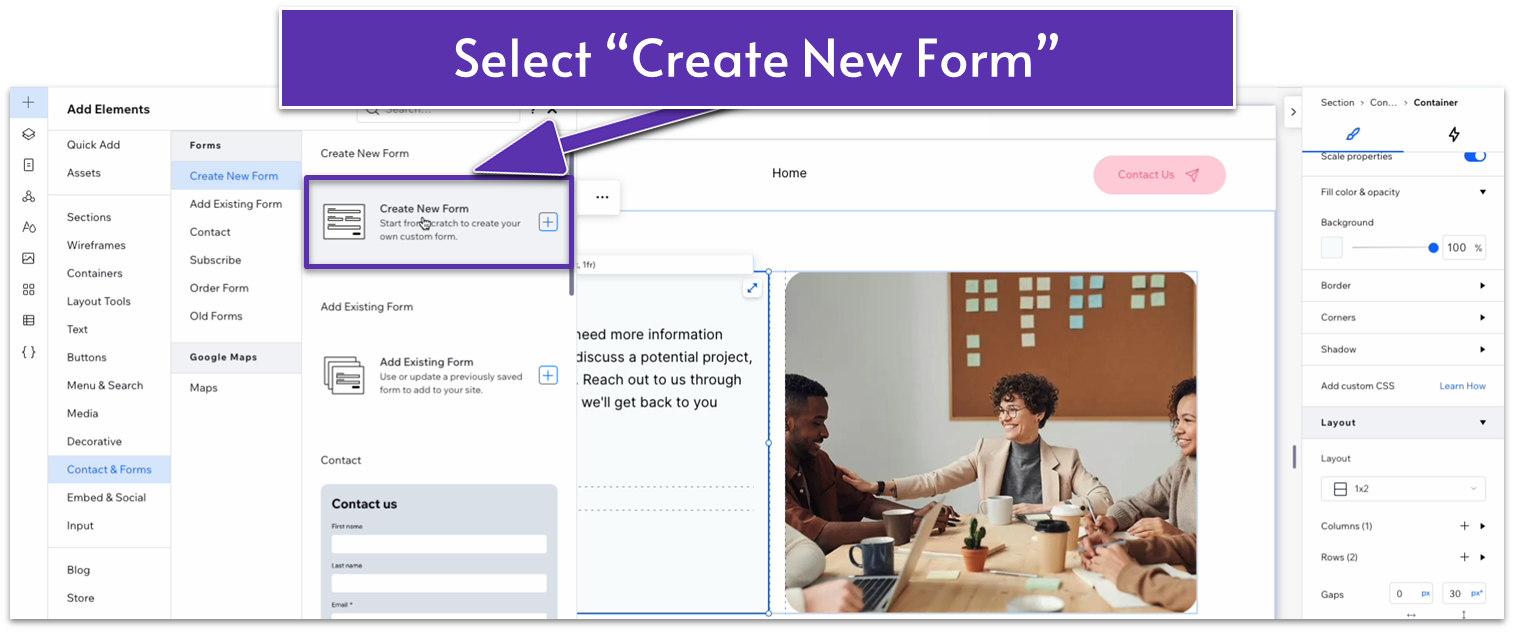
Step 10: Add a contact form to the bottom row of the container.
- Go to the “Add Elements” ( ), then “Contact & Forms,” and then “Create New Form.” Then, select “Create New Form” and drag the element into the bottom row.
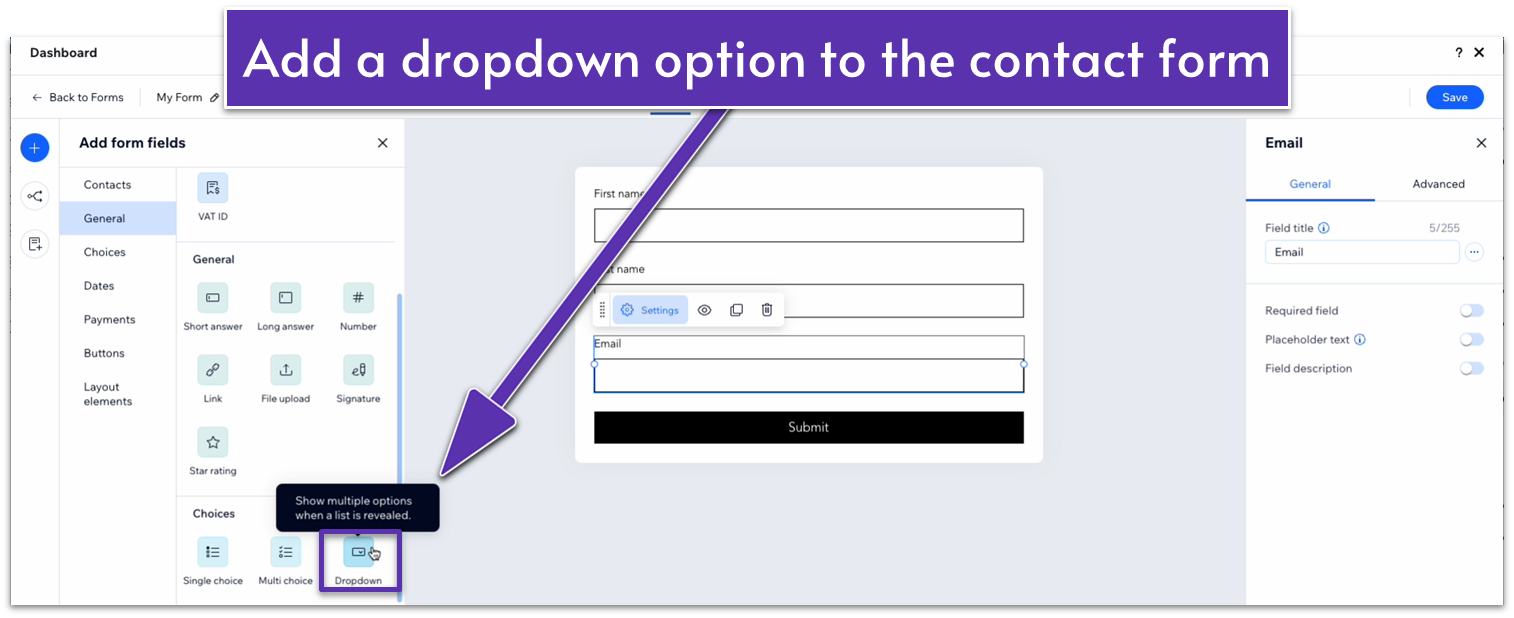
- On the contact form dashboard, add “First name,” “Last name,” and “Email” fields to the form.
- Scroll down to “Choices” and then select “Dropdown.”
- Click on the three dots ( ) next to the field title and toggle on “hide field title.”
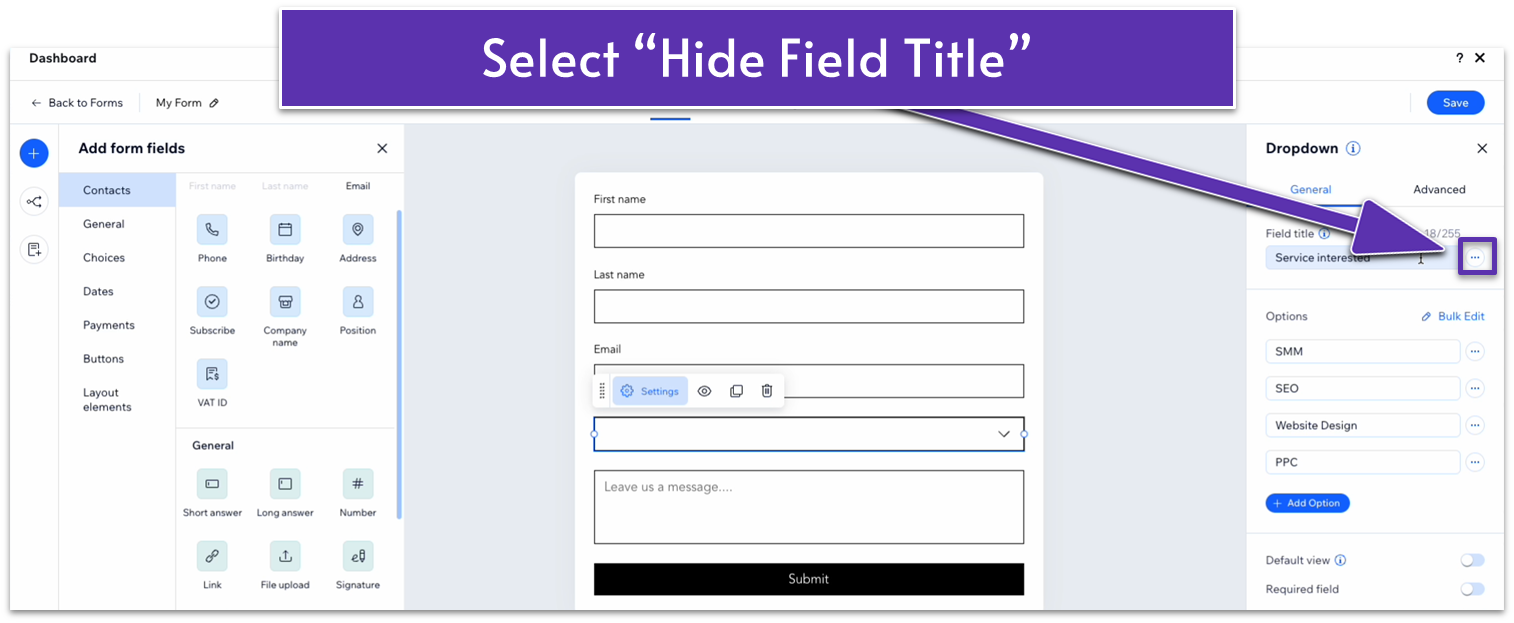
- Toggle “Default view” on and replace the placeholder text.
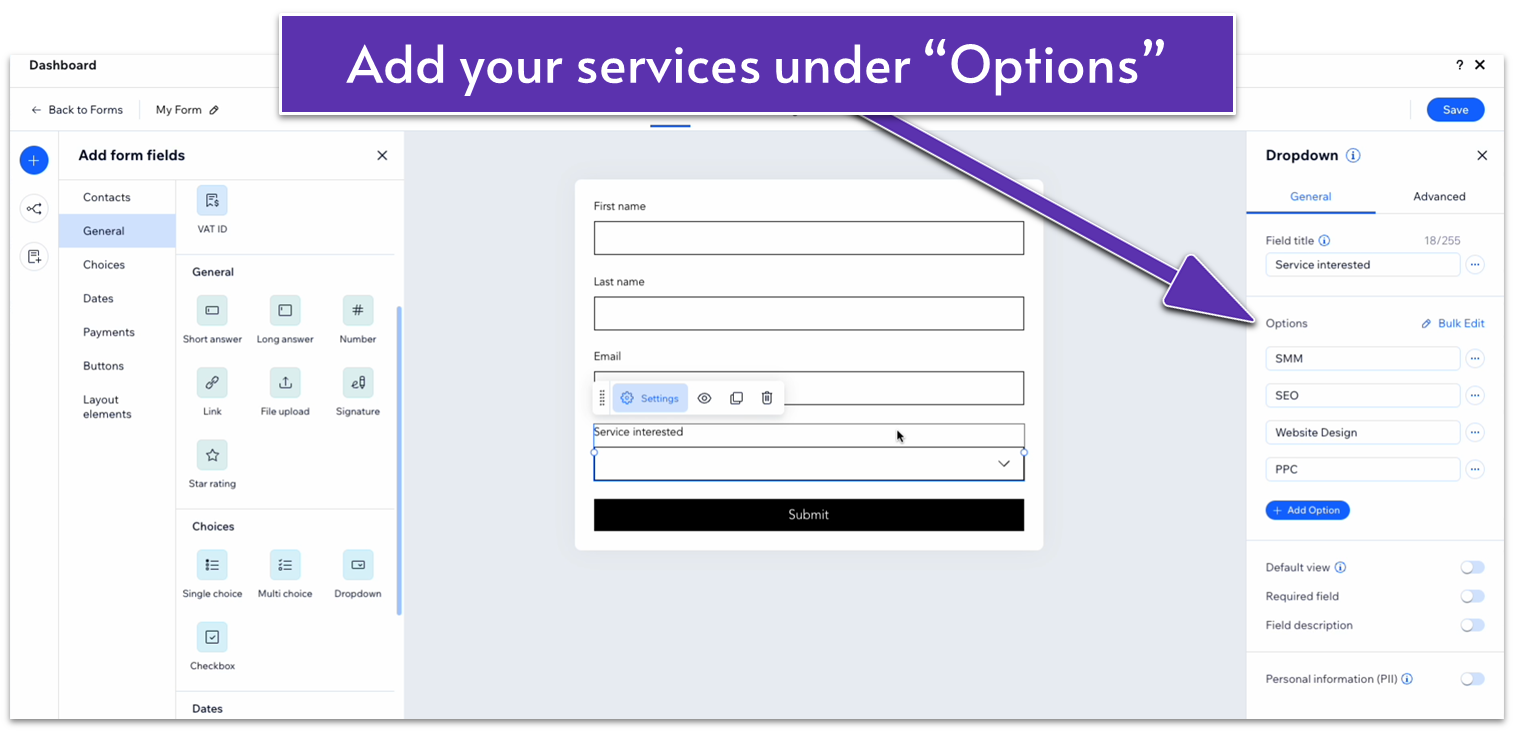
- Add the different offered services under “Options.”
- Add a long answer field.
- Click on the three dots icon ( ) next to the field title and select “Hide field title.”
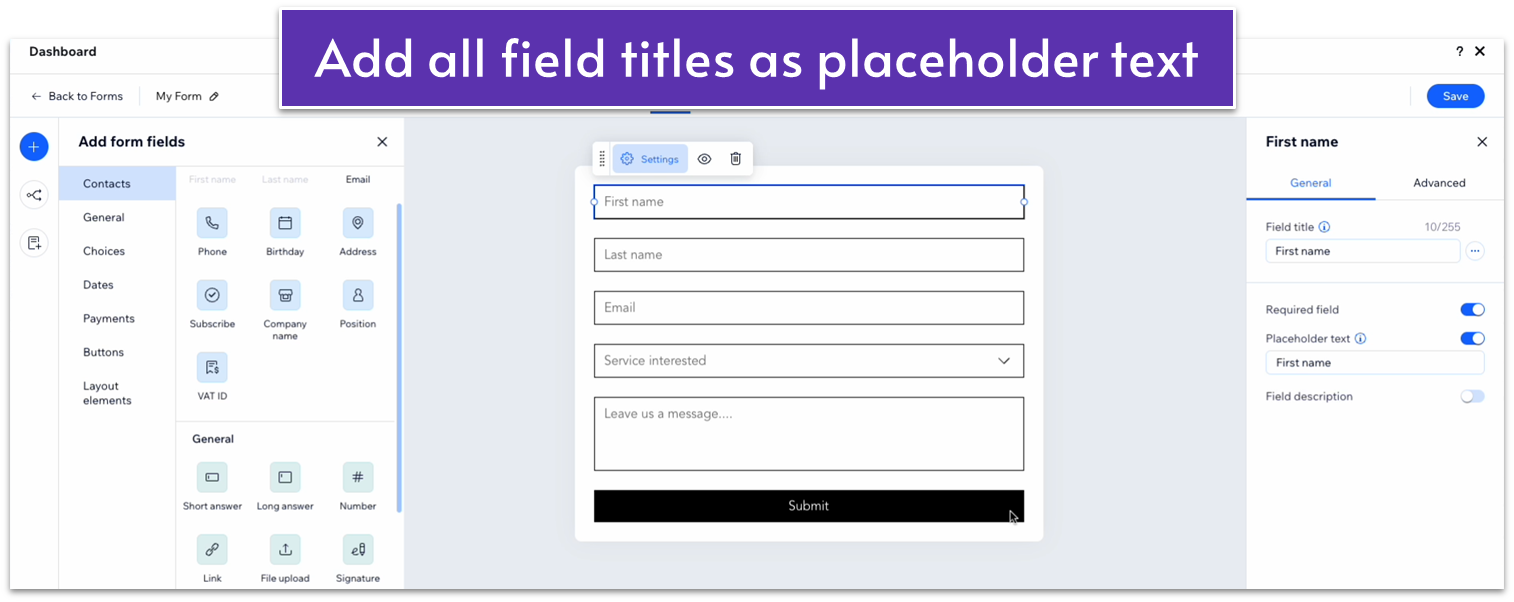
- Toggle “Placeholder text” and change the placeholder to “Leave us a message…”
- Hide the field title for all other fields and insert the title as placeholder text.
- Narrow the “submit” button and center it.

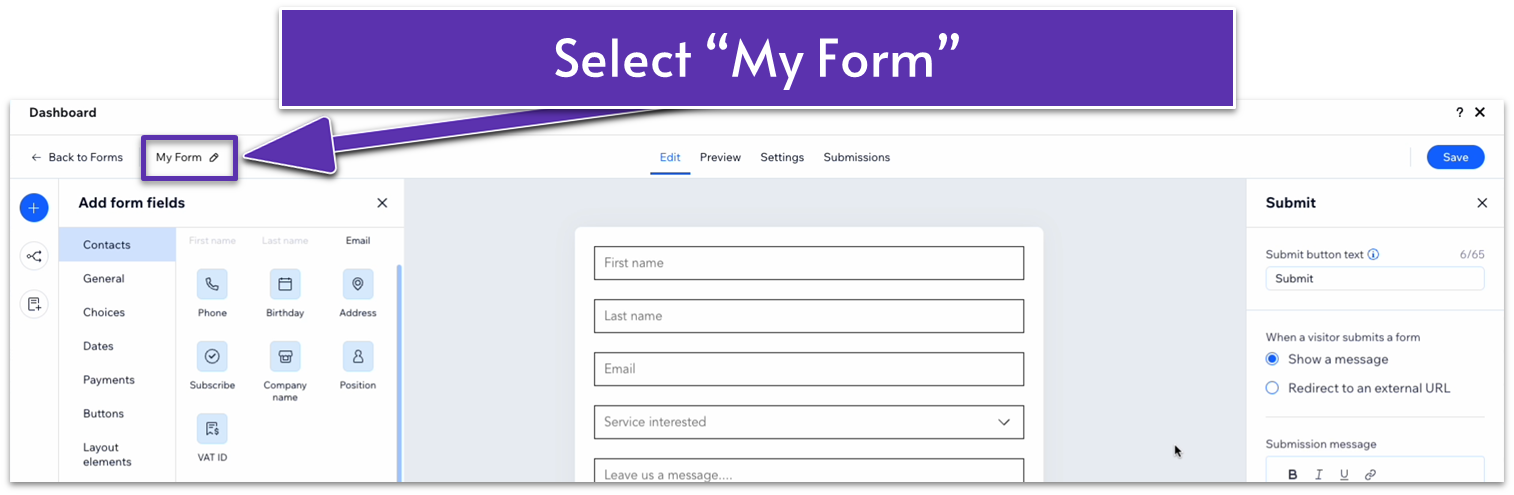
Step 11: Change the form settings.
- Still in the form dashboard, select the “My Form” option.
- Change the form name to “Contact page form.”
- Select “Save” and exit the form dashboard.
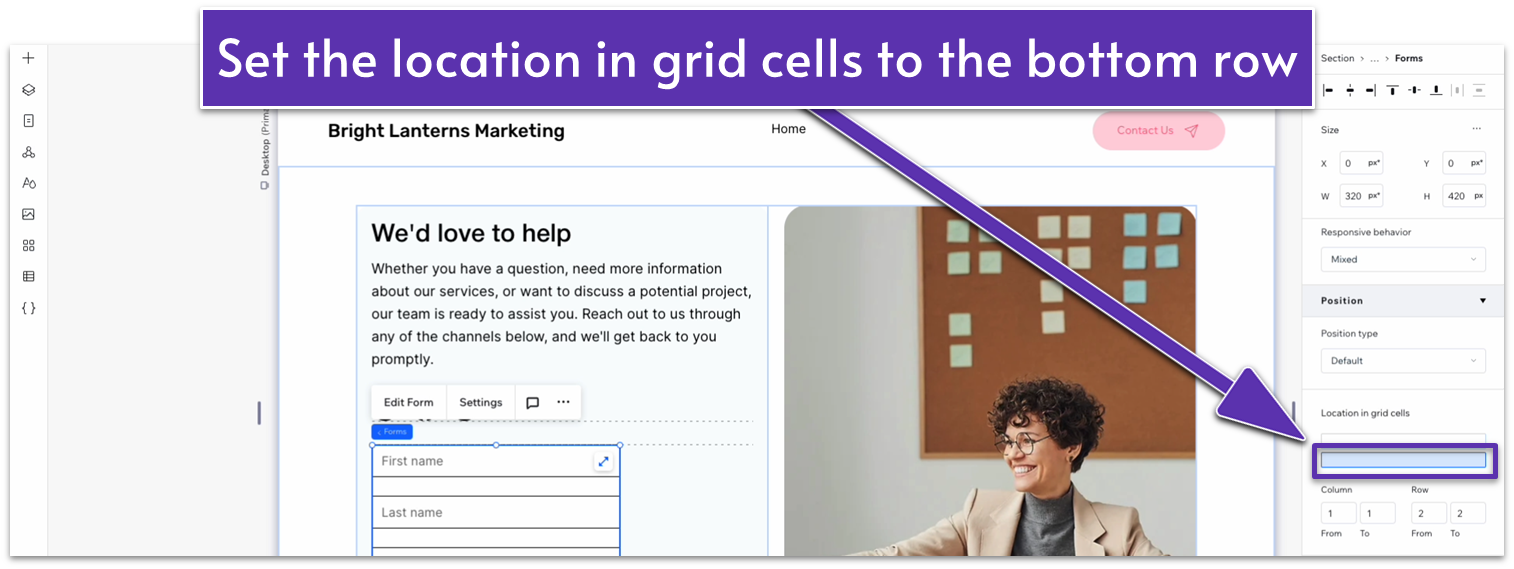
Step 12: Change the form’s location in grid cells.
- Set the location in grid cells for the form to the bottom row.
- Set all margins to 0.
- Set the form’s width to 100%.
- Set the “Min W” to “none” ( ) and the height to “auto” ( ).
Step 13: Set both rows’ behavior to auto ( ).
Step 14: Edit the form design.
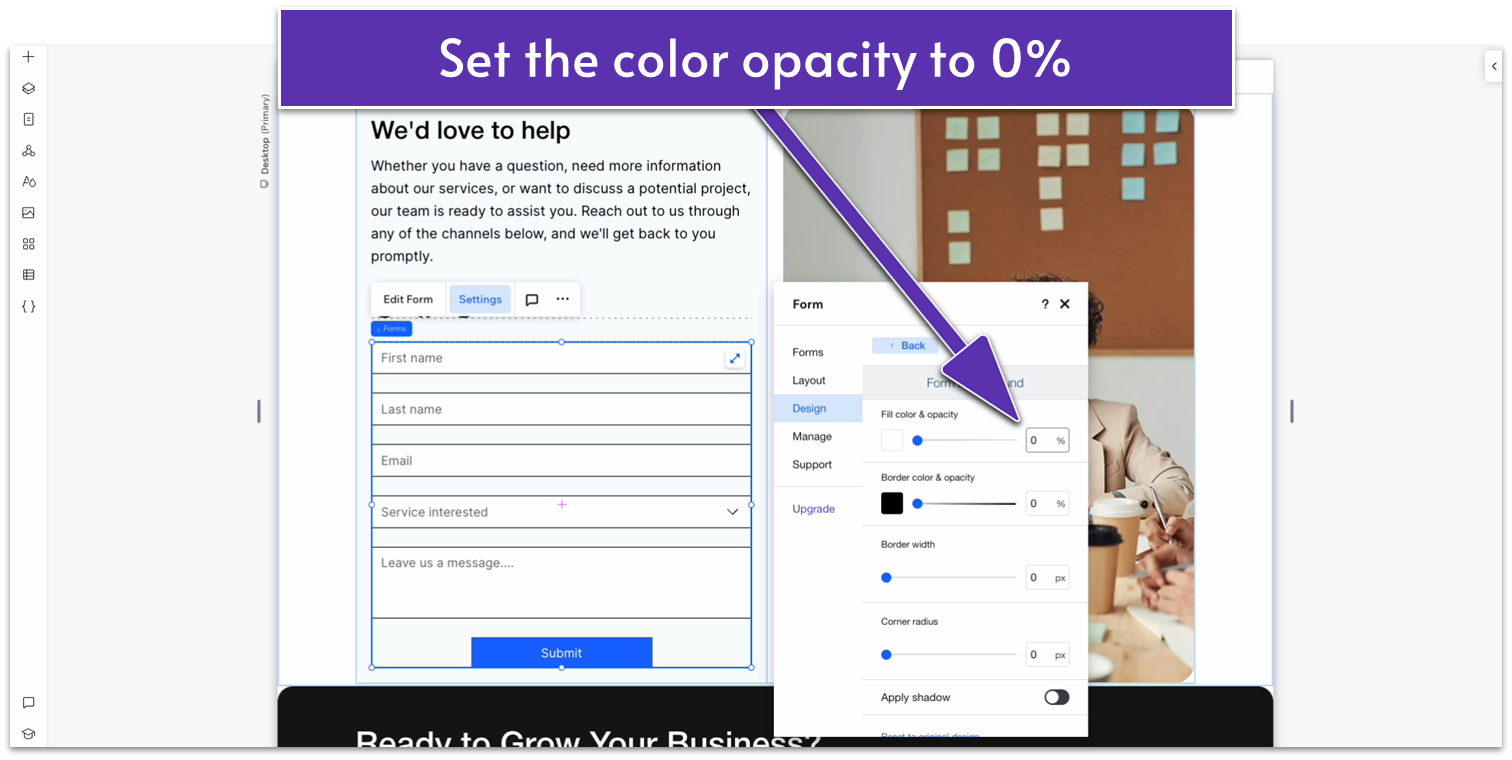
- Click on the form and select “Settings” on the pop-up menu.
- Head to “Design” and then “Form Background.” Set the fill color opacity to 0.
- Back on “Design,” head over to “Form Fields.” Change the fill color to a blueish gray (#F5F5F7 HEX).
- Set the corner radius to 5px.
- Set the border color to the same gray.
- Set the “checked option color” to a slight pink (#D88EEA HEX).
- Change the “link text color” to the same pink.
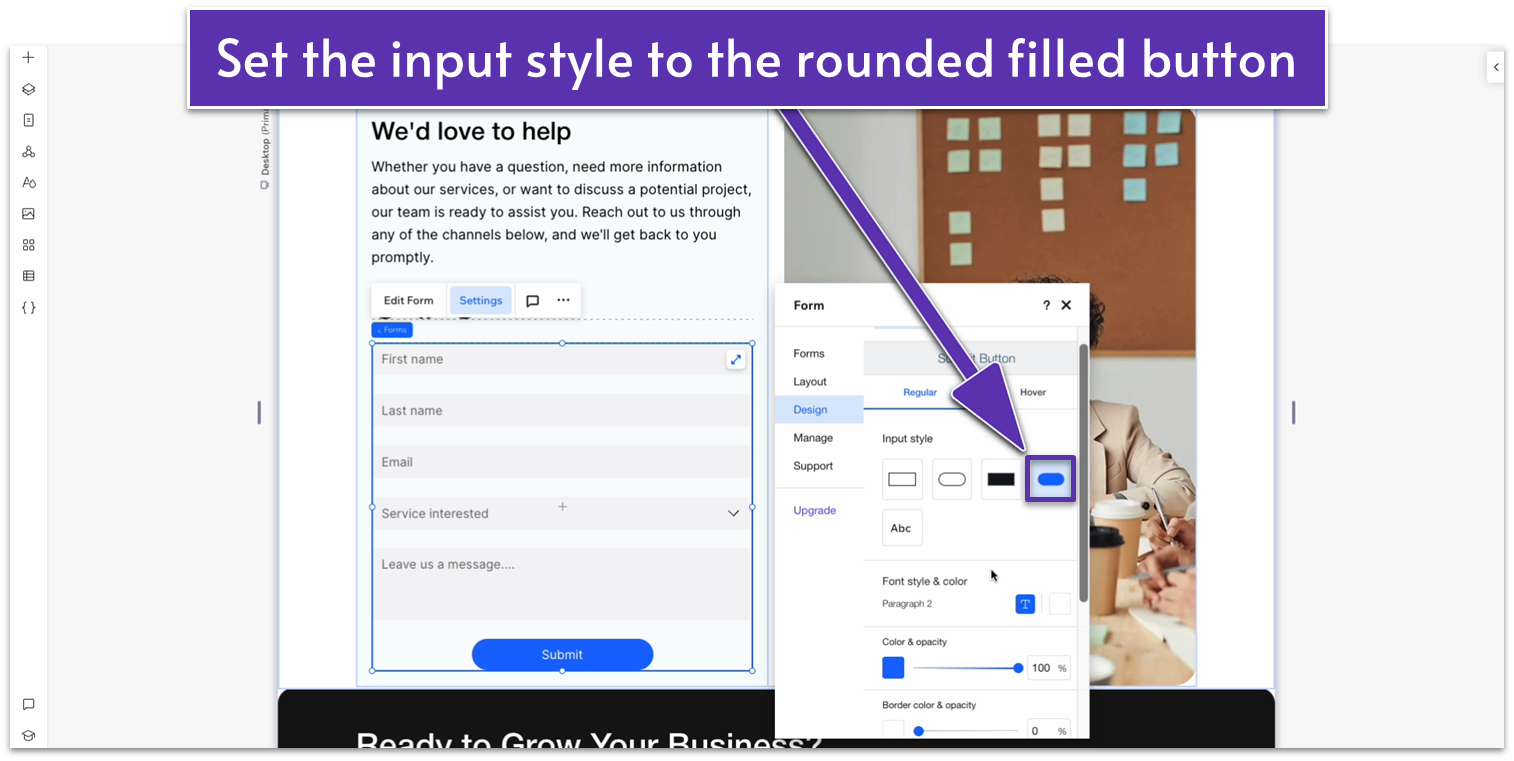
- Head back to “Design” and then “Buttons.” Then select “Submit Button.”
- Change the input style to the rounded, filled button ( ).
- Set the button color to an easy teal (#C94001 HEX).
- Set the border color opacity to 100% and the border color to the same teal.
- Set the font color to a soft gray (#5E718D HEX).
- Set the border width to 1px.
- Scroll back up to change the submit button’s behavior when hovering.
- Set the color on hover to the same teal (#B9E8F2 HEX).
- Set the button opacity on hover to 70%.
- Set the text color on hover to the same soft gray (#5E718D HEX).
- Set the border color to the same teal and its opacity to 70%.
Adapt for Tablet and Mobile Views
Step 1: Adapt for tablet view.
On tablet view ( ):
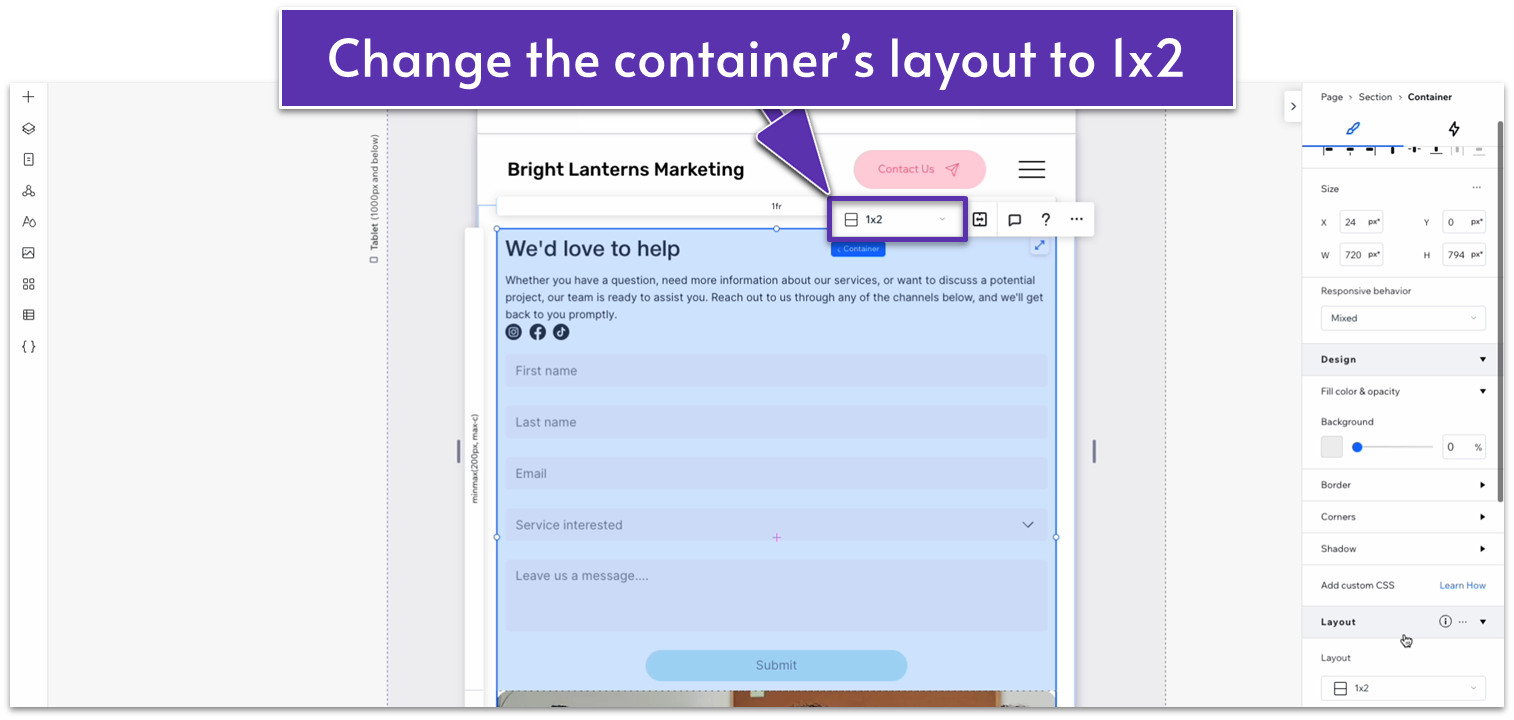
- Set the width for the container within the section to 720px.
- Change the container’s layout to 1×2 ( ).
- Set the vertical gap ( ) between rows to 30px.
- Set the behavior of the bottom row to a 400px scale.
- Set the behavior of the top row to auto ( ).
- Set the horizontal ( ) and vertical ( ) padding for the container to 20px.
- Set the vertical gap ( ) between rows for the container on the top row to 30px.
- Set the margin ( ) below the paragraph text to a 20px scale.
- Click on the social bar and then select the divided square icon ( ) on the pop-up menu to open the “Social Bar Layout” menu. There, change the icon size to 30px and the spacing to 15px.
- Set the corner radius for the top container to 20px.
- Set the corner radius for the image to 20px.
Step 2: Adapt for mobile view.
On mobile view ( ):
- Set the vertical gap ( ) for the overall container to 30px.
- Set the bottom row behavior (the one with the image) to 250px.
- Set the horizontal ( ) and vertical ( ) padding for the container on top to 20px.
- Set the bottom margin ( ) for the paragraph text to a 20px scale.
- On the “Social Bar Layout” menu ( ), set the icon size to 25px and the spacing to 12px.
- Set the vertical gaps ( ) for the container on the top row to 30px.
- Set the corner radius for the container on the top row to 20px.
- Set the corner radius for the image to 20px.
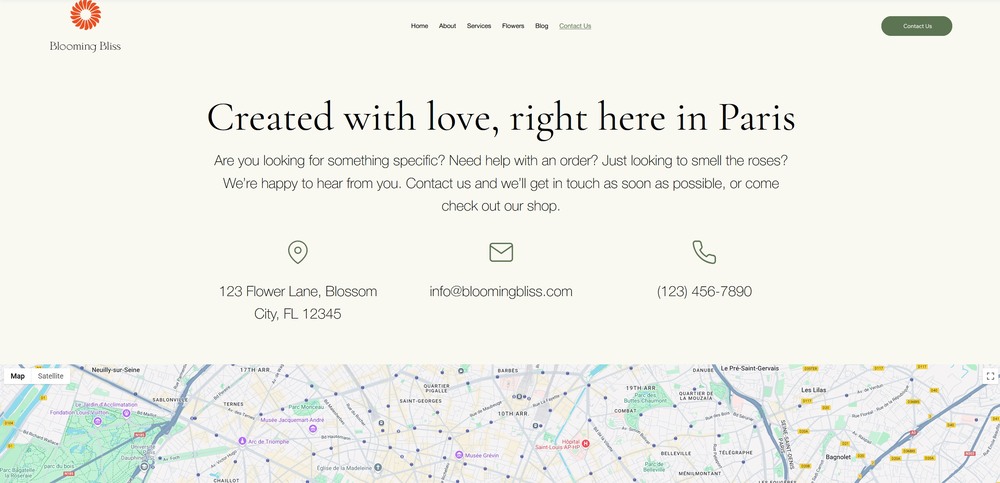
4.2 Map
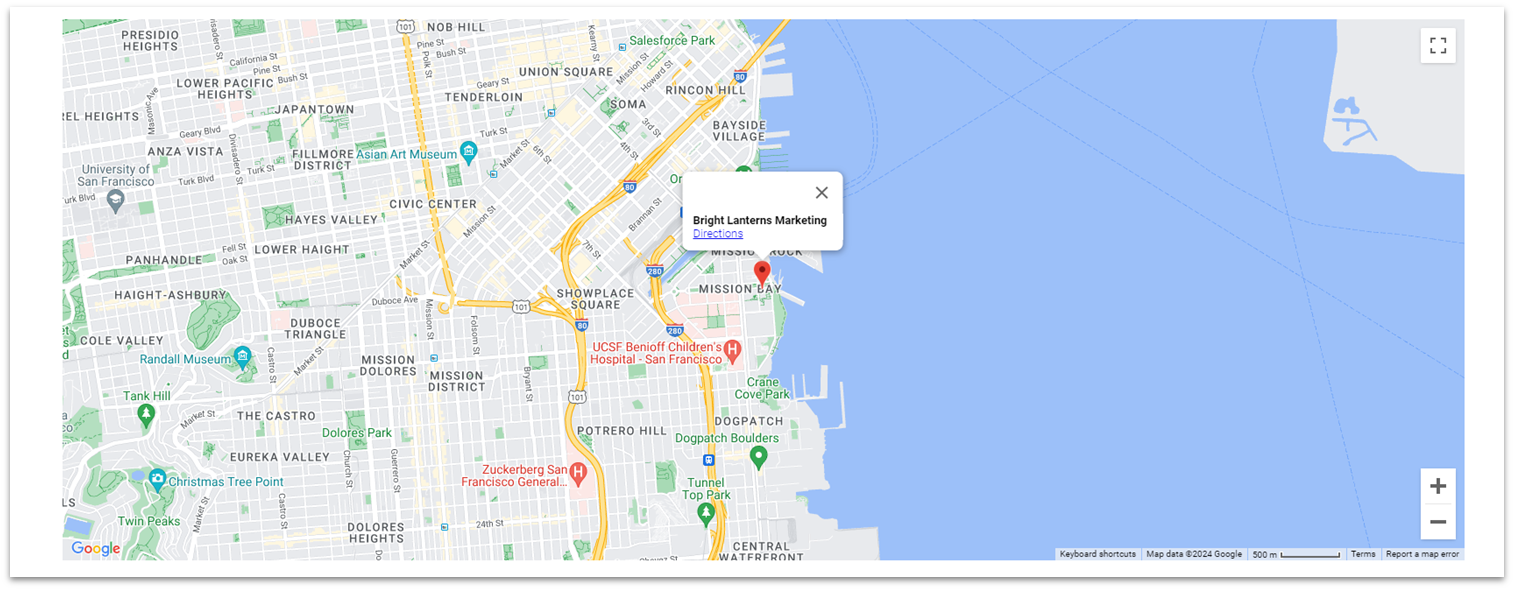
We’ll add a simple map element at the bottom of the page.
Step 1: Add a new section and apply an advanced CSS grid.
- Set the top and bottom padding for this section to a 50px scale.
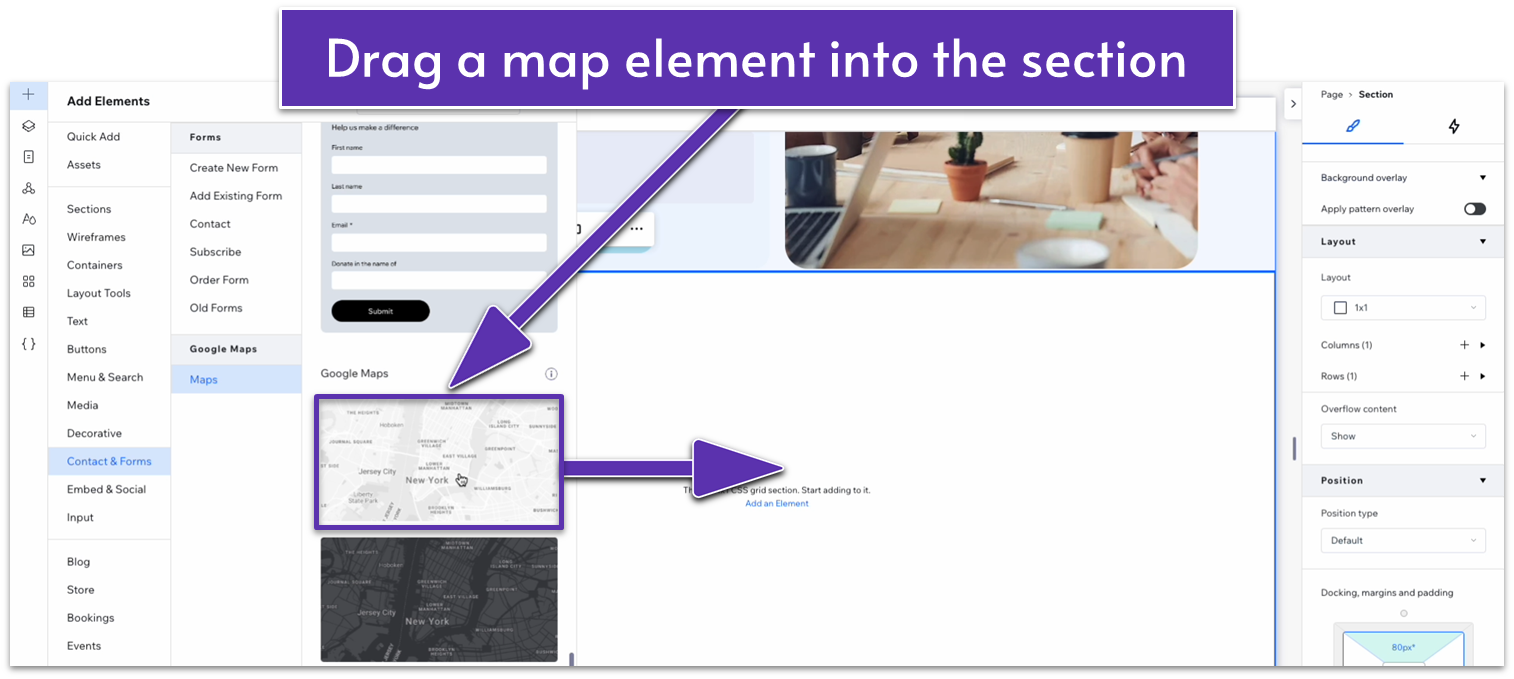
Step 2: Add a map element to the section.
- Head over to the “Add Elements” ( ), “Contact & Forms,” and then “Maps.” Then drag a map element into the section.
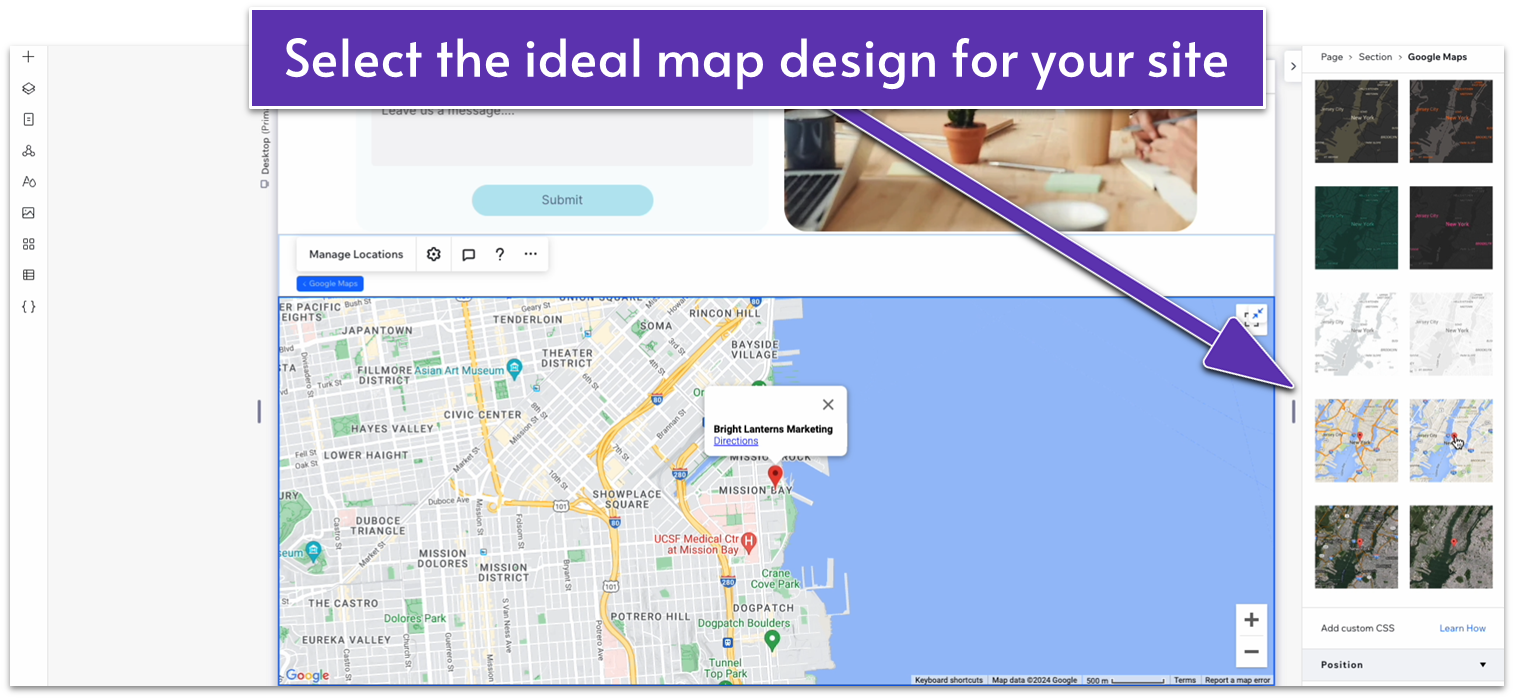
- Click on the “Manage Location” option on the pop-up menu.
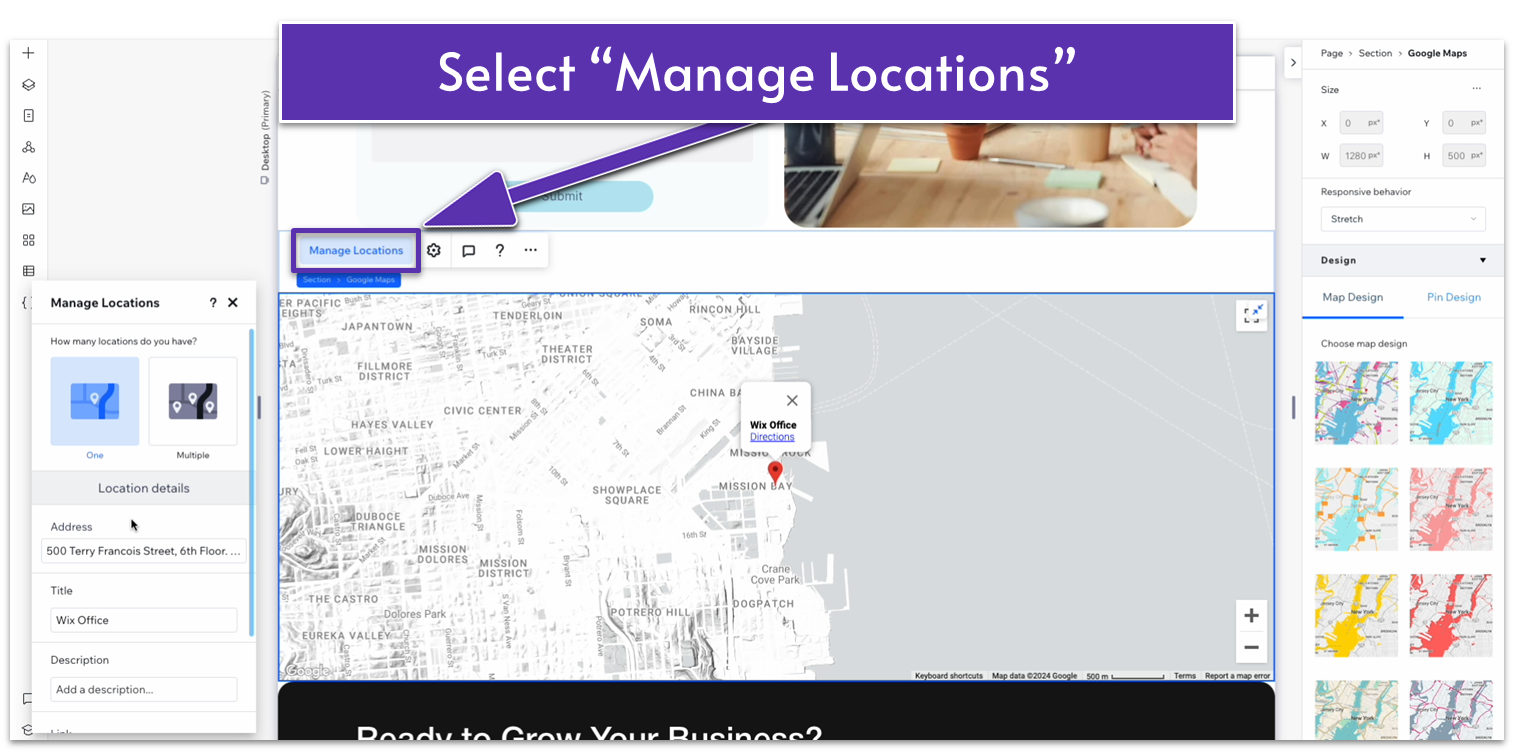
- Change the address below to your business’ address.
- Change the title to the name of your business.
- Select a map design on the inspector.
Adapt for Tablet and Mobile Views
Step 1: Adapt for tablet view.
On tablet view ( ):
- Change the vertical padding ( ) for the section to 50px.
Step 2: Adapt for mobile view.
On mobile view:
- Toggle “Advanced Settings” under “Size.” Set the map’s width to 100%.
- Set the map height to 250px.
- Set the vertical ( ) padding to 50px.
