


3.0 Adding a New Page
Since this is our first time adding a new page, let’s see exactly how we do it. The process is the same for every page we add later down the line.
Step 1: Go to the pages menu.
- Click on the icon that looks like a rectangle with some horizontal lines ( ) on the left-side menu. It’s just below the “Layers” menu ( ).

Step 2: Open the pages menu and select “Add a New Page.”
- On the pages menu ( ), click the plus symbol ( ) beside the search bar to create a new page.
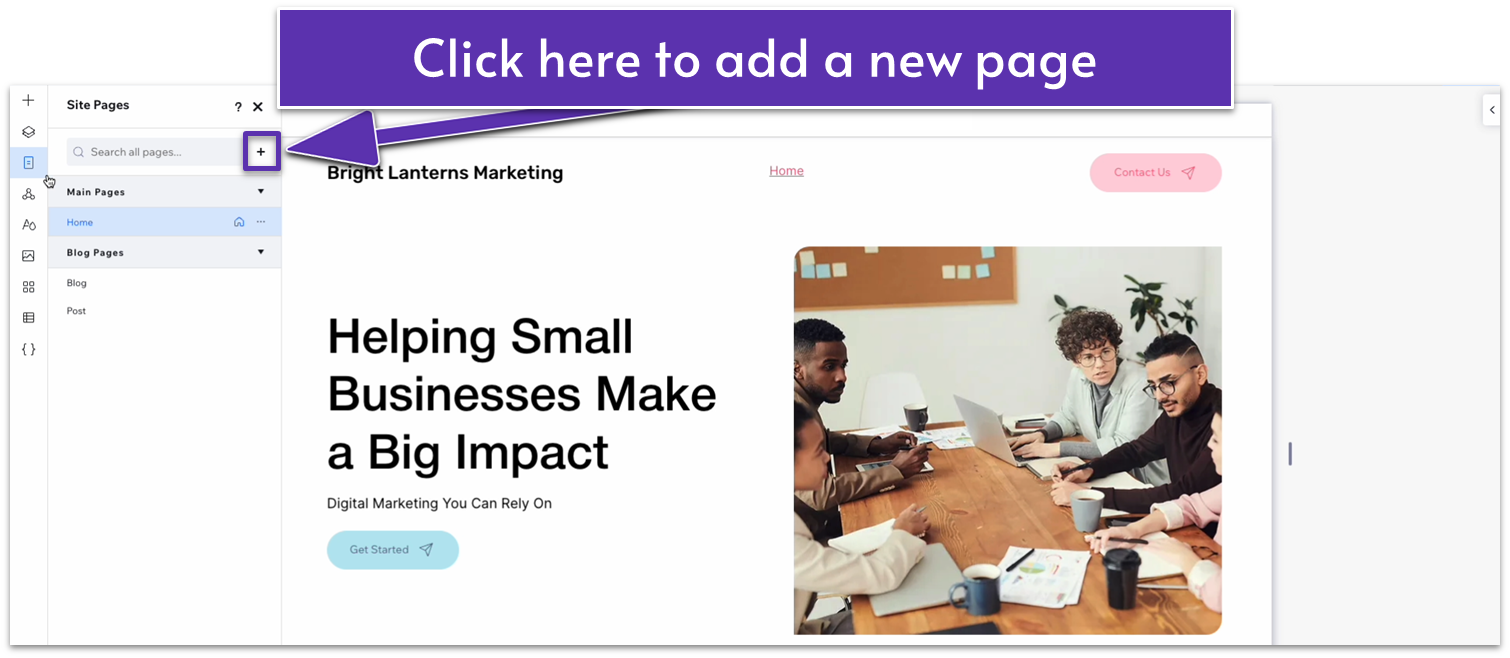
- You will see two options: “Page” and “Dynamic Page.” We’ll select “Page” this time.

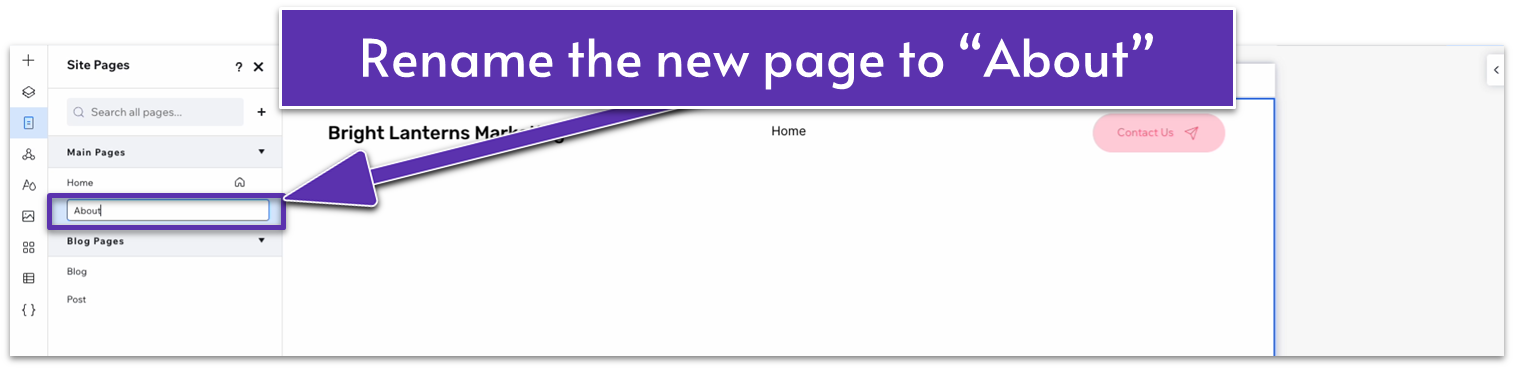
- You’ll be redirected to a blank page. A new name will also appear below “Home” on the “Main Pages” list. Rename the new page, for this example, we’ll go with “About.”
Step 3: Close the pages menu.
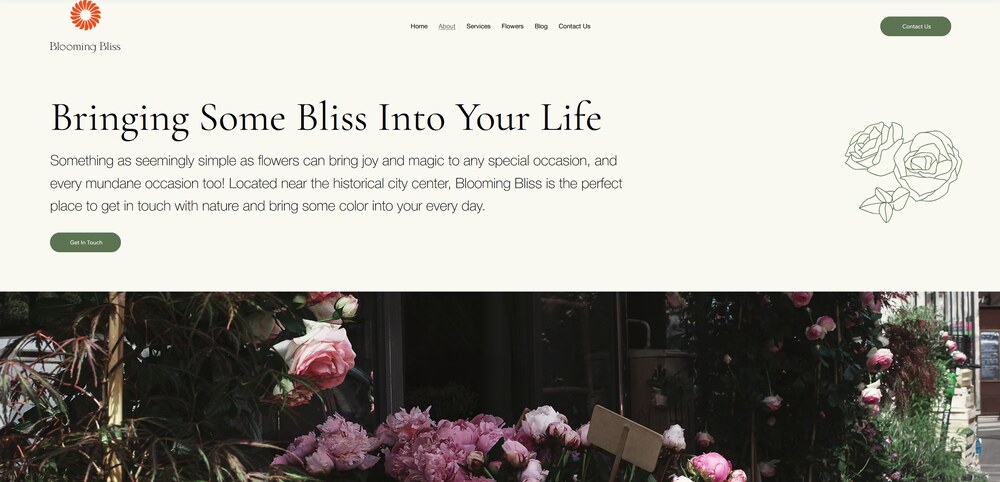
3.1 Hero Section

Our hero section will be very similar in structure to the hero for our homepage, with just enough differences to keep it interesting. We have already created many of the elements we will use for this and other sections (headings, paragraph text, buttons) on the homepage.
So, to make our lives easier, we’ll rely heavily on the copy-paste tool to simply adapt new elements to this page instead of creating them from scratch.
Step 1: Copy the hero section from the homepage.
- Using the “Pages” menu ( ), head back to the homepage.
- Select the hero section and right-click on it, or select the three dots ( ) on the pop-up menu to open the “more actions” menu.
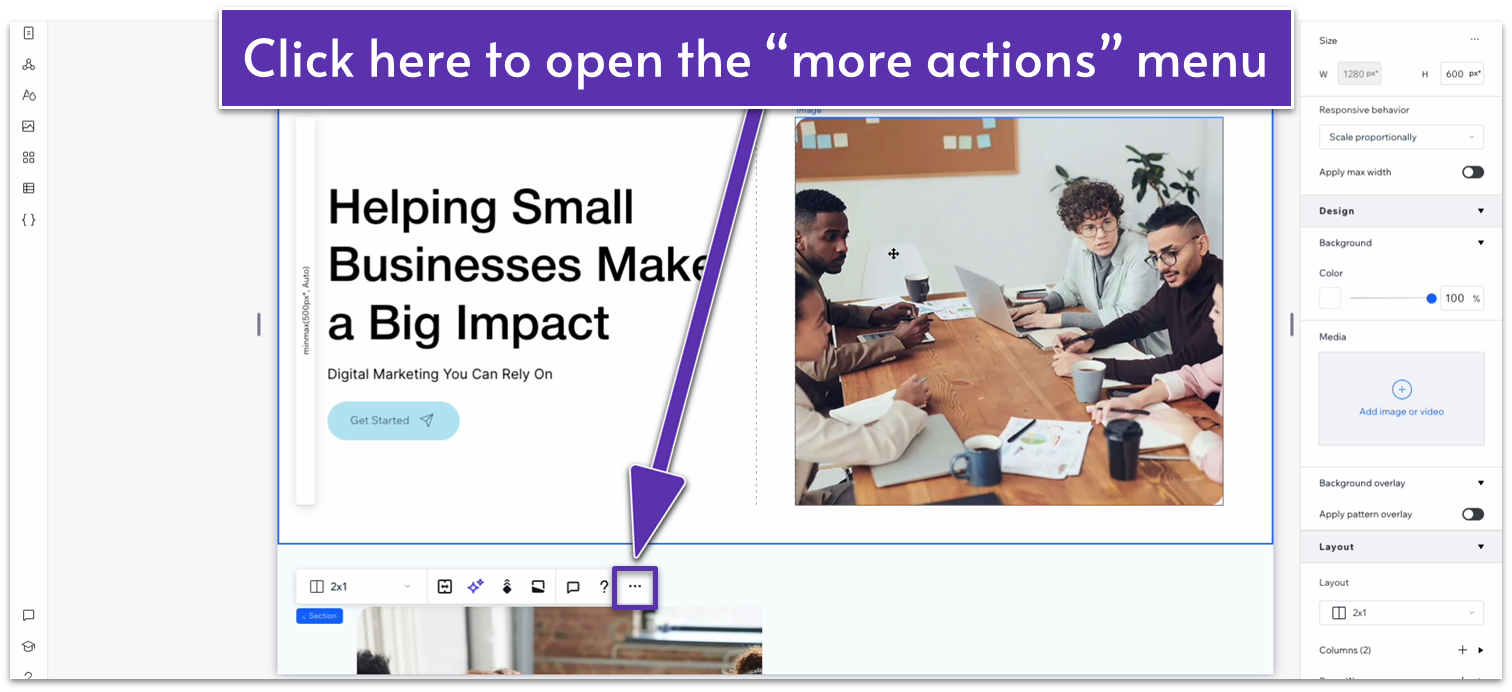
- Copy the section. Ensure you’re selecting the entire section, not just an element or container.
- Head back to the “about” page and paste the section. If the section appears beneath the default blank section for the page, delete the blank section.

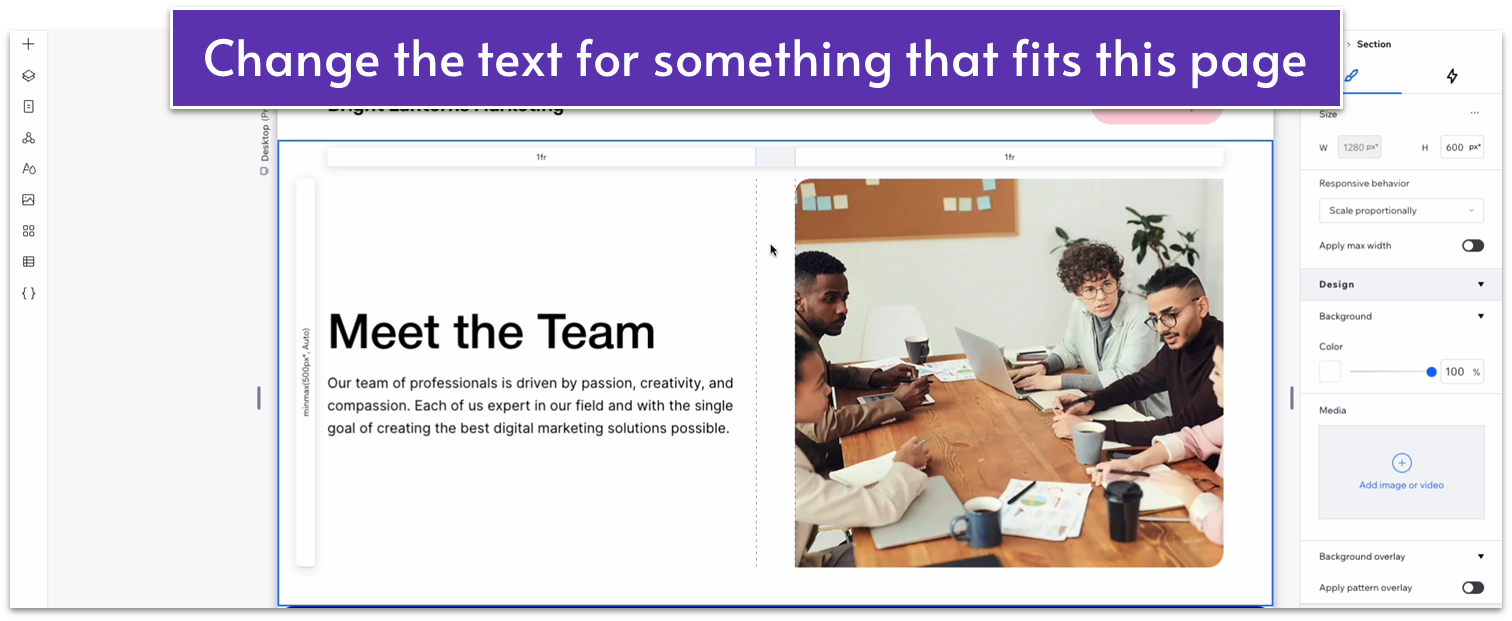
Step 2: Change the section text.
- Change the heading and paragraph text to something more appropriate for this “About” page.
- Delete the contact button from this section.
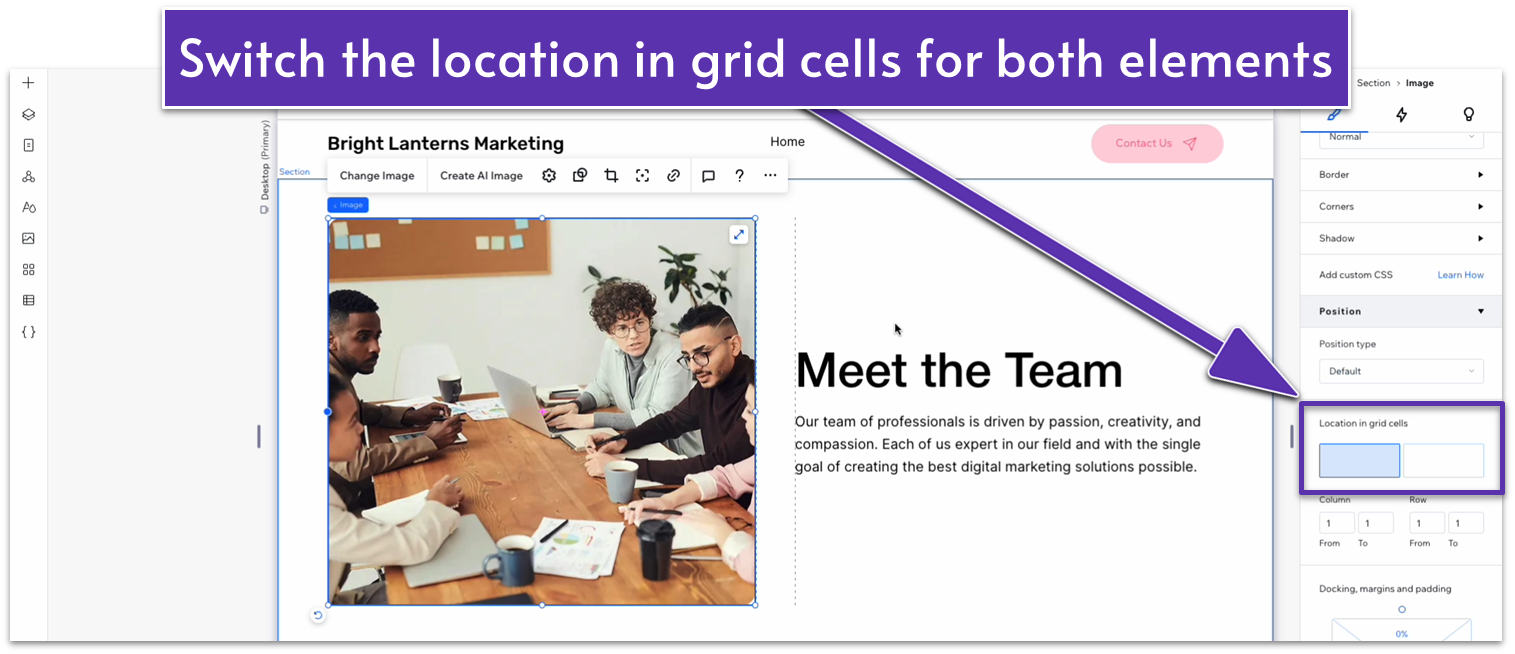
Step 3: Switch places for the image and text.
To avoid visual monotony, we’ll switch the places for the image and text and replace the image with another that shows our team hard at work.
- Select the text stack with the heading and paragraph text and set its location in grid cells to the right-side column.
- Select the image and change its location in grid cells to the left-side column.
Adapt for Tablet and Mobile Views
Since we previously adapted this section for tablet and mobile viewing, we don’t need to make any changes in either view.
3.2 “Why Choose Us?” Section
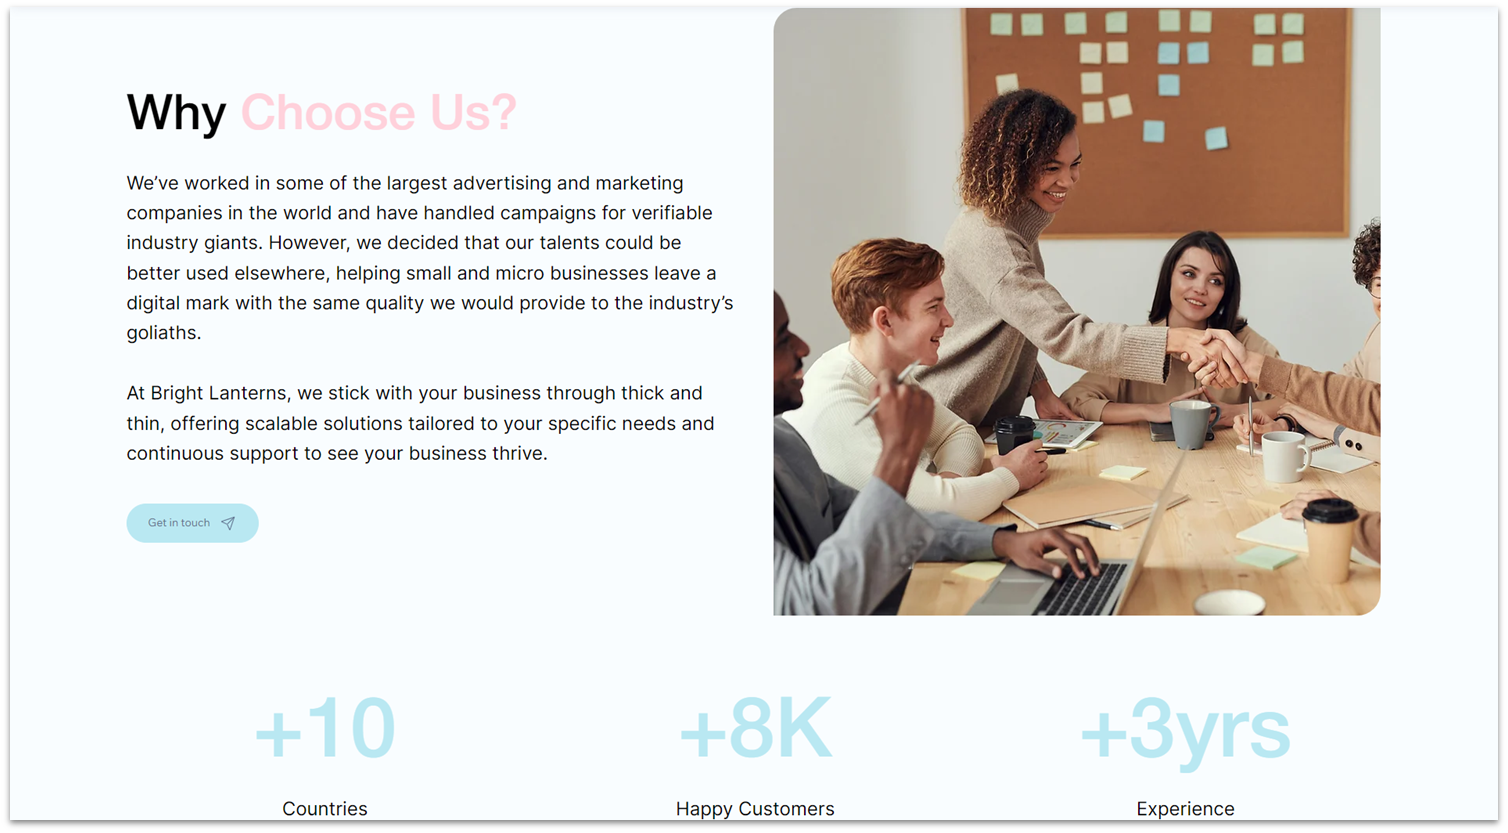
Once again, we already have a “Why Choose Us” section on our homepage, so instead of building it from scratch, we can simply copy it and make the necessary changes as needed.
Step 1: Copy the “Why Choose Us” section from the homepage and paste it below the hero.
Step 2: On the top row, switch sides for the text and image columns.
- As before, all you have to do is click on each element and set its location in grid cells to the opposite column.
Step 3: Change the text and image for the section
Even if we’re keeping the same heading for the section, you should change the paragraph text to something else that conveys (briefly) why hiring your business would be beneficial to potential clients.
We will also use the button at the bottom to redirect to the contact page, so you should change the button’s text to something that suggests reaching out.
Adapt for Tablet and Mobile Views
This section is already properly adapted for mobile and tablet viewing, so you probably won’t need to make any changes – we didn’t. However, previewing mobile and tablet views to double-check is always a good idea.
3.3 “Our Team” Section
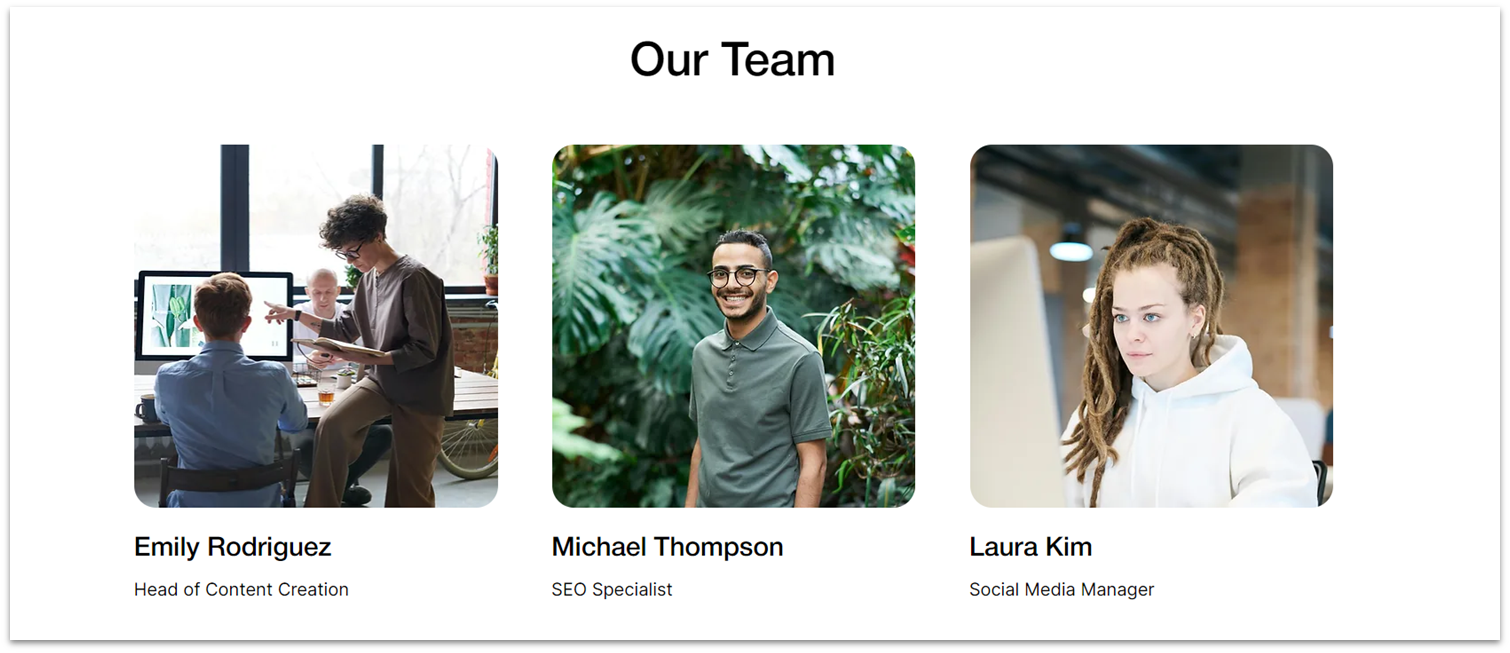
It’s good for all small-to-medium businesses to create a personal connection with potential clients. You want to make sure that your visitors feel like they’d be doing business with other people, not with a faceless brand.
Including a section with the top talent of your business achieves just that and also conveys legitimacy and trustworthiness by showcasing the experience of individual team members.
Step 1: Create a new section and apply an advanced CSS grid to it.
- Set the top padding ( ) to an 80px scale.
- Set the section’s layout to 1×2 ( ).
- Set the vertical gaps ( ) to 50px.
Step 2: Copy the heading text from the section above and paste it into the top row.
- Make sure its location in grid cells is set to the top row and set all margins to 0.
- Align the text to center ( ).
- Edit the text to match this section.
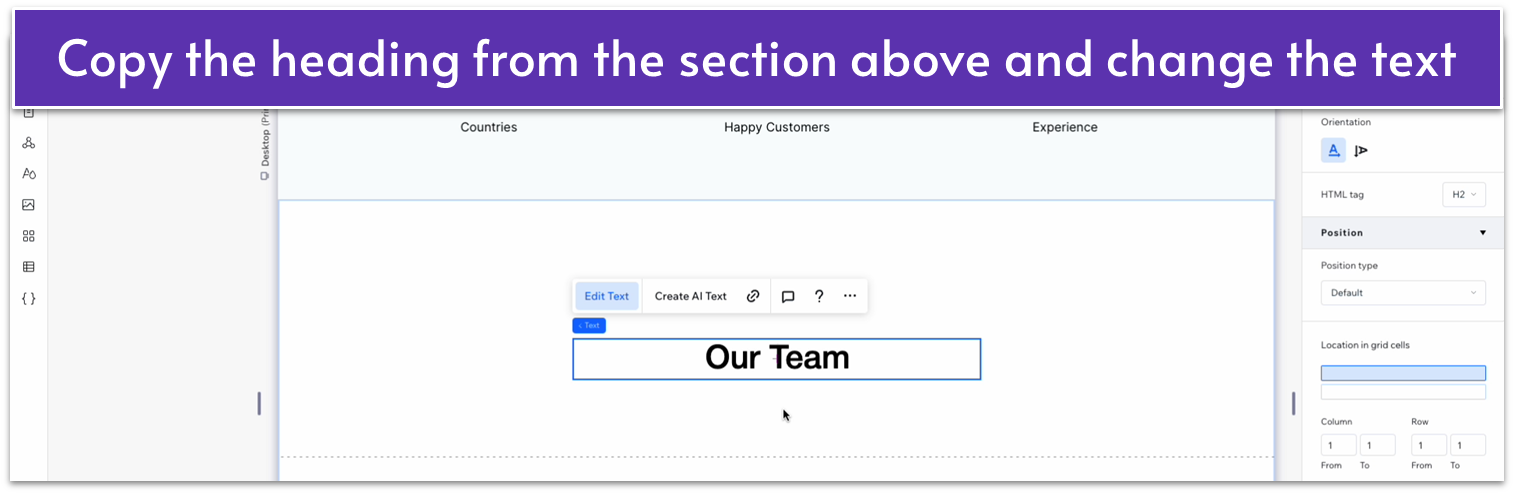
- Change the row’s behavior to auto ( ).
Step 3: Add a repeater to the bottom row.
- Set all margins to 0.
- Set the width for the whole repeater to 1080px.
- Change the vertical ( ) and horizontal ( ) gaps for the repeater to 50px.
- Apply an advanced CSS grid to the repeater items.
- Remove the background from the repeater items by setting the opacity to 0%.
Step 4: Add an image to one of the repeater items.
- Drag an image element inside one of the repeater items.
- Expand the item’s height if necessary to keep some room beneath the image.
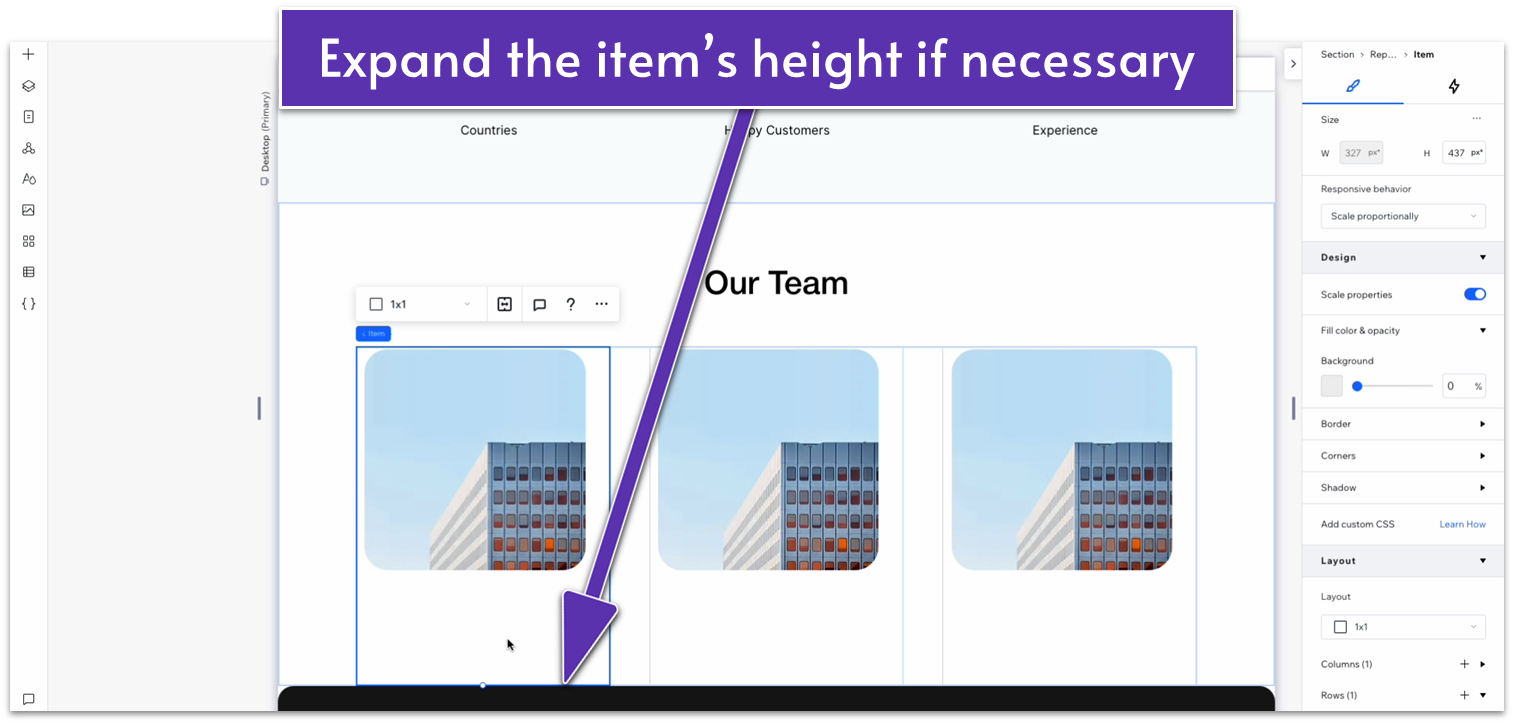
- Move the image to the top-left corner of the repeater item.
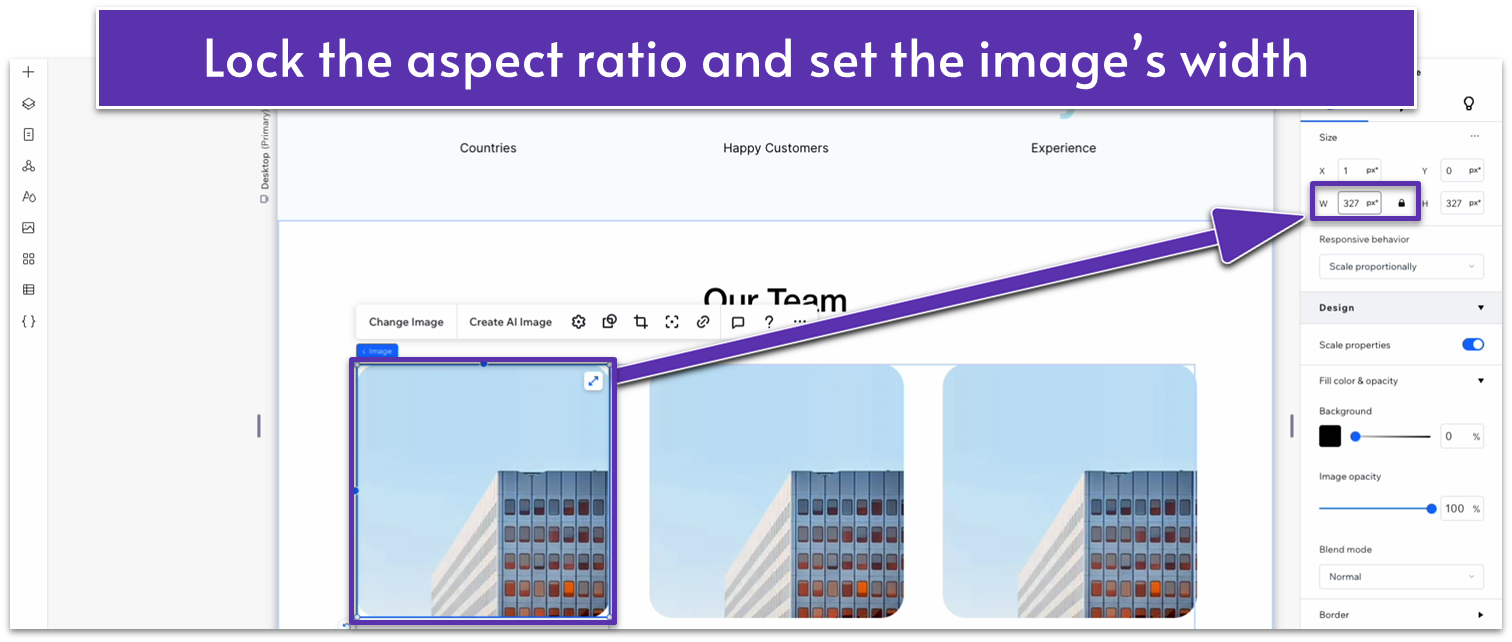
- Click anywhere in the blank space around the image and check the width of the repeater item.
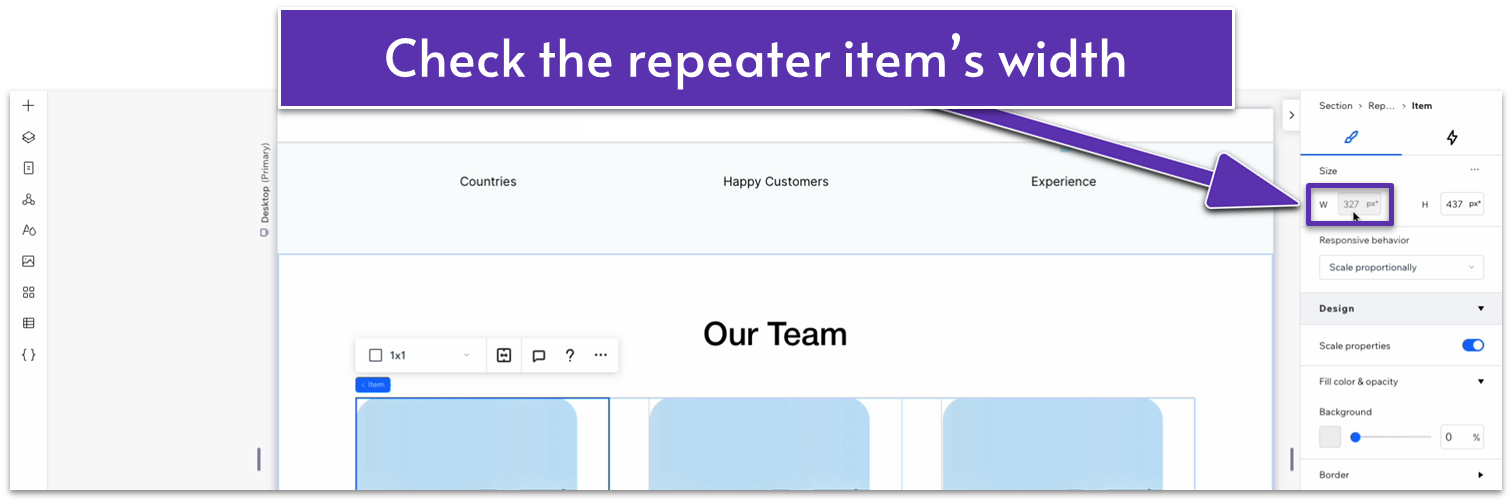
- Click the image again, lock its aspect ratio ( ), and change the width to match the repeater item.
Step 5: Add a heading below the image.
We’ll copy a heading from the homepage and drag it just below the image inside the repeater item.
- Head back to the homepage and copy the heading inside the repeater for the “Services” section.
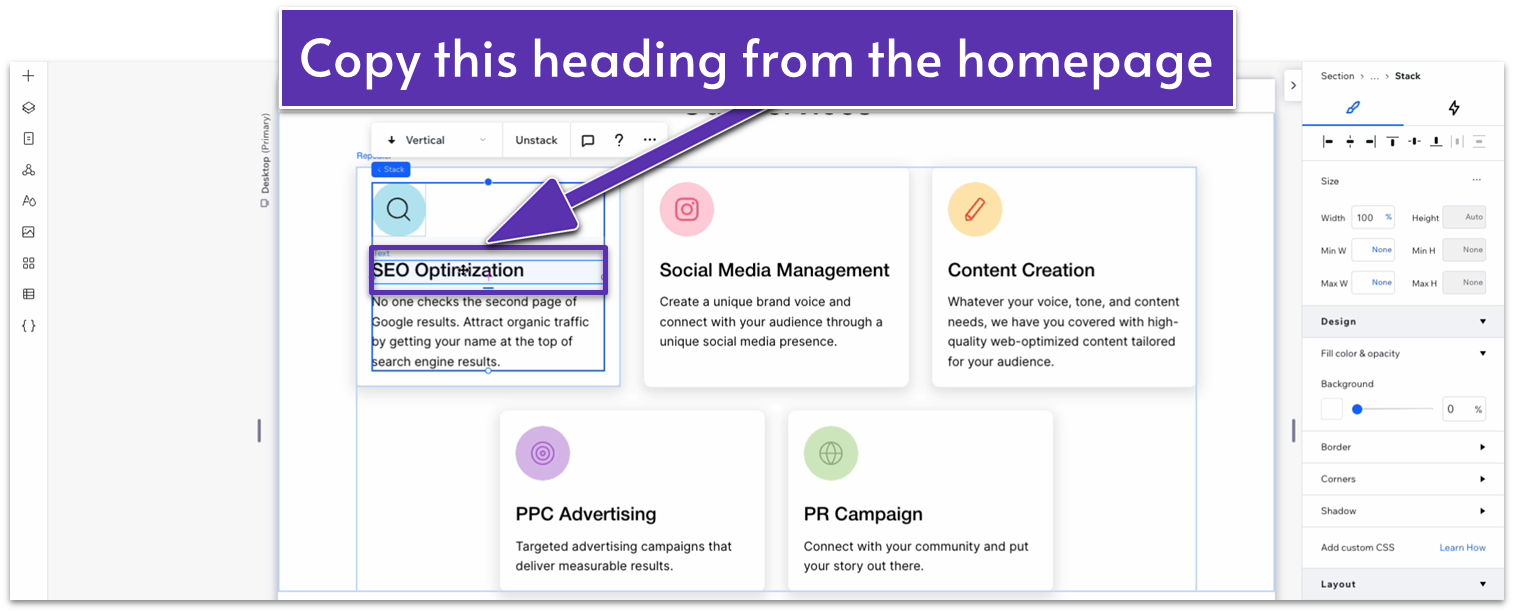
- Back on the “about” page, paste the heading just below the image.
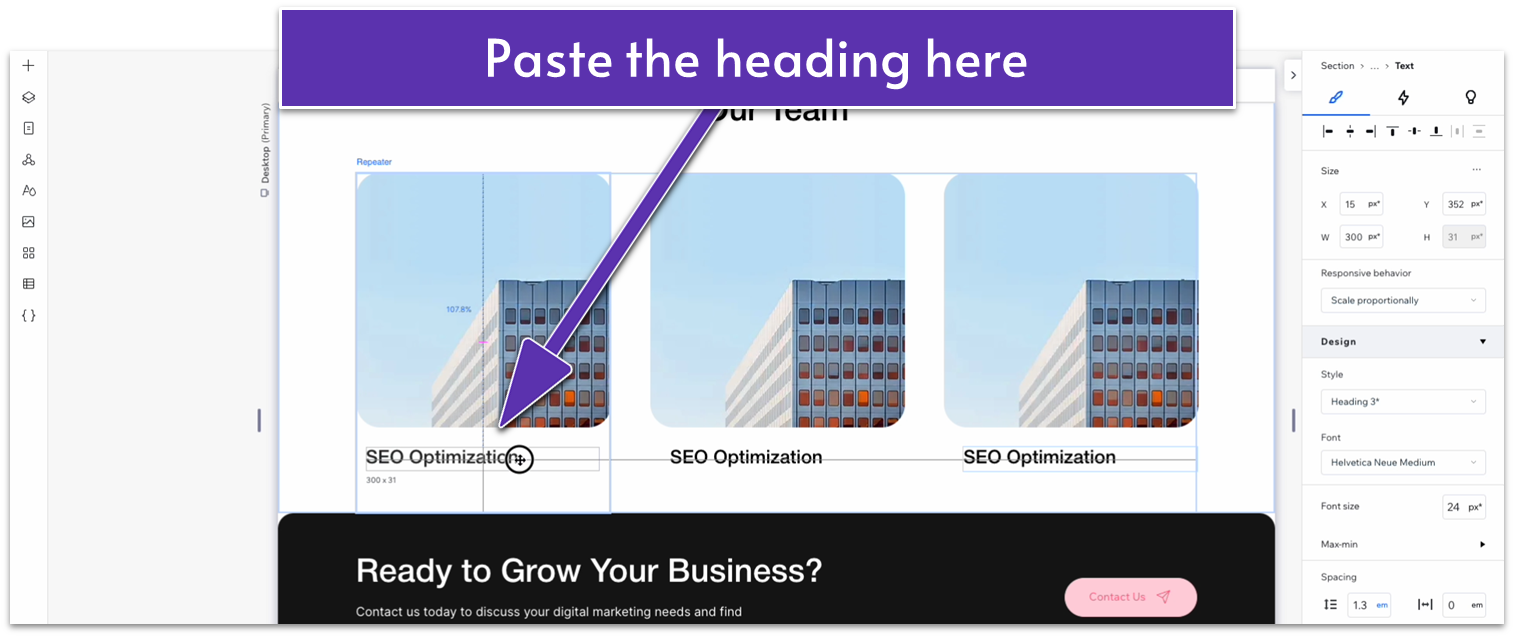
- Use the gridlines to move the text box to the left and a little below the image.
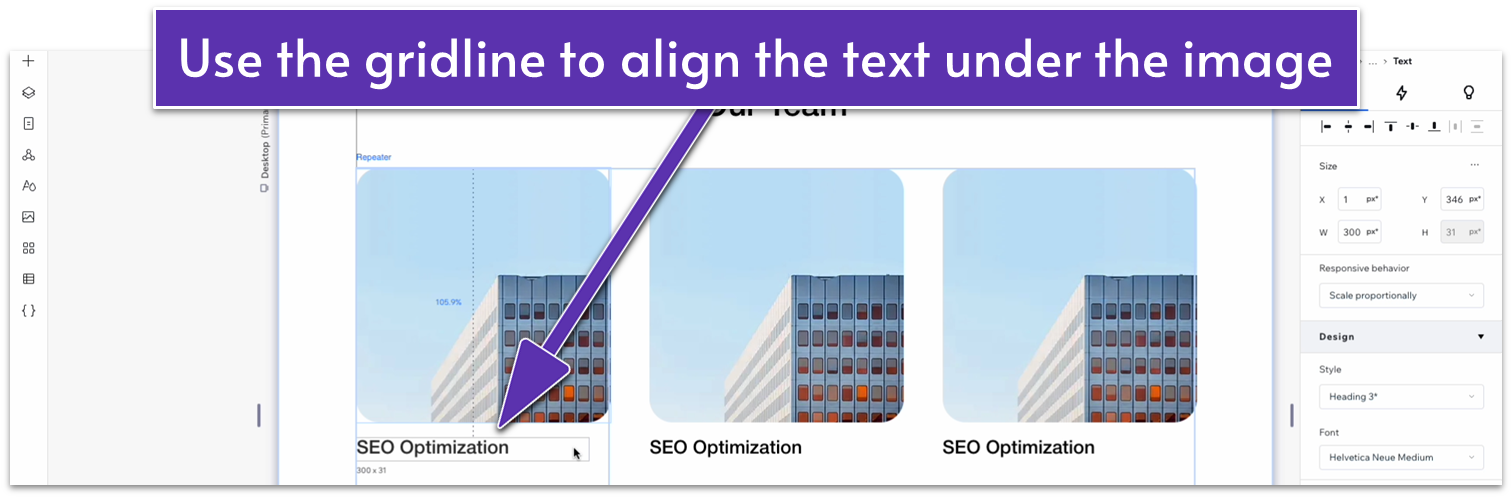
- Set the width for the text box to 100%.
Step 6: Copy text from the section above and paste it into the item.
- Copy the text just below the numbers for the section above.

- Paste that text underneath the heading inside the repeater item.
- Change the text box width to 100% and move it up a little.
- Align the text to the left ( ).
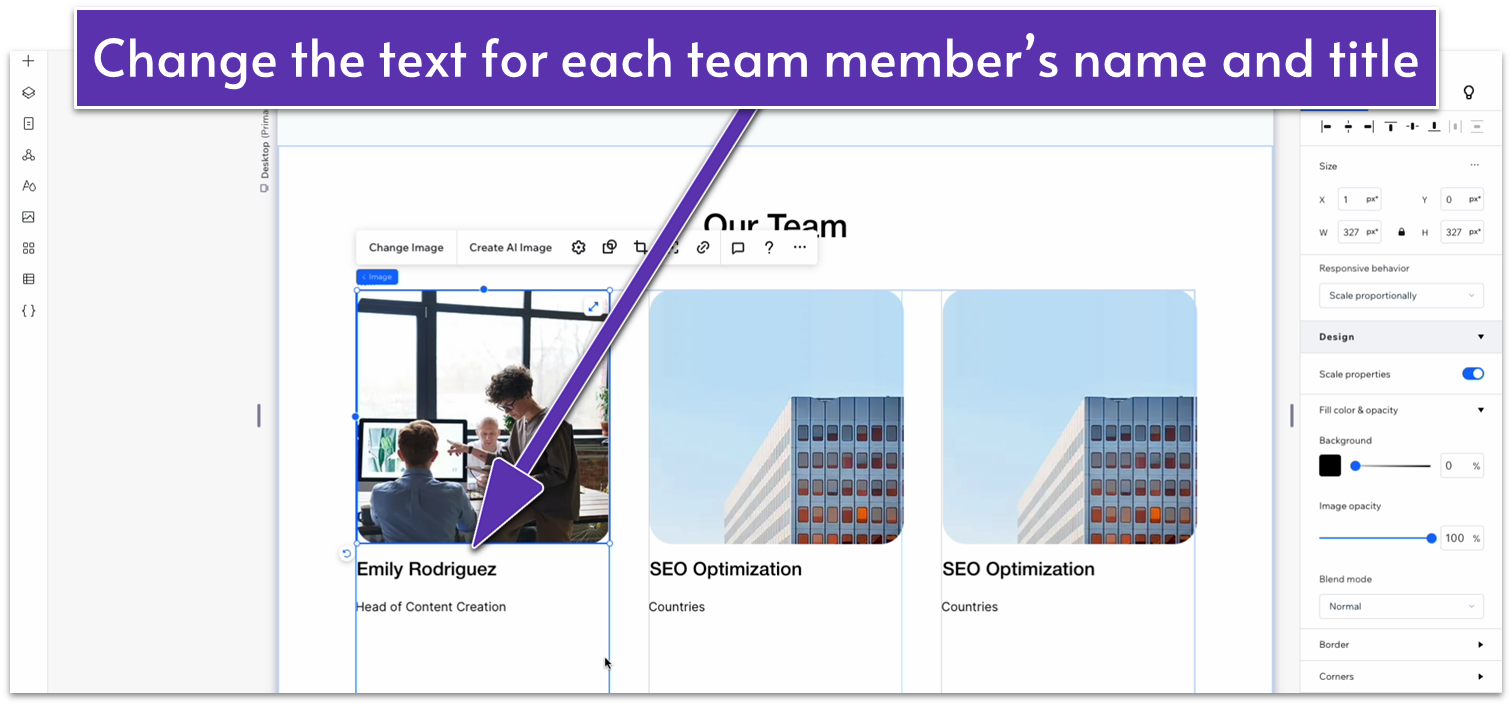
Step 7: Replace the text with your team members’ names and a brief description
- Replace each heading with the name of a different team member.
- Replace the text below for the occupation of each member.
- Replace the default image with a high-quality picture of that team member.
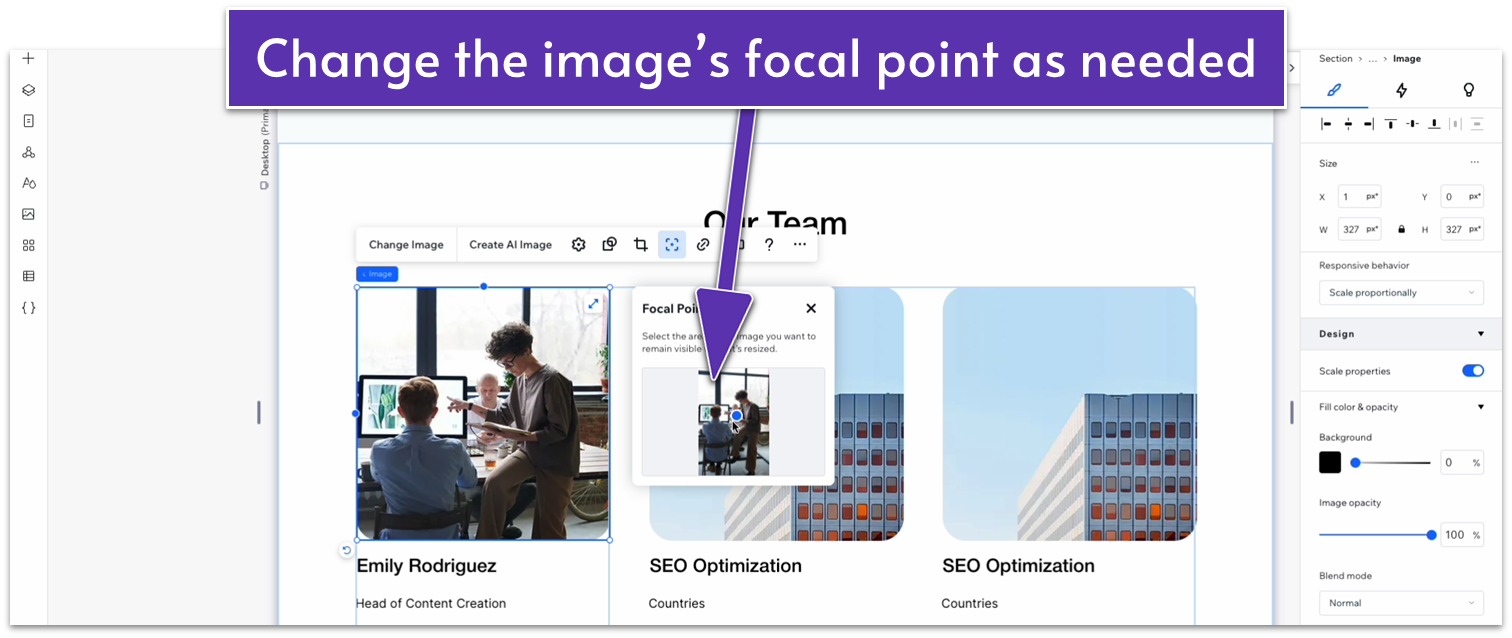
Step 8: Set the focal point of each photo to focus on each team member
If an image is larger than its container, you might often have to change its focal point. In Wix’s terms, the focal point doesn’t mean the same as it would in photography or optics. Here, “focal point” simply means which part of the image will be centered within the container.
- Click on the image and then select the icon with a dot inside the corners of a square ( ) to change the focal point.
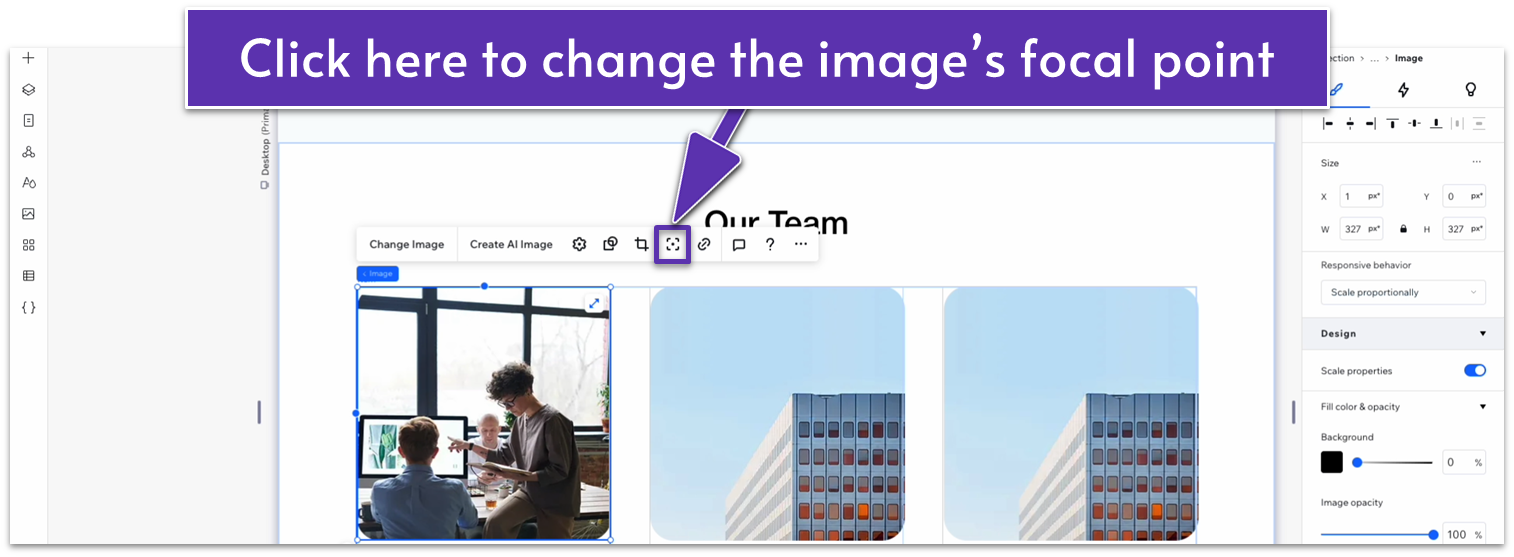
- Move the focal point until you can fully see the face and as much of the body of the person as possible.
Step 9: Stack the elements together.
- Stack the image, heading, and subheading together.
- Set the bottom margin ( ) of the image to 20px scale and all other margins to 0.
- Set the bottom margin ( ) for the heading to 10px scale and all other margins to 0.
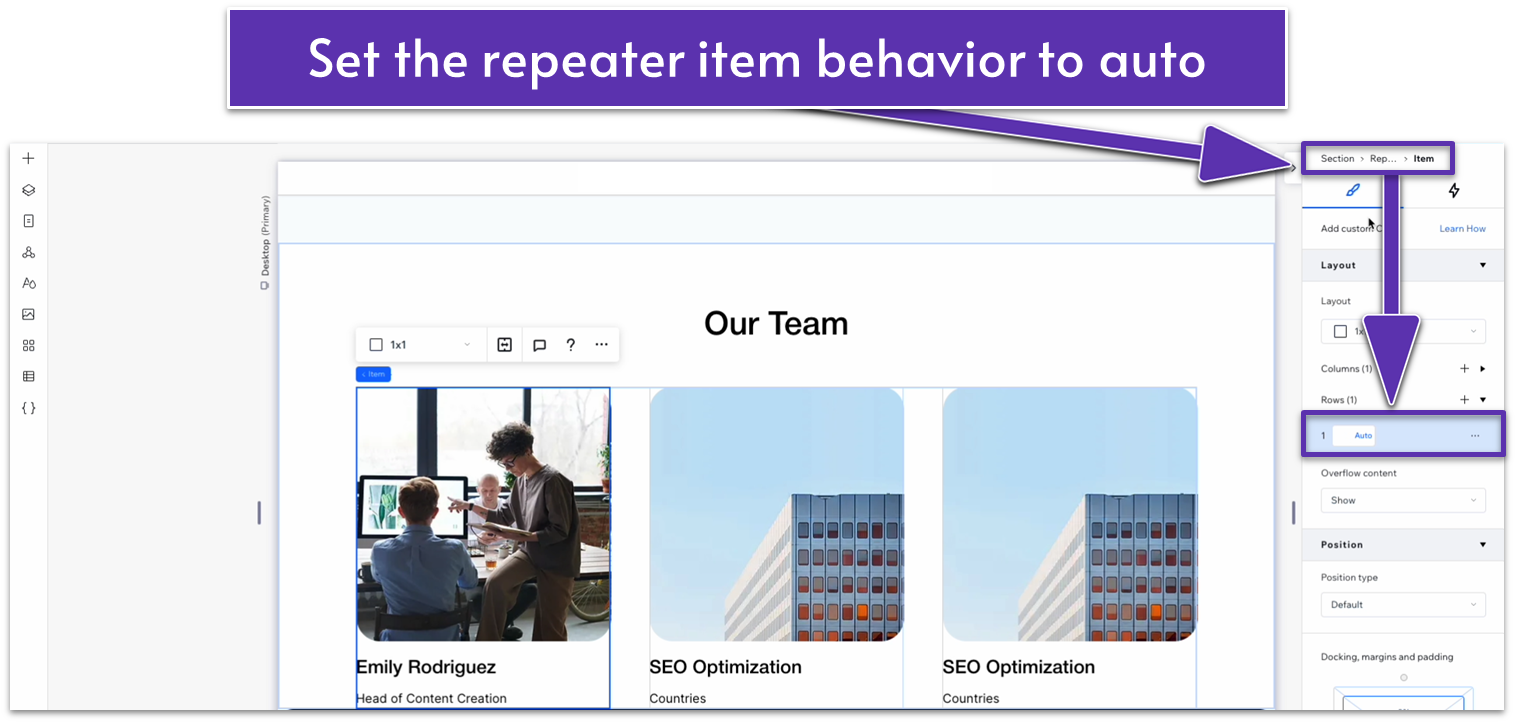
Step 10: Set the row’s behavior to auto inside the repeater.
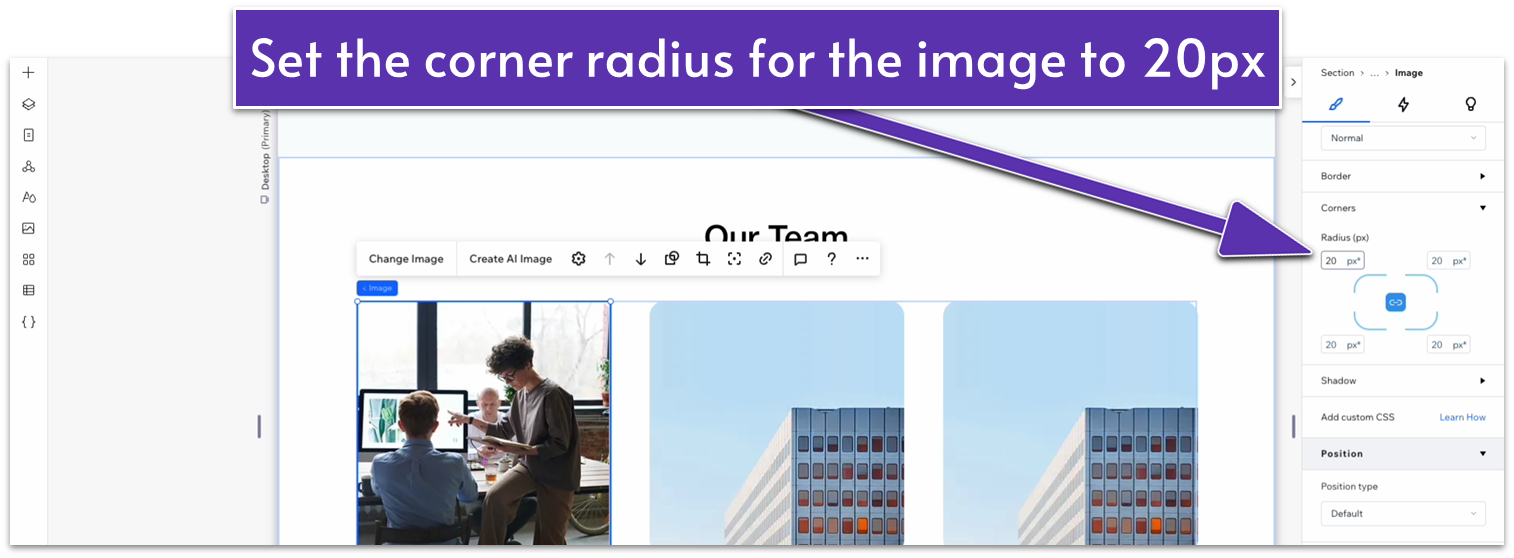
Step 11: Style the image.
- Change the corner radius of the image to 20px.
Step 12: Adjust the spacing.
- Set the bottom row’s behavior for the section to auto ( ).
- Set the bottom padding ( ) for the section to an 80px scale.
Adapt for Tablet and Mobile Views
Step 1: Adapt for tablet view.
On tablet view ( ):
- Set the top and bottom padding ( ) for the section to 70px.
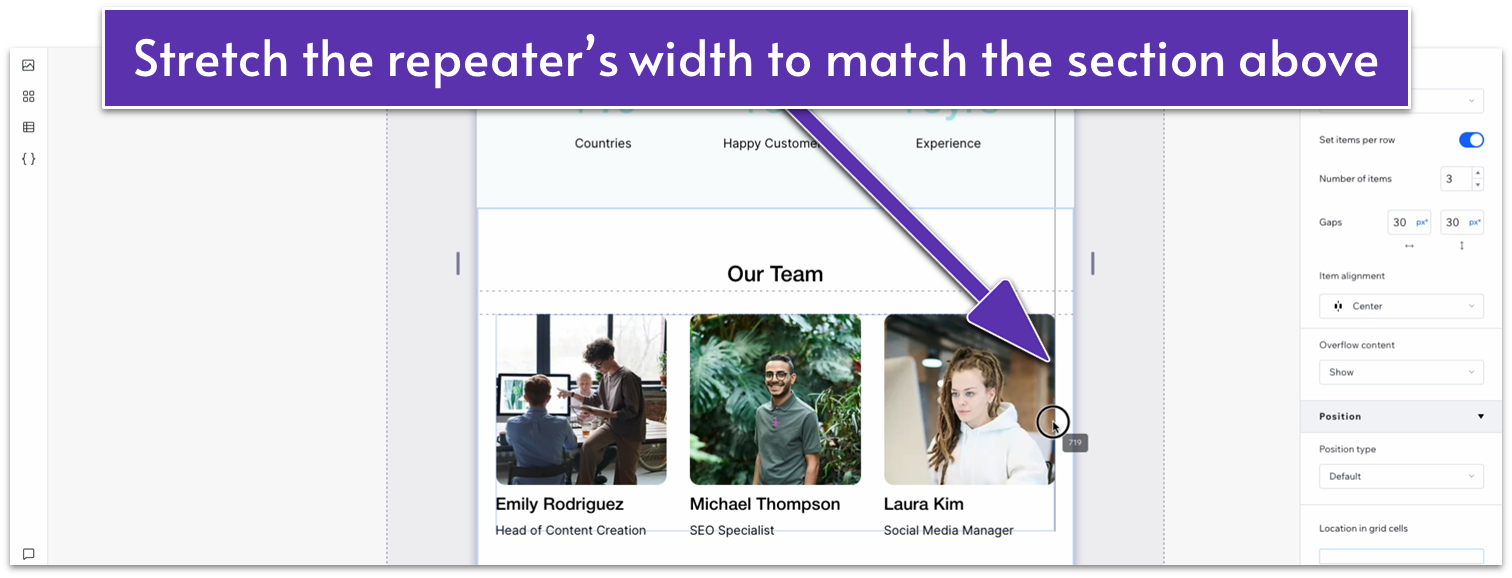
- Stretch the width of the repeater to match the section above.
- Set the horizontal gaps ( ) inside the repeater to 20px.
- Set the bottom margin ( ) for the images to 20px.
- Set the bottom margin ( ) for the heading with the team member’s name to 10px.
- Set the corner radius for the image to 20px.
Step 2: Adapt for mobile view.
On mobile view ( ):
- Set the top and bottom padding ) for the section to 70px.
- Change the vertical gaps ( ) for the section to 30px.
- Set the number of items per row on the repeater to 1.
- Set the vertical gap ( ) for the repeater to 30px.
- Set the margin ( ) for the bottom of the image to 20px.
- Set the margin ( ) at the bottom of the heading with the team member’s name to 10px.
- Set the corner radius of the image to 20px.
Adding More Team Members to the Section
If you want to add more team members to the section, click on the “Add Item” option in the repeater’s pop-up menu.
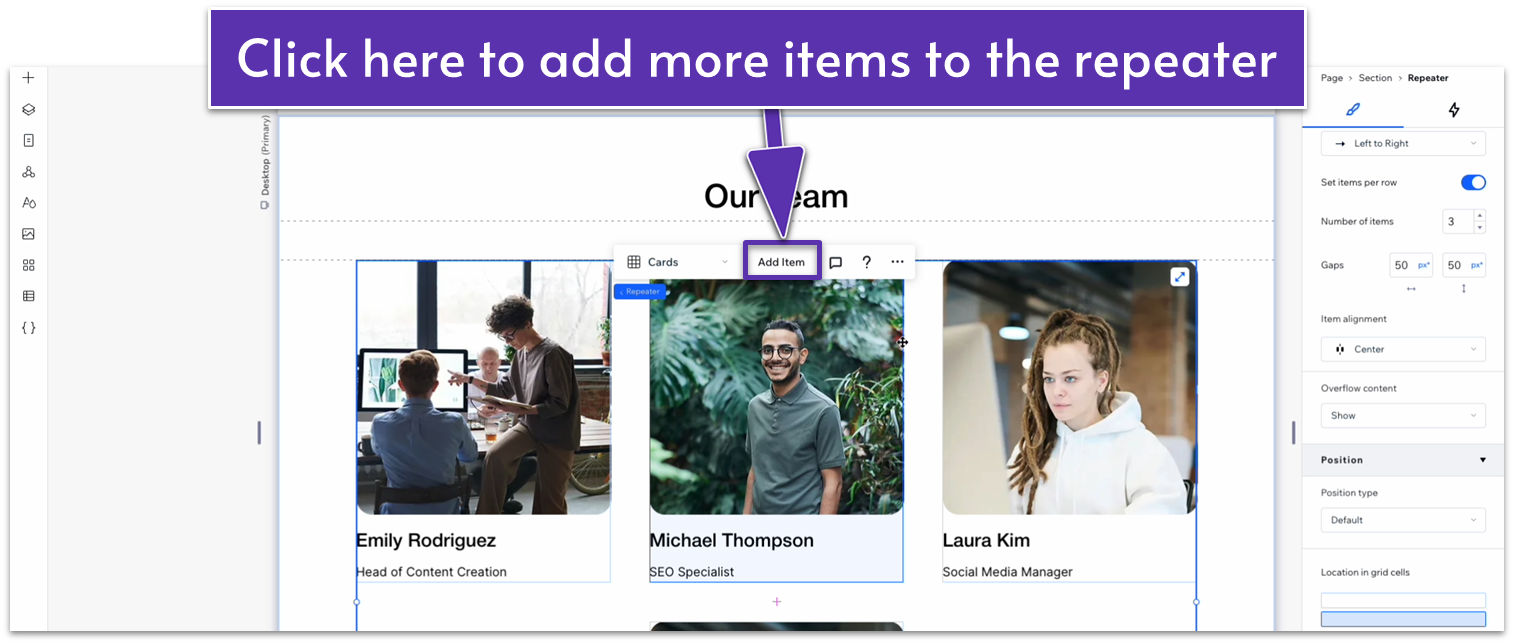
Just make sure to change the number of items per row so there’s always the same number of items in each row (e.g., set to either 2 or 4 if there are four team members, set to 5 if there are 5, set to either 2, 3, or 6 if there are six, etc.).
3.4 Testimonials Section
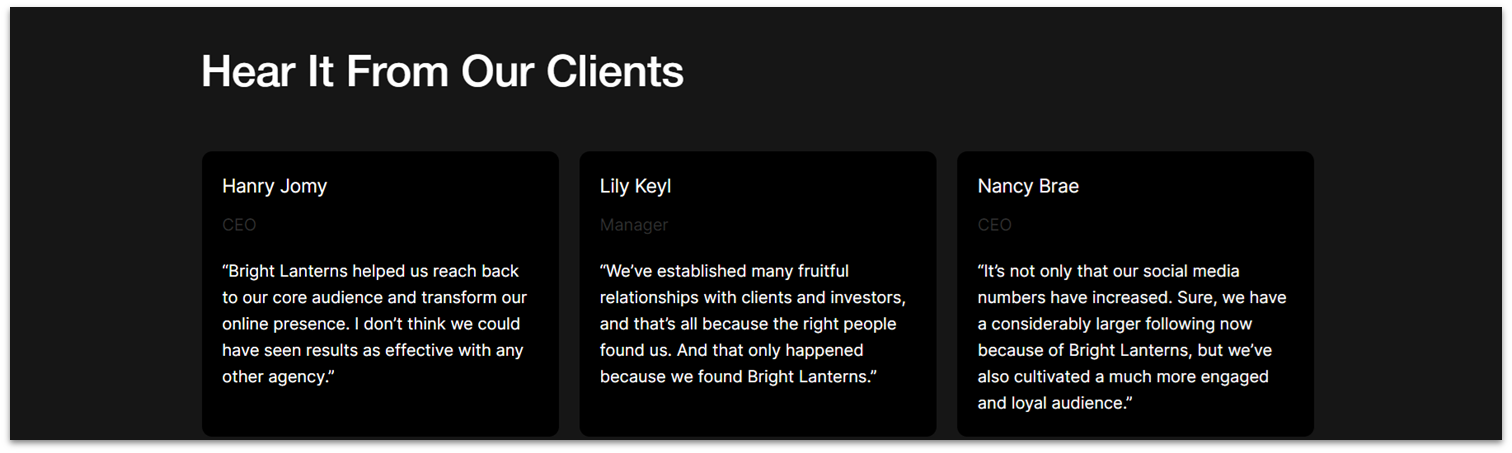
We want to add a testimonials section to this page, but since we’ll be using the same section repeatedly, we’ll just turn the “Testimonials” section from the homepage into a global section so we can quickly add it to any page.
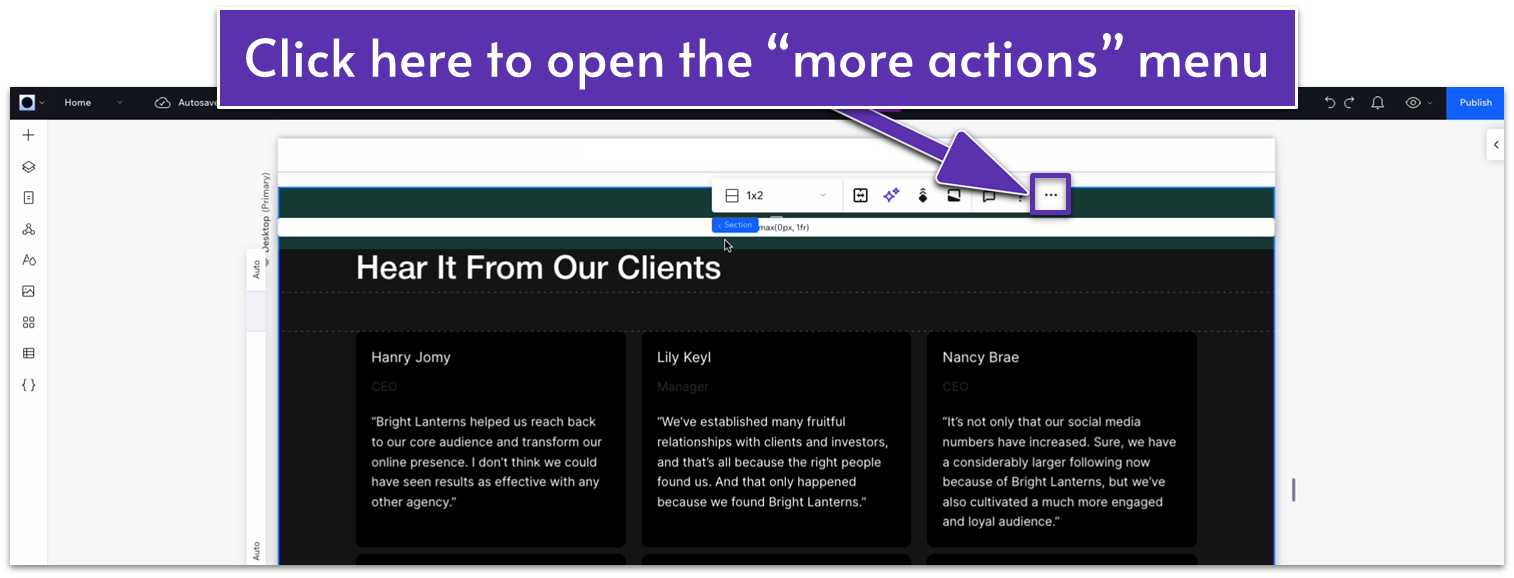
Step 1: Turn the “Testimonials” section into a global section.
- Head back to the homepage and find the “Testimonials” section there.
- Click on the section and open the “more actions” menu by clicking on the three-dot icon ( ) in the pop-up menu.
- Head down to “Set as Global” and select “Section.”
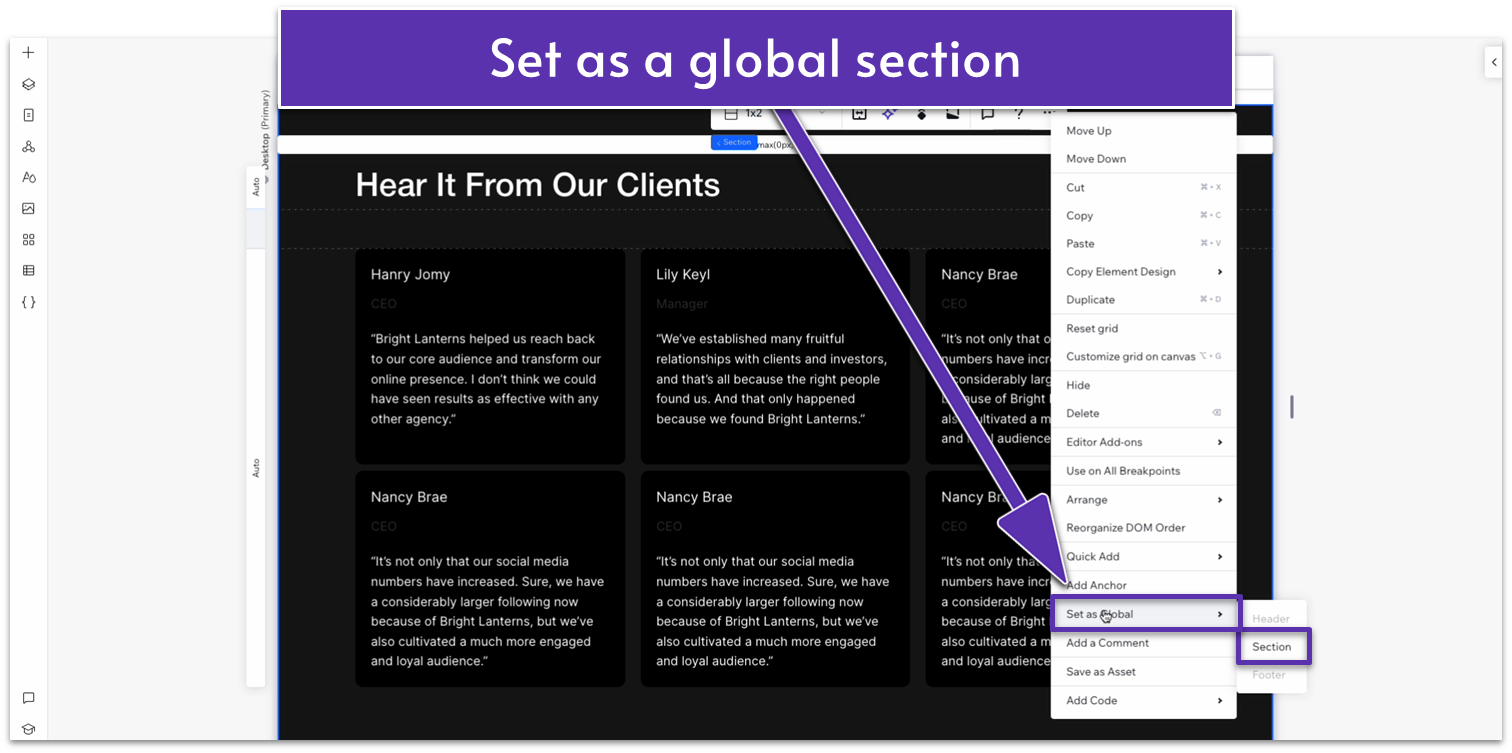
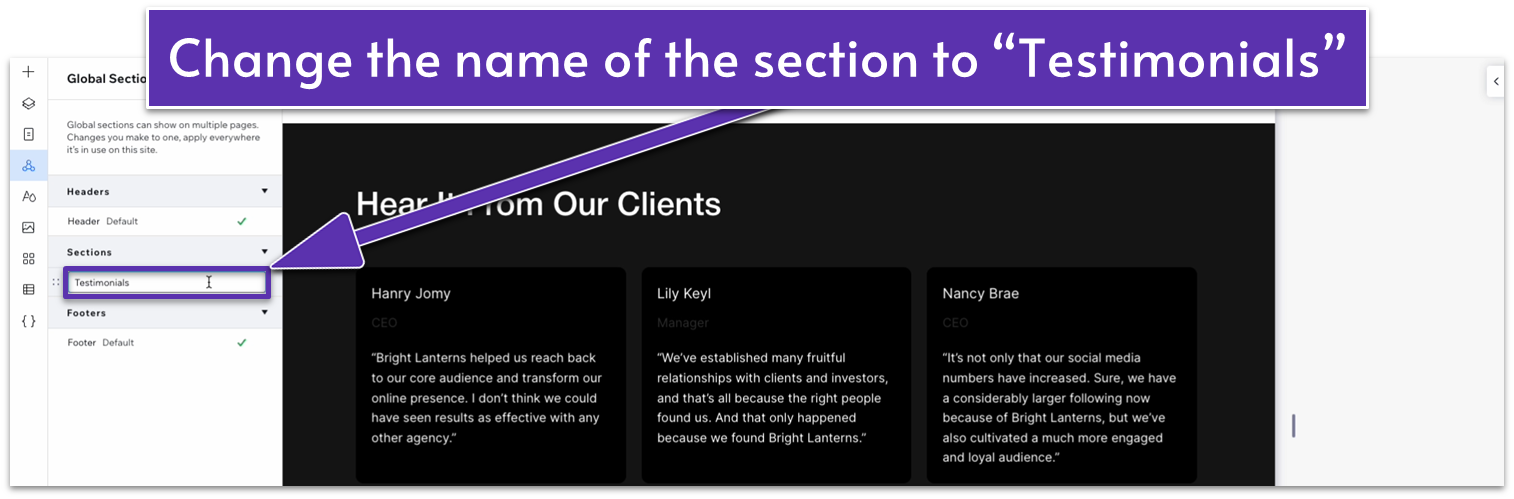
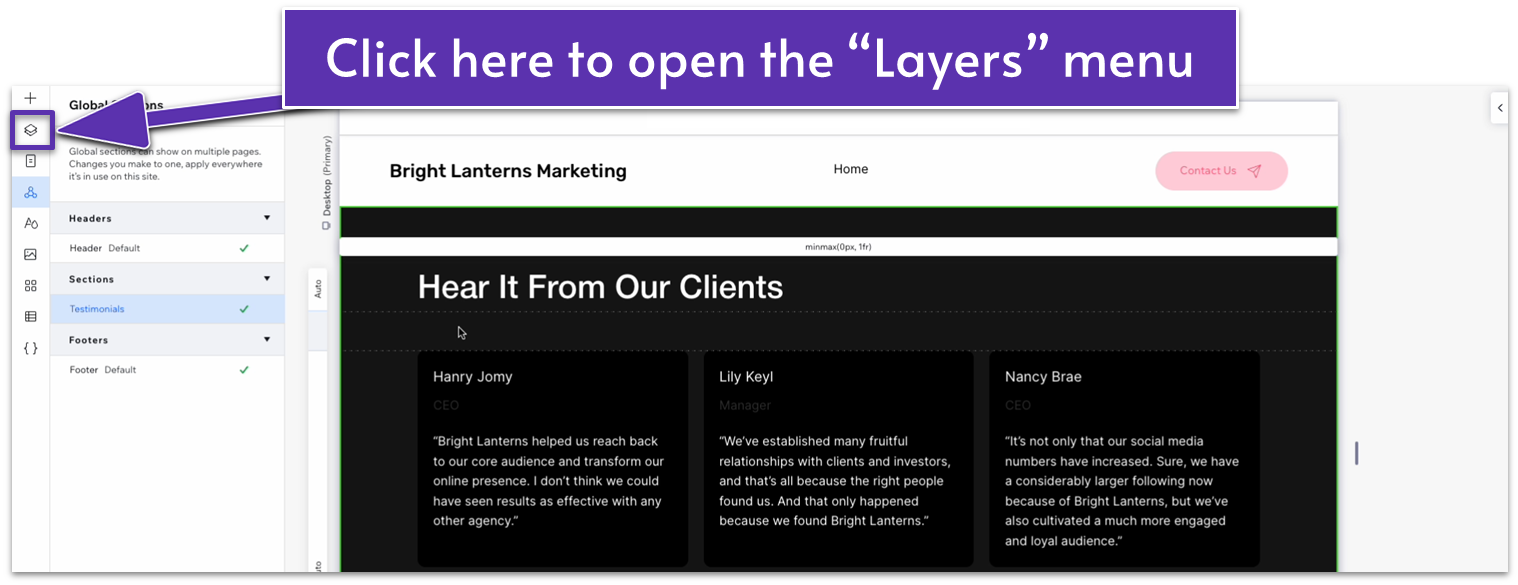
- The “Global Sections” menu will open. Change the name of the section to “Testimonials.”
Step 2: Add the testimonials section to the “About” page.
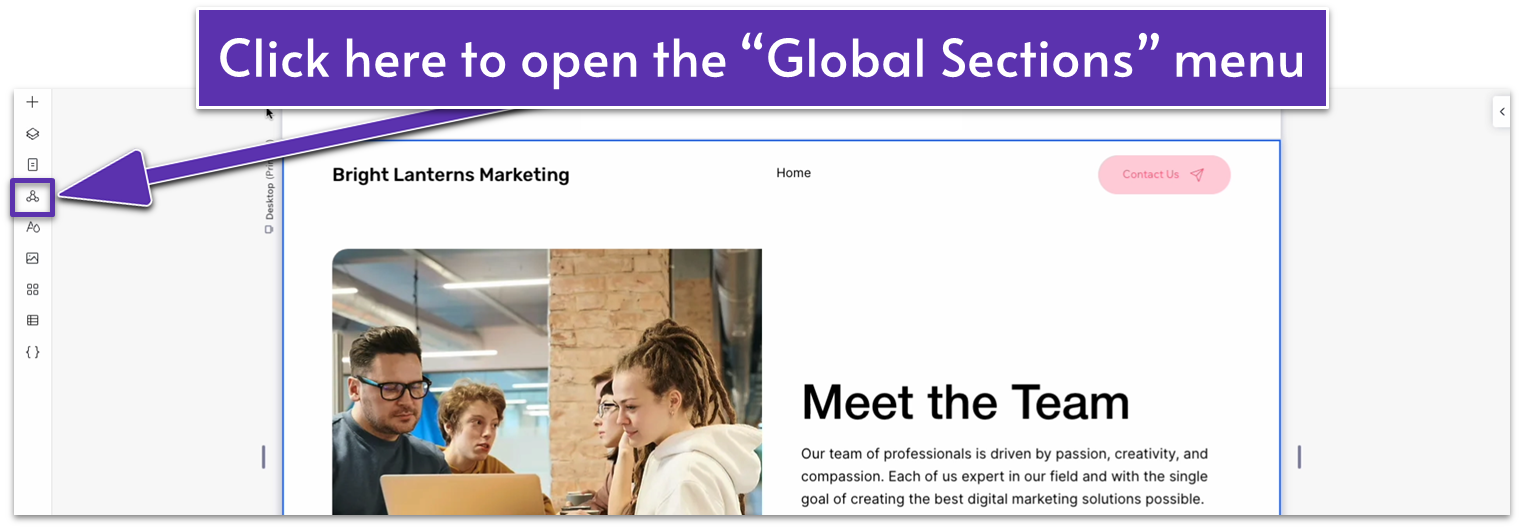
- Head back to the “About” page.
- Click on the symbol of a triangle with circles at each point ( ) to open the “Global Sections” menu.
- Hover over the “testimonials” section and select “Add to page.”
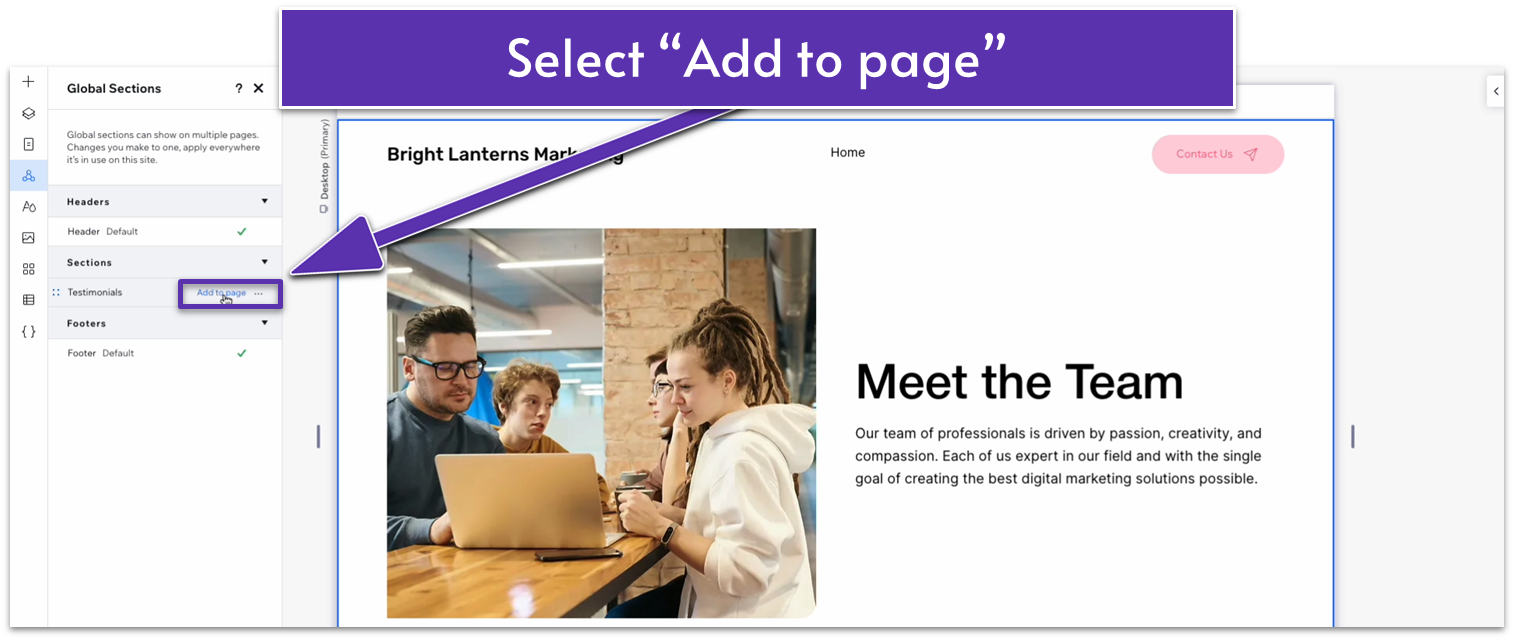
- By default, the section will be added to the top of the page.
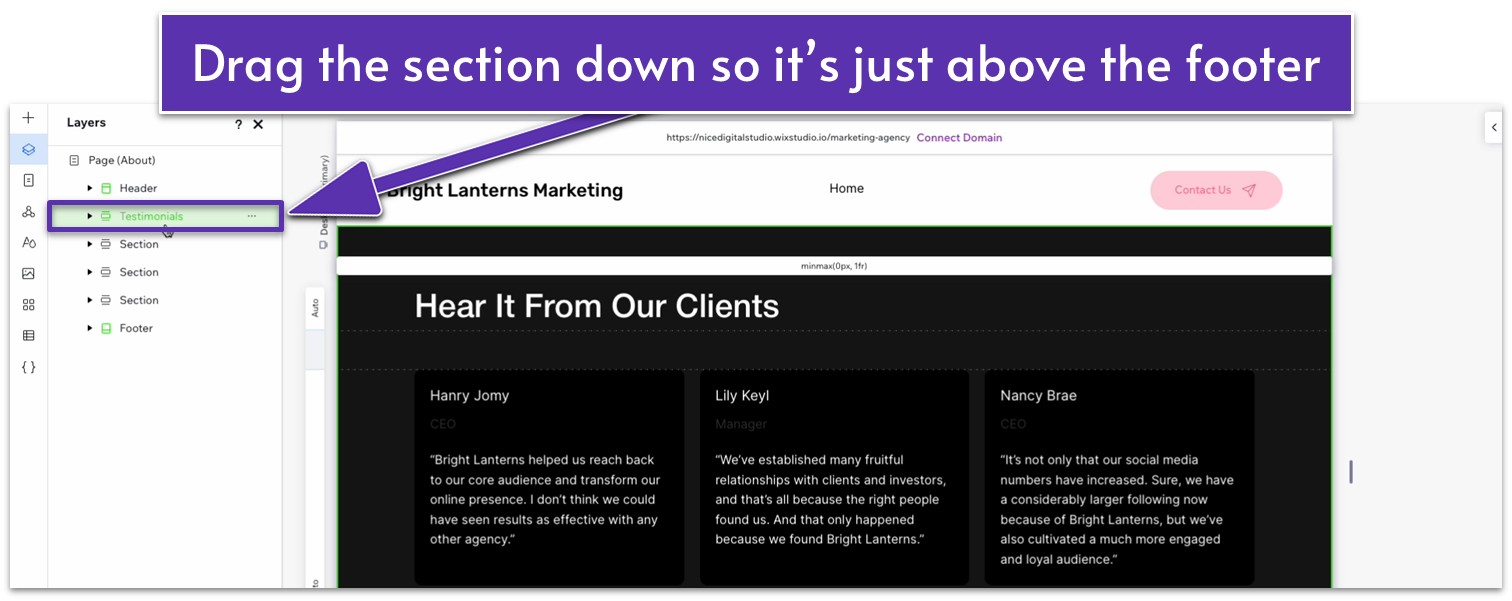
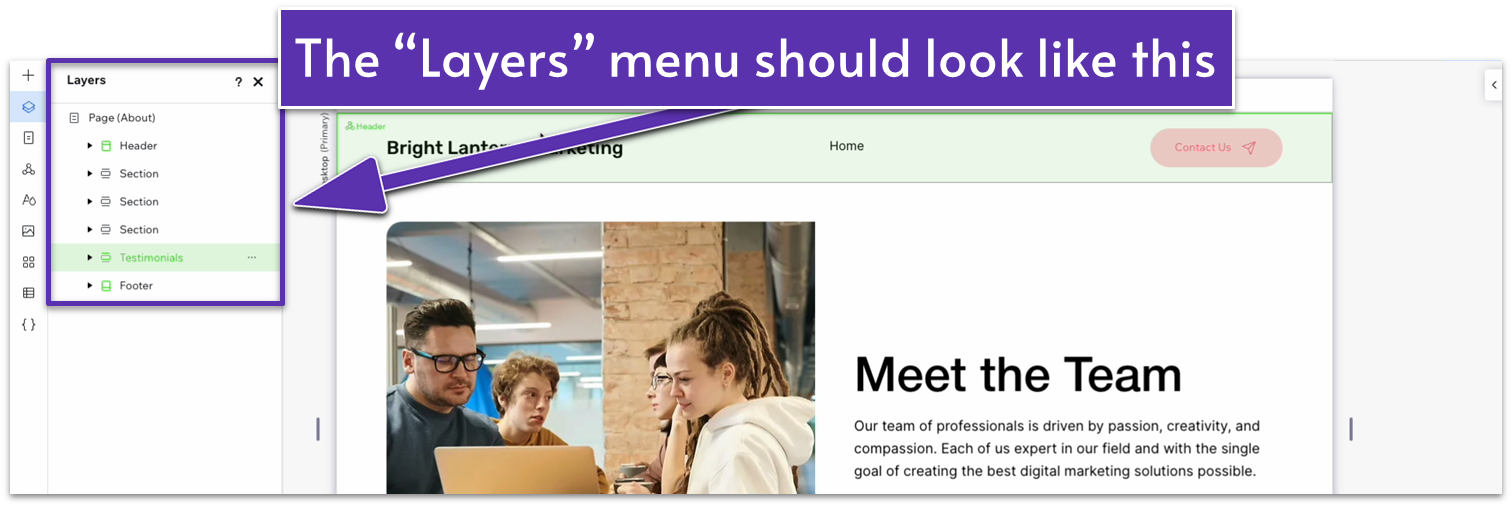
Step 3: Move the “testimonials” section to the bottom of the page
- Click on the icon with two overlapping squares ( ) to open the “Layers” menu.
- Drag the “testimonials” section down until it’s just above the footer.
Adapt for Tablet and Mobile Views
Since we’ve already adapted this section for tablet and mobile viewing before, it should be good to go.
3.5 Instagram Section
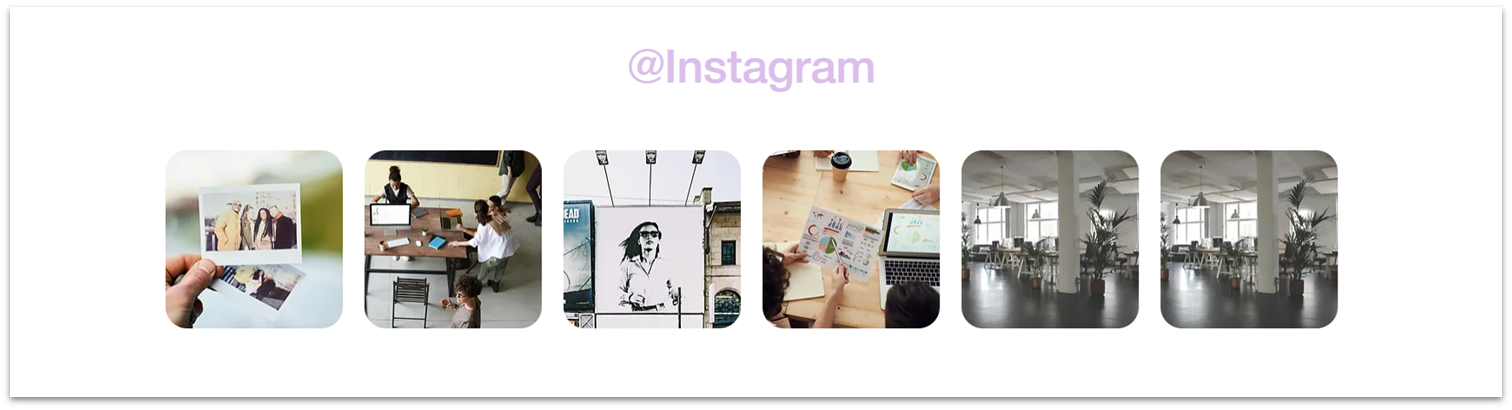
An Instagram presence is a crucial part of any modern business, so we’ll add a section that showcases some of the best photos from our Instagram and provides users with a quick link to our profile.
Step 1: Add a new section and apply a 1×2 ( ) CSS grid.
- Set the vertical gap ( ) to 50px.
Step 2: Copy the heading from the section above.
- Change the font color to black (#000000 HEX).
- Align the text to the center ( ).
- Set all margins to 0.
- Change the text to your Instagram username.
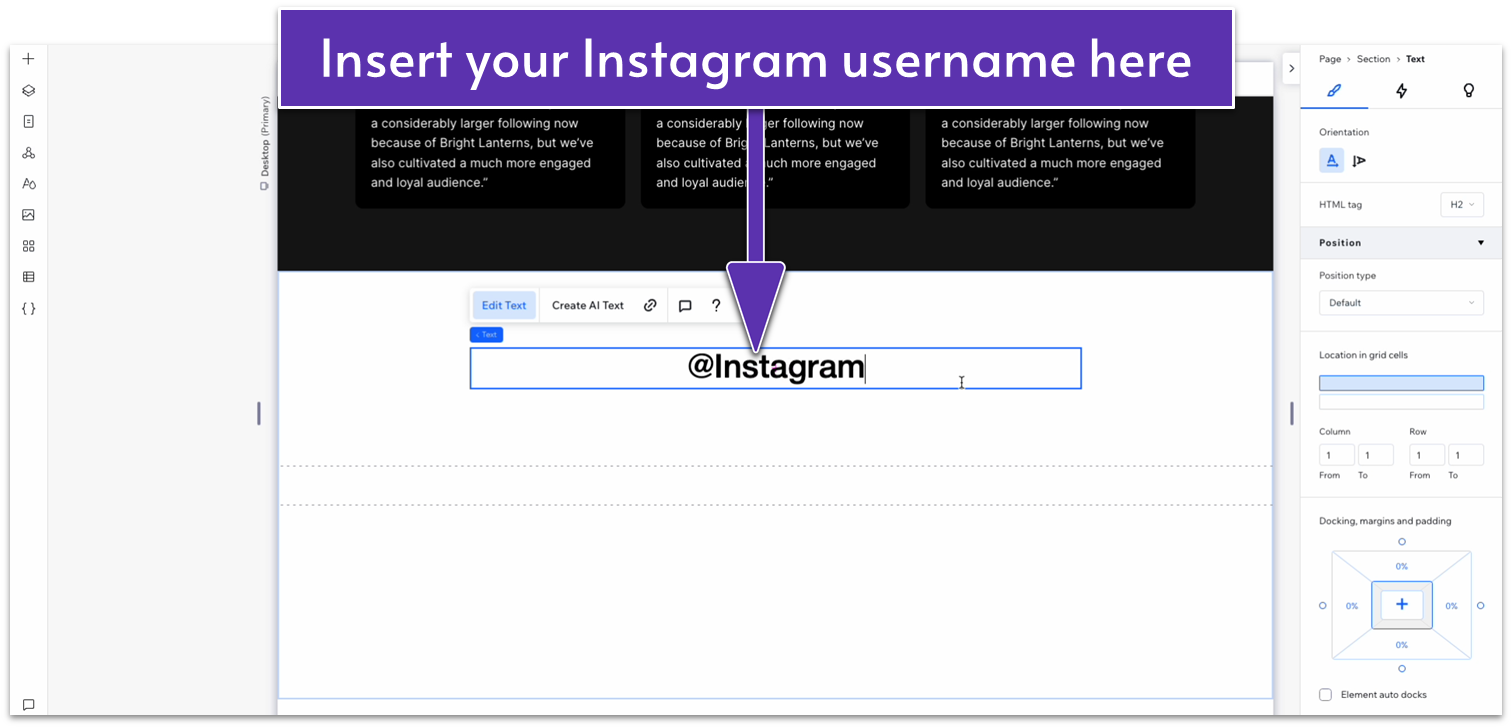
- Set the top row’s behavior to auto ( ).
- Set the top padding ( ) for the entire section to an 80px scale.
Step 3: Add a link to the username heading.
- Highlight the text with your Instagram username and click the chain icon ( ) to add a link.

- On the “link” menu, select “web address” and insert a link to your Instagram profile.
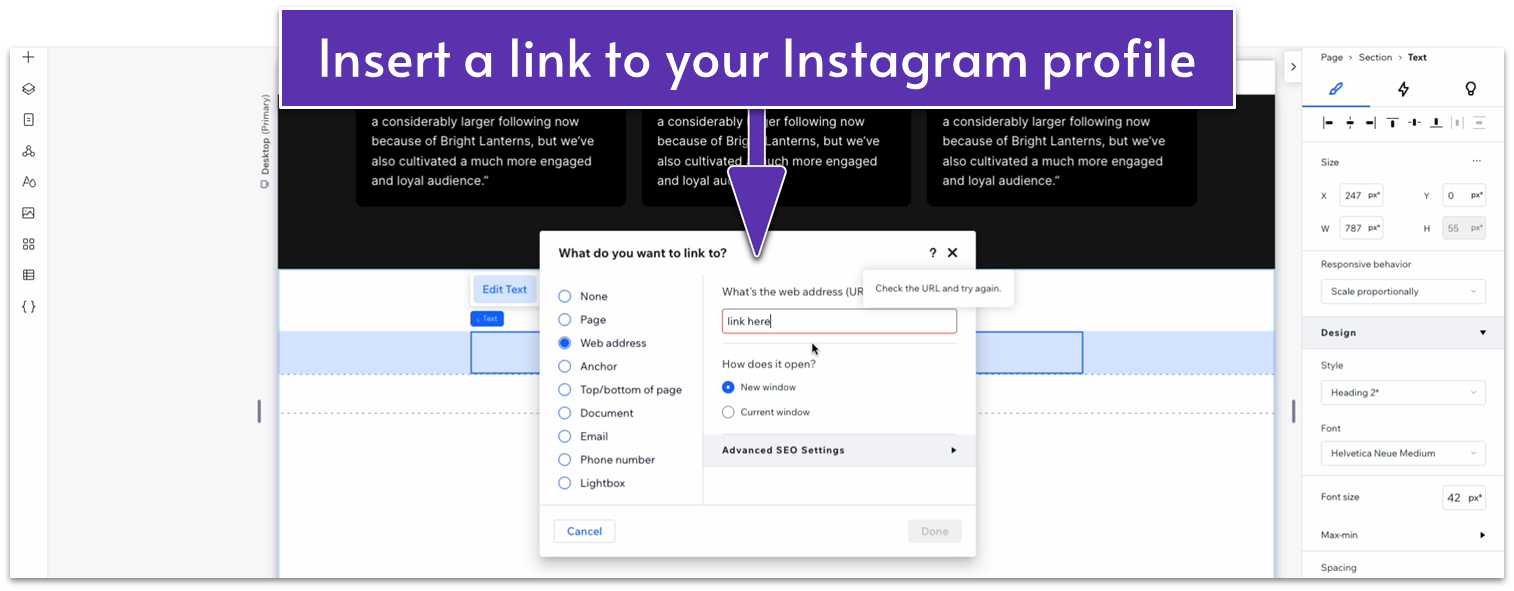
- Click on “done” to save the changes.
- Change the text color for the heading to a soft purple (#D88EEA HEX).
Step 4: Add an image repeater to the bottom row.
- Drag a repeater into the bottom row.
- Set all margins to 0.
- Set the repeater’s width to 1080px.
- Set the number of items per row to 5.
- Set the horizontal ( ) and vertical ( ) gaps for the repeater to 20.
- Add two more items, so there are five in total.
- Apply a CSS grid to the repeater items.
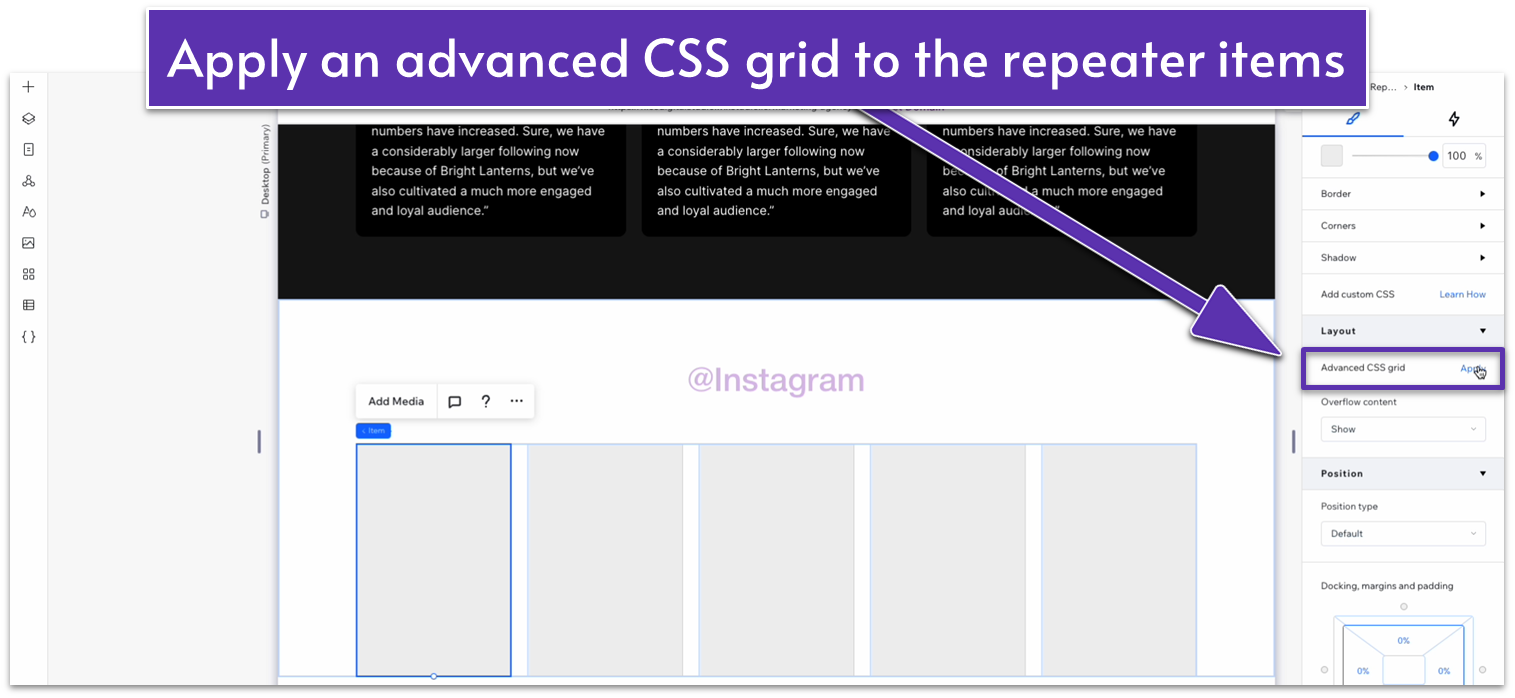
- Remove the background from the repeater items.
- Copy an image from the “our team” section above and paste it into one of the repeater items.
- Check the width of the repeater items and set the image’s width to the same value.
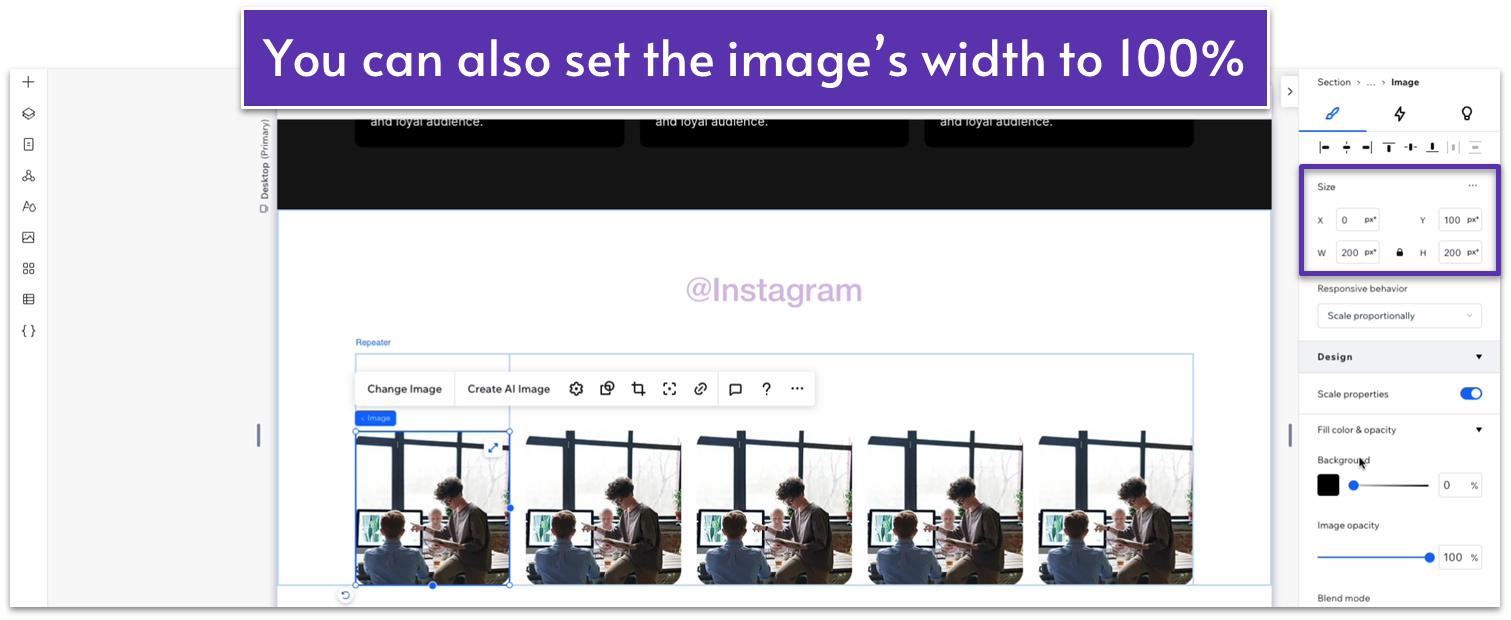
- Set all margins to 0 for the image.
- Select the row behavior for the repeater items to auto ( ).
- Set the behavior for the bottom row on the section to auto ( ).
Step 5: Replace the images.
Replace the images with your favorite photos from your Instagram. You’ll have to upload them manually since this process doesn’t automatically update with your Instagram feed.
Adapt for Tablet and Mobile Views
Step 1: Adapt for tablet view.
On tablet view ( ):
- Set the top padding ( ) for the entire section to 70px.
- Set the repeater’s width to 720px.
- Set the horizontal gaps ( ) for the repeater to 20px.
- Change the number of items per row to 3.
Step 2: Adapt for mobile view
On mobile view ( ):
- Set the top padding ( ) for the entire section to 70px.
- Set the vertical gap ( ) for the repeater to 30px.
- Set the number of items per row for the repeater to 1.
- Set the vertical gap ( ) for the repeater to 20px.
3.6 Blog Section
We’ll use the same method of creating a global section to add a blog section. This set of instructions will be incredibly straightforward since we’ve already discussed the minutiae of the process in the “Testimonials” section above.
Step 1: Head to the homepage and set the blog section as a global section.
Step 2: Using the “Global Sections” menu ( ), add the blog section to the page.
Step 3: Using the “Layers” menu ( ), drag the blog section to the bottom of the page.
Adapt for Tablet and Mobile Views
Since we have already adapted this section for tablet and mobile viewing, there isn’t anything else we need to do here.
