

Time to Complete Module: 30 minutes
Last updated: March 13, 2025
IN THIS MODULE
7.1 Upgrade Your Squarespace Plan
If you haven’t already, you’ll need to upgrade to one of Squarespace’s paid plans to publish your site. If you don’t have a domain yet, you can get a free domain name for a year with any plan as long as you select an annual payment cycle. Annual billing also has the benefit of costing you less on a per-month basis. Here’s what you need to do to upgrade your plan: Step 1: Head to global settings- Click the “Settings” icon (
) in the main sidebar menu.
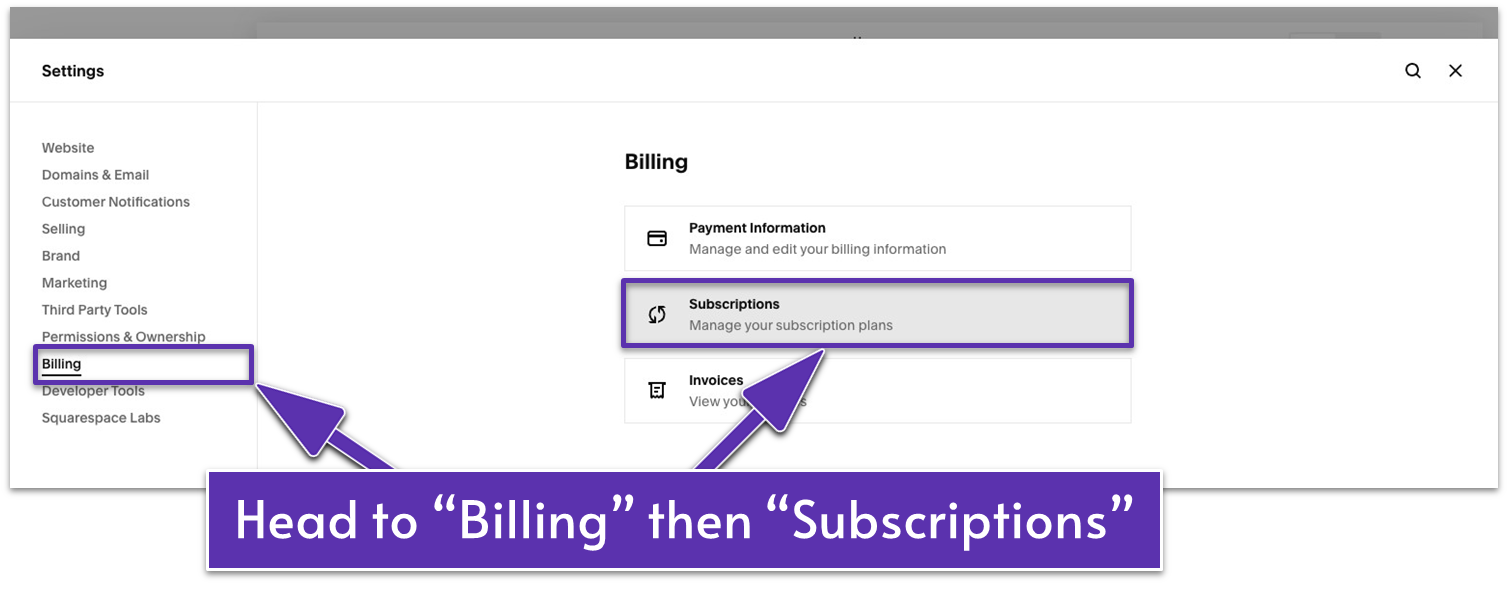 Step 3: Upgrade your subscription
- Select “Subscriptions” in the billing menu.
- Click on “Website.”
- In the “Website Subscription” panel, click the “Subscribe” button.
- Open the currency dropdown in the upper-right corner, and select your currency if needed.
- Choose the ideal Squarespace plan for you and click “Select.”
Overview of Squarespace plans:
Step 4: Select your billing cycle- Personal: An entry-level plan that’s more than enough for a simple personal website or business card site.
- Business: Designed for e-commerce sites needing basic online store features.
- Commerce (Basic and Advanced): This option is best for businesses that require advanced e-commerce tools, such as digital cash registers and third-party system integration.
- Choose if you want to pay annually or monthly.
- Click “Confirm Selection.”
- Complete all the address fields.
- Optional: If you’re tax-exempt, check the VAT status box and enter your business name and registration number.
- Click “Save and Continue.”
- Select “Credit or Debit Card,” “SEPA Direct Debit” (for euro payments), or “PayPal” as your payment method.
- Enter the required payment details for your chosen method.
- Click “Save and Continue.”
- Check the total amount you’ll pay and other payment details.
- Click “Confirm Payment.”
7.2 Connect a Custom Domain
Now that you have set up your subscription, connecting your site to a custom domain will be straightforward. You can connect a domain from Squarespace or another provider.Option A: Connect Domain Directly From Squarespace
Step 1: Open the “Settings” (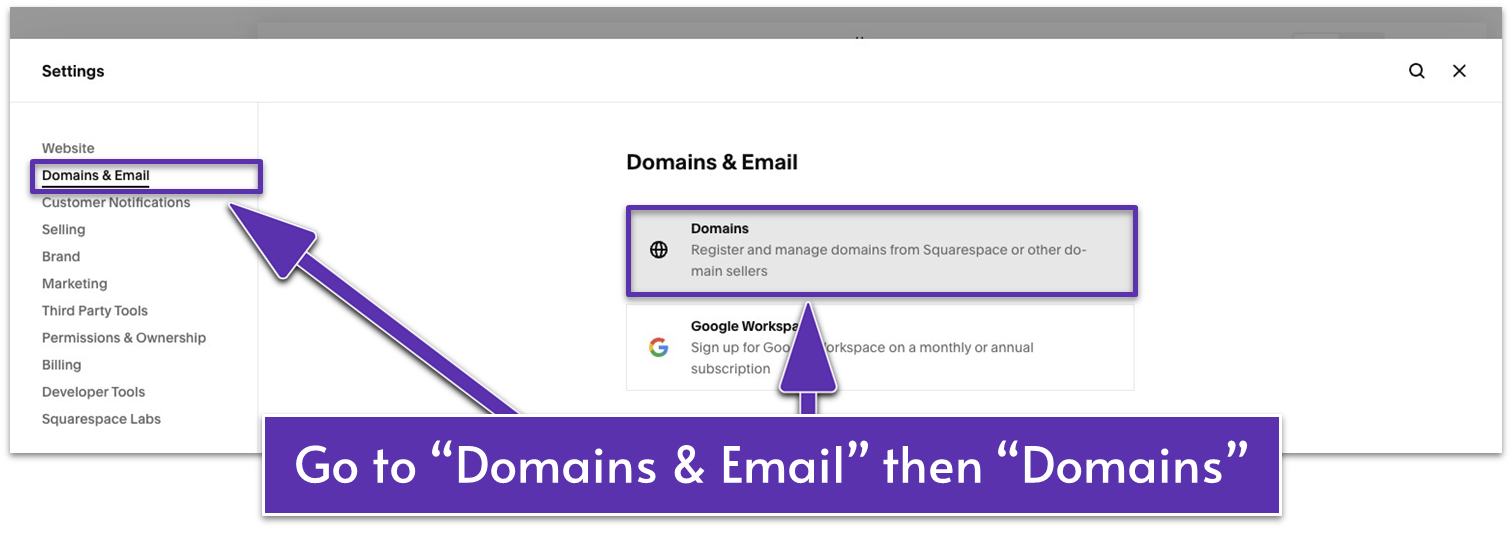
- Select the “Domains” option.

- Click “Get a Domain.”
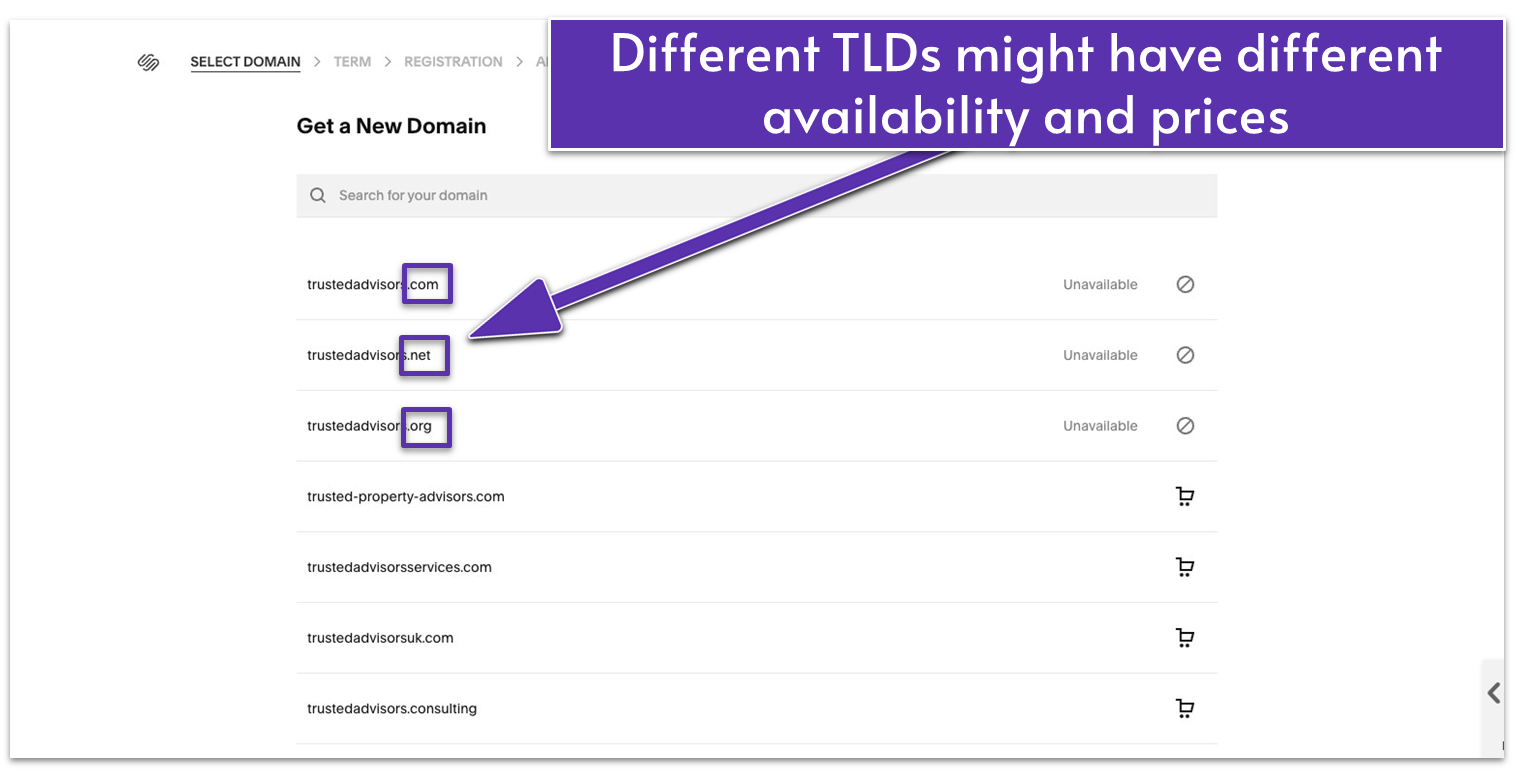
- Type your desired domain name in the search bar on the “Get a New Domain” page. You can also choose from the list of suggested domain names.
Tip: If the domain you want isn’t available, you can always try changing the top-level domain (TLD) – the .com, .net, and other extensions at the end of your website’s address. For example, if “example.com” isn’t available, you can try searching for “example.net” or “example.org.”
- Click on your chosen domain name to add it to your cart. If you signed up for a yearly plan, the domain’s price should say “for free.”
- Optional: Add more domains if you want to, but you might have to pay extra for those.
- Click on “Checkout.”
- Click the “Term length” dropdown and choose how long you want to register your domain. You can choose up to 10 years.
- Click “Save and Continue.”
Option B: Connect Domain From a Different Registrar
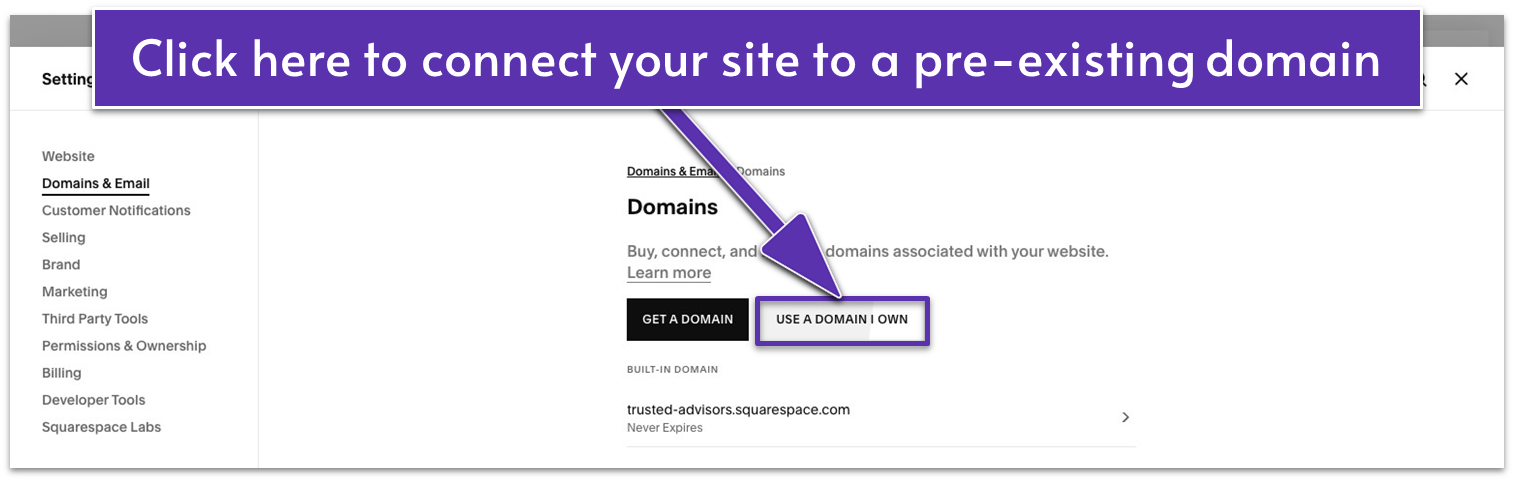
If you already own a domain registered with a different service or prefer using a different domain registrar, start by following their steps to purchase your domain. Most registrars will also give you instructions for connecting your domain to a website, which should probably be the simplest way. Alternatively, you can add a third-party domain directly from Squarespace. Step 1: Head to the “Domains” menu- Go to “Settings” (
). - Select “Domains & Email” and then “Domains.”
 Step 3: Enter your domain
- A pop-up panel will open requesting you to type in your domain address.
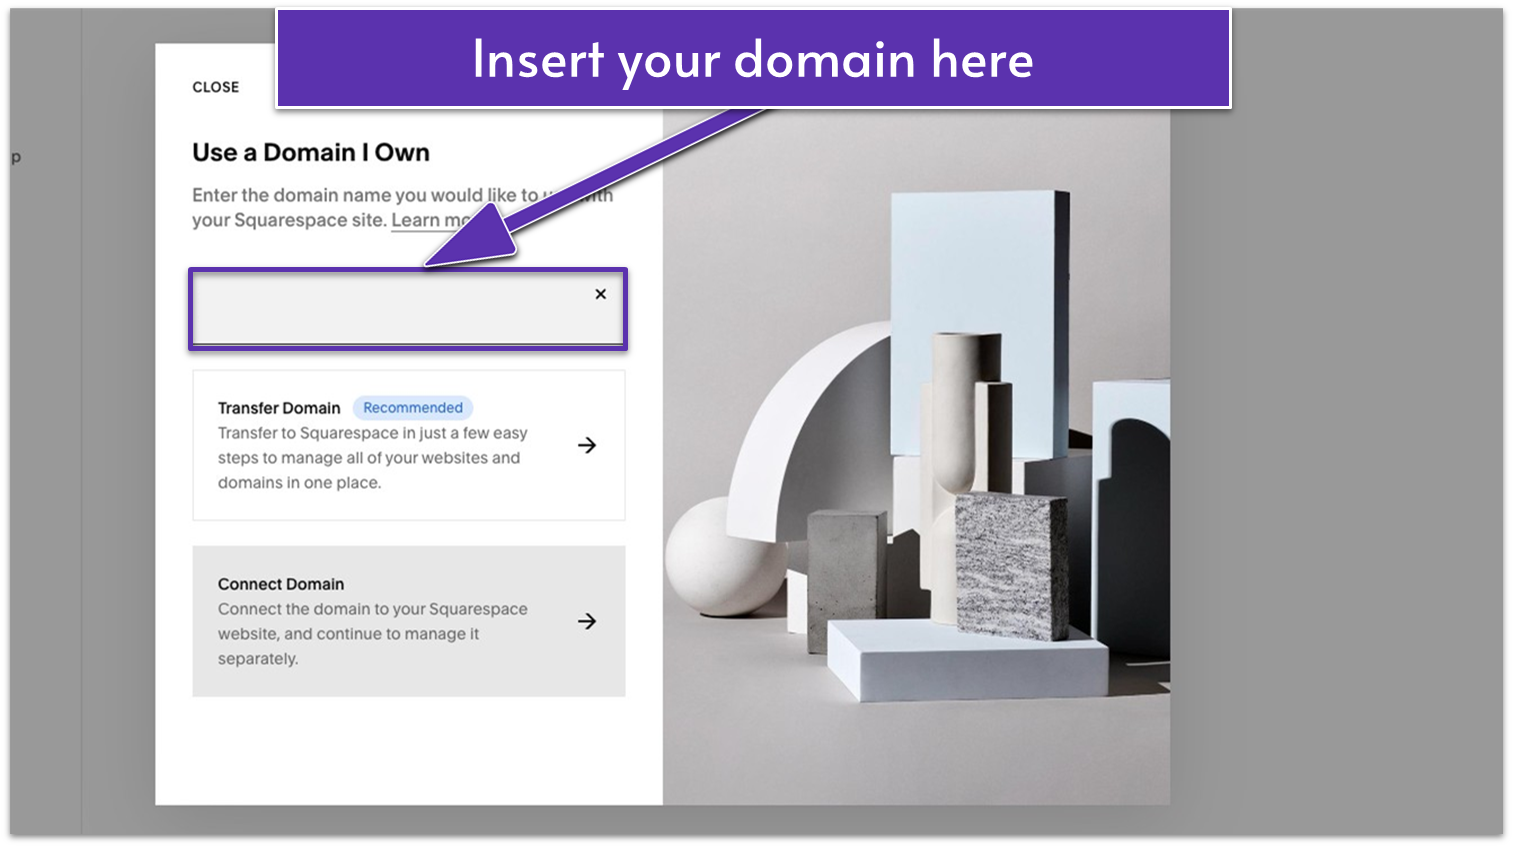
- Insert your domain and hit “Enter” or click the arrow next to the text field. Squarespace will automatically look up where the domain is hosted and offer you two options:
- “Transfer Domain” transfers the domain information to Squarespace’s registrar.
- “Connect Domain” simply connects your Squarespace site to your domain.
- Select “Connect Domain.”
- If a panel appears offering you to use Squarespace’s auto-connect option for GoDaddy, Namecheap, or Network Solutions, select “No, Use DNS Records.” Otherwise, continue to the next step.
- Click the “Select Provider” dropdown menu and select your domain provider. If your provider isn’t on the list, select “Other.”
- Click on “Connect Domain.”
- A dialog box appears, indicating the domain is connecting to your site. Click “Continue” to open the “DNS Settings” panel.
- Log in to your domain provider and go to its DNS manager.
- Copy the DNS records from your Squarespace site’s “DNS Settings” panel and add them to your domain provider’s DNS. Include the hostname, type, and data in the correct fields.
- Once you’ve added your DNS records, return to Squarespace’s “DNS Settings” panel. Click the “Refresh Records” button in the upper-right corner.
7.3 (Optional) Connect to Google Workspace
If you’ve purchased the Business plan or above, you can connect your site’s domain to a Google Workspace account free for one year. You can also connect to a Google Workspace account independently, which can help you manage communications to your website from a single business address. To connect your site to Google Workspace, all you have to do is: Step 1: Go to the “Google Workspace” panel
- Head to “Settings” (
). - Go to “Domains & Email,” then click “Google Workspace.”
- In the “Google Workspace” panel, select “Use a Domain I Own.” Squarespace may automatically use the connected domain and take you directly to the “Select a Google Workspace Plan” page.
- Choose a Google Workspace plan. If you’re eligible and want to claim your free Google Workspace plan, select the “Starter” plan.
- Choose your billing cycle and complete the registration, address, and payment pages.
- After completing registration and payment, follow the steps on the screen to finish setting up your Google Workspace account.
7.4 Publish Your Site
Now that you have a premium plan and an ideal domain name, we can finally move on to premiering your site to the world. Step 1: Head to “Settings” (Tip: You can also select “Password Protected” if you want to show the finished version of your site to specific people first to get their feedback. That way, you can implement whatever notes they give you before moving on with your finished product.
7.5 Make Post-Launch Adjustments
Now that the site is public, you only have to make some final adjustments to ensure the quality of the finished experience. Step 1: Remove the “www” prefix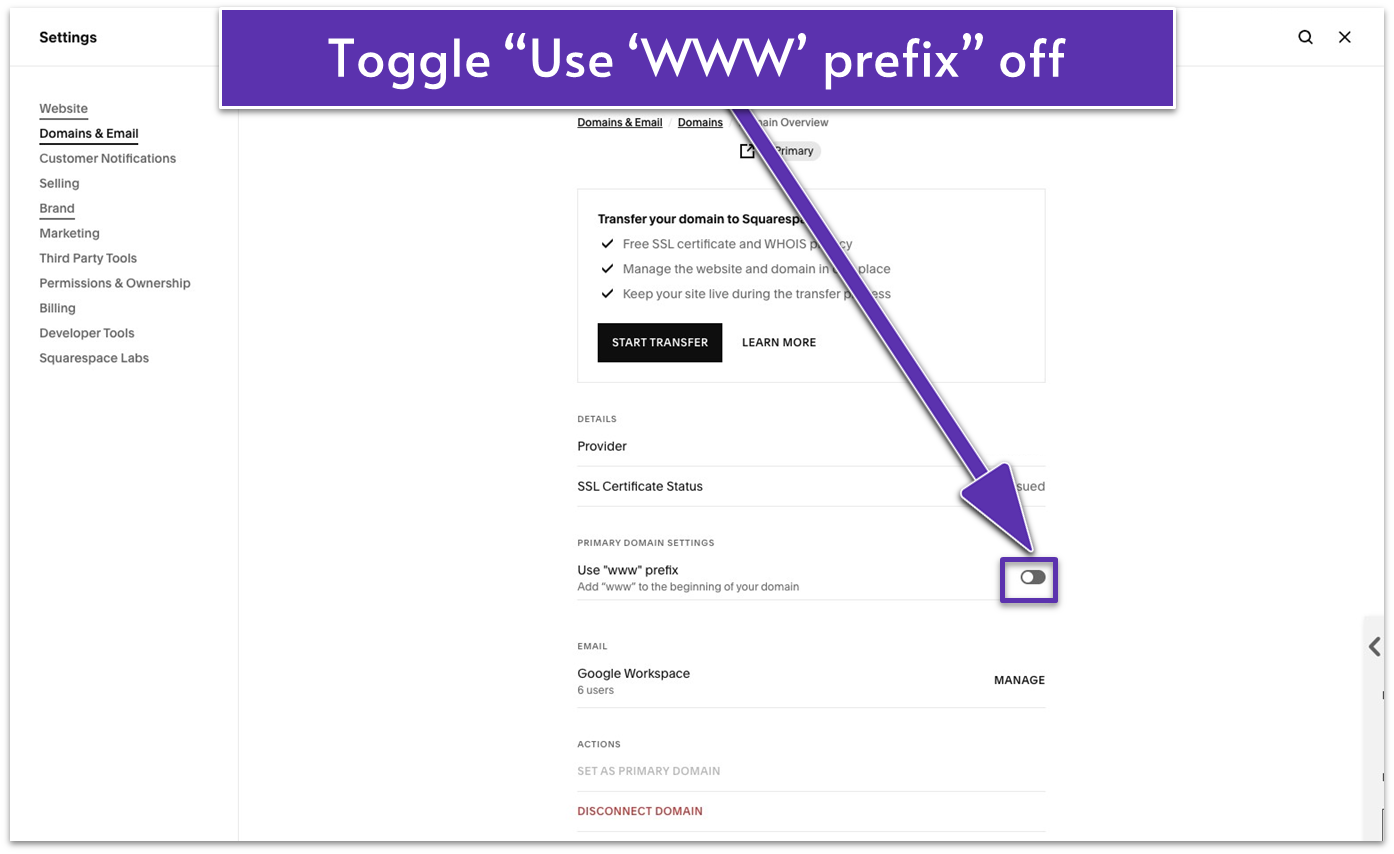
- Go to “Settings” (
). - Select “Domains & Email” and click “Domains.”
- Click on your primary domain to go to its “Domain Overview” panel.
- Turn off “Use ‘www’ prefix.” This will make your web address look cleaner.
- Repeat the process for other domains linked to the site.
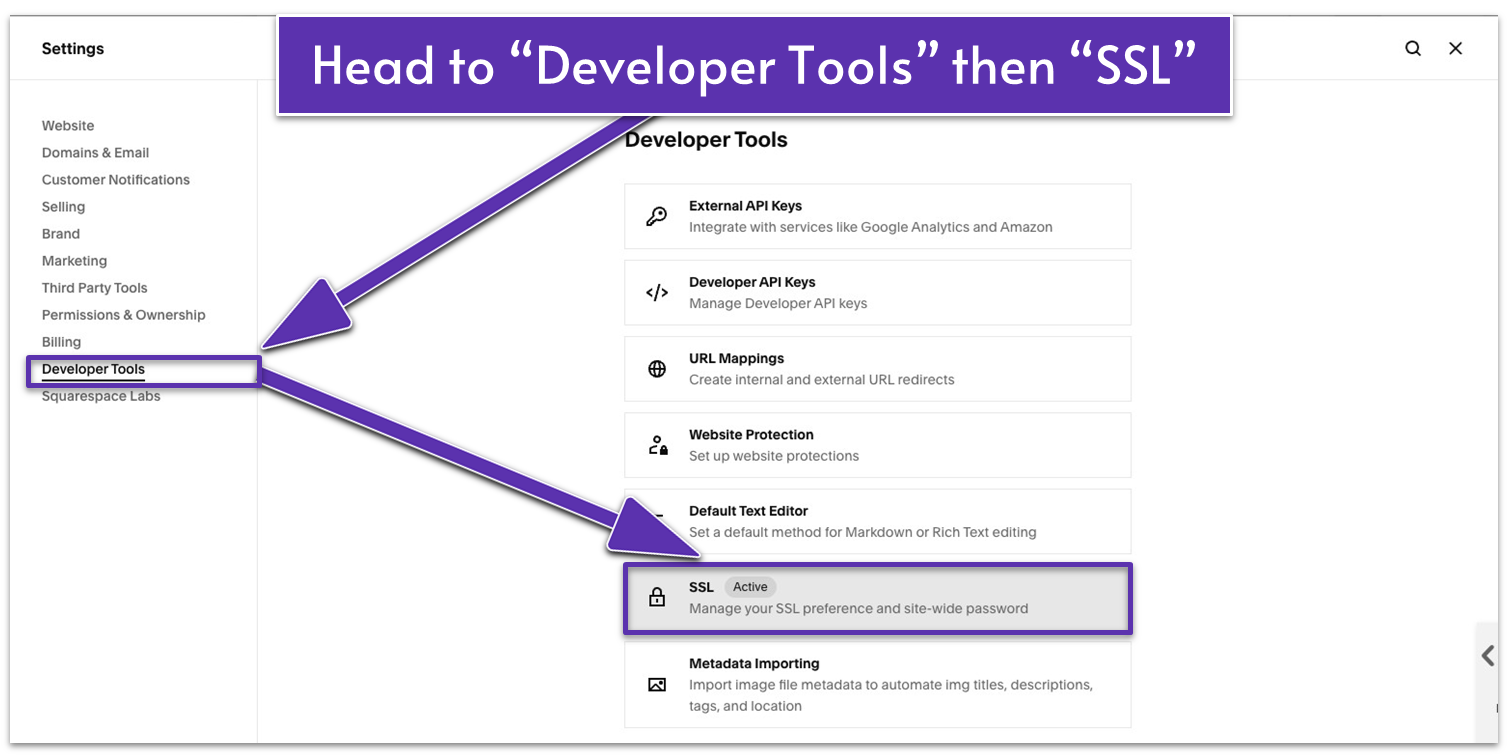
- Head to “Settings” (
) and then “Developer Tools.” - Click on “SSL.”
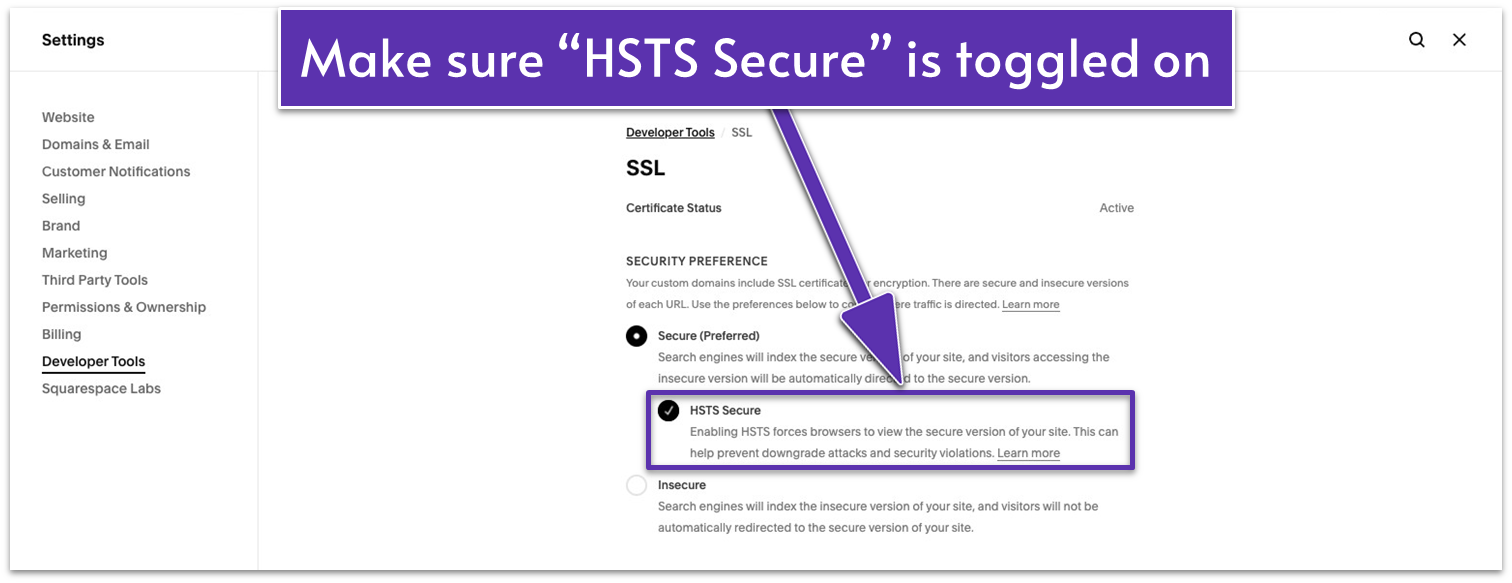
- Enable the “Secure” option.
- Turn on “HSTS Secure” to make sure your visitors always use the secure version of your website.
- Click “Save” in the upper-right corner of the panel.
