

Your About page was all about telling your story and highlighting your expertise. Now, you’ll create a Services page to showcase your offerings. This page will be even easier to build since much of the groundwork is already done. You’ll be tweaking the existing About page design to suit your needs and save a lot of time.
Your Services page will outline the various treatments available to your visitors, helping them understand what they can expect. It will also help you establish professionalism and transparency and encourage potential clients to book.
4.1 Add a New Page
Just like you did in the previous module, you’ll start by adding a new page in the “Main Navigation” menu.
Step 1: Add a “Main Navigation” blank page
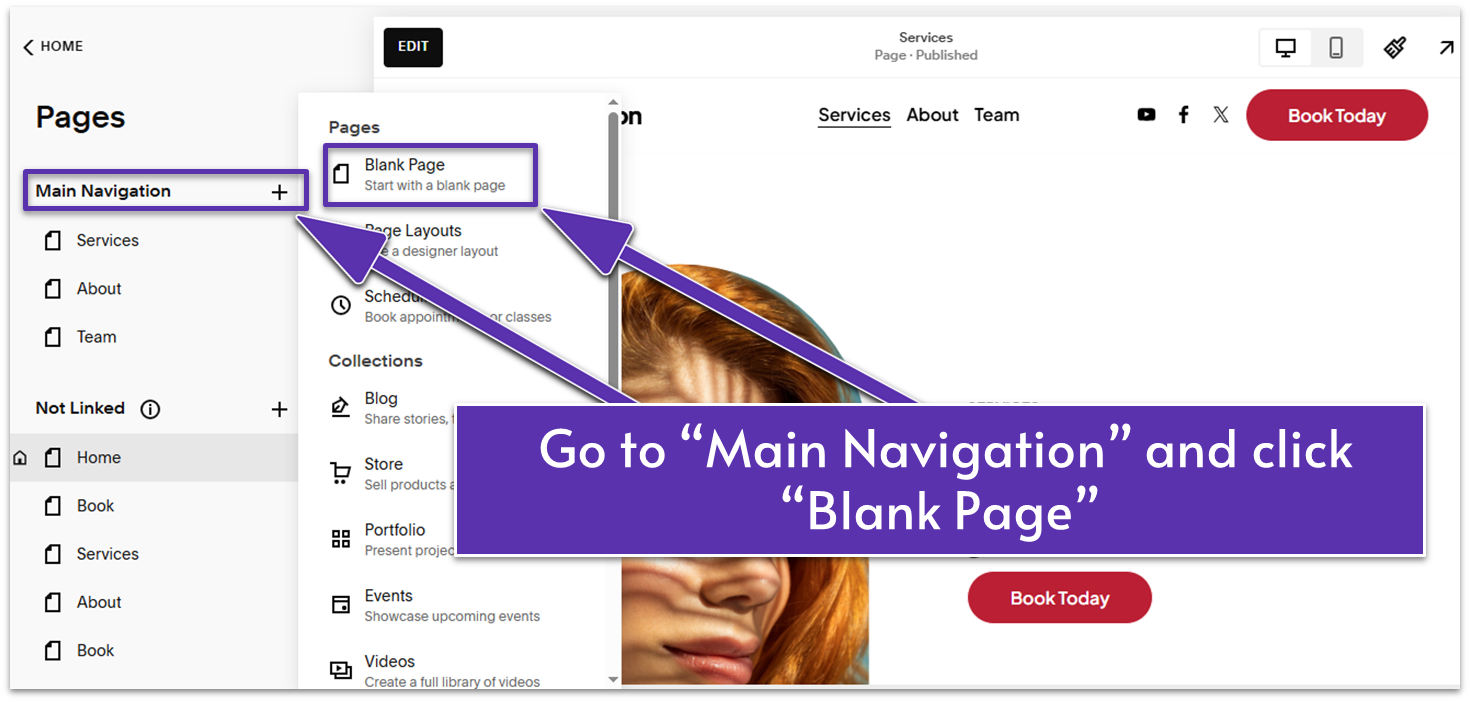
Step 2: Rename the page to “Services”
Now, we can start building individual sections.
4.2 Introduce Your Service (First Section)
The first section of your Services page should grab your visitors’ attention with the right mix of images and copy. You already built a captivating About section in the previous module, so now you can reuse it with tiny adjustments.
Step 1: Open the page editor and click “Add Section”
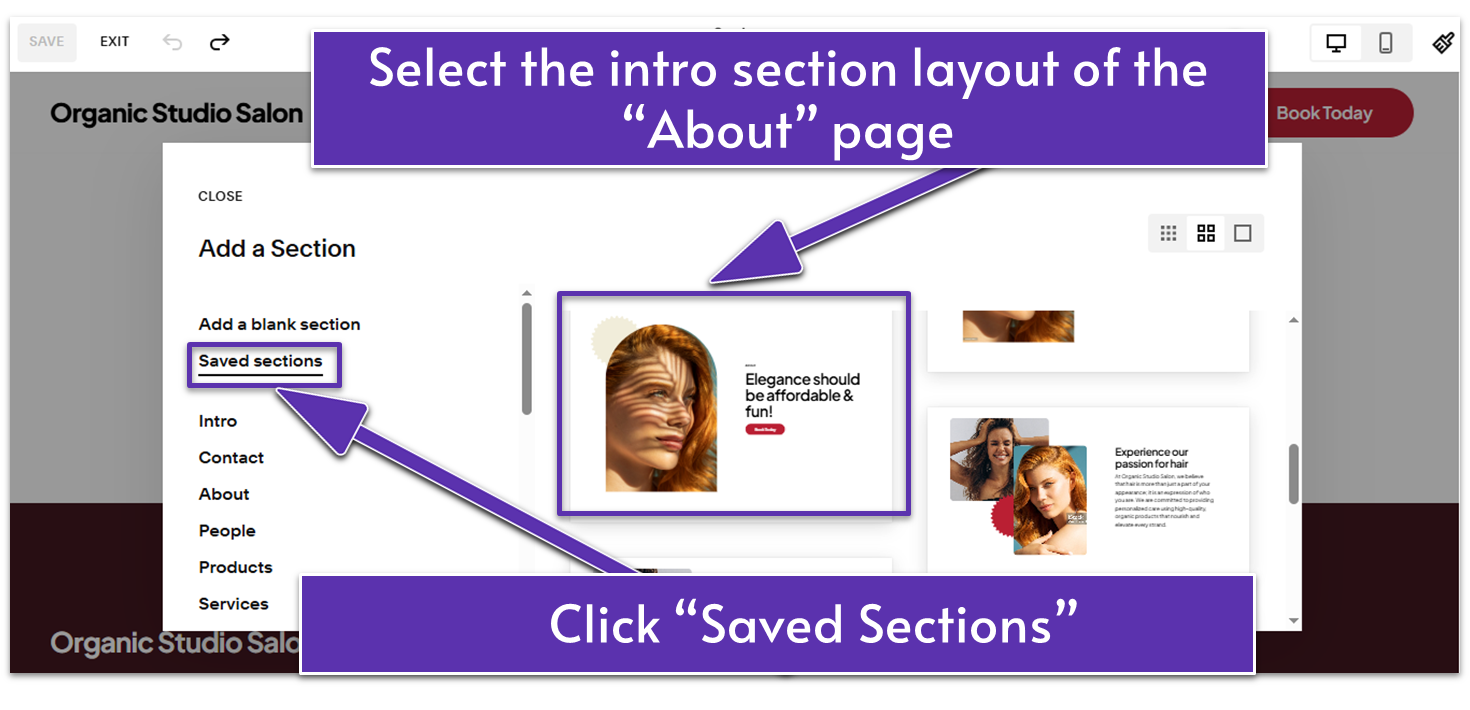
Step 2: Go to “Saved Sections” and select a saved layout
- Select the first section of the About page you made in the previous module.
Step 3: Replace the text
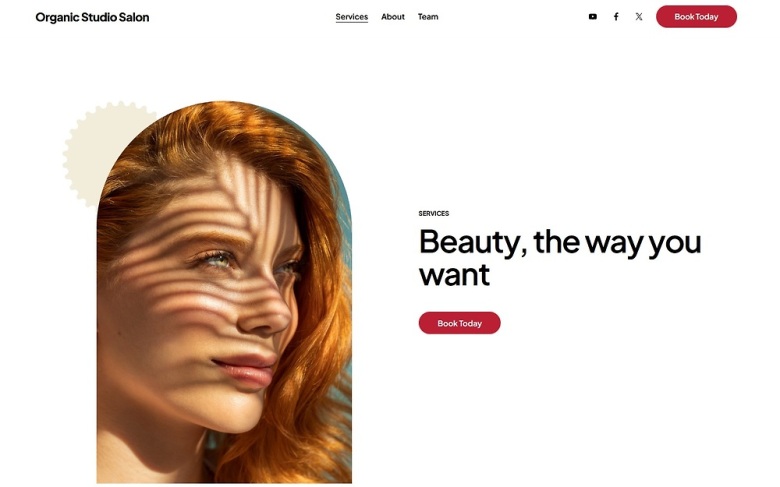
- Double-click the section title (the top-most text block) and replace it with a descriptive title that clearly labels the page’s purpose. We replaced the “About Us” section title with “Services,” keeping its “Paragraph 3” formatting.
- Replace the headline in “Heading 1” with the core message of your service. We wrote: “Beauty, the way you want.”
- The “Book Today” button stays the same.
Step 4: Add a section divider
- Go to “Edit Section.”
- In the “Design” tab, scroll down to “Styling” and toggle on the “Divider” switch.
- Click under “Shape” and select a shape of your choice. We chose “Wavy Shape.”
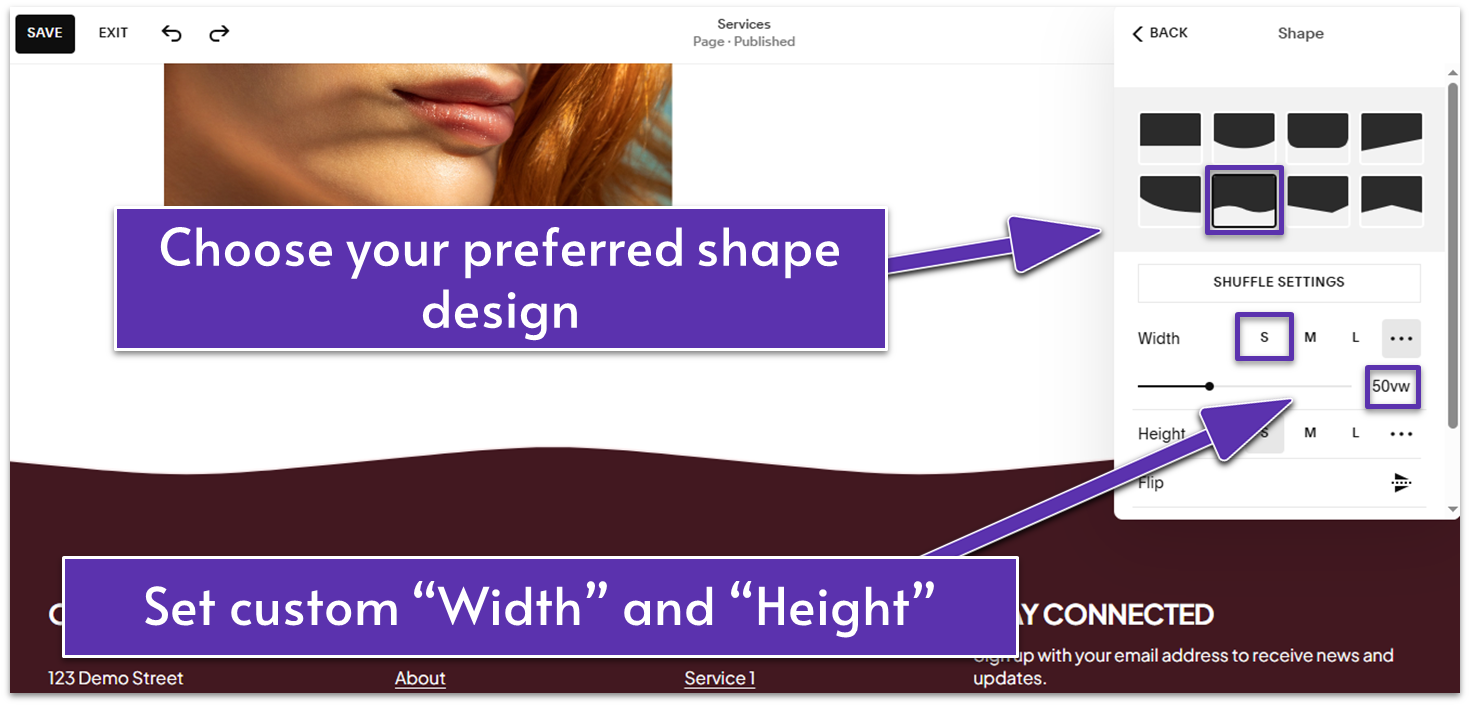
- Adjust the “Width” of your divider shape. If you want a custom width, click the three dots ( ) menu. We chose a custom width of 50 vw.
Set “Height” to “S” (Small) or adjust to your preference. - Go back to the “Design” tab.
- Set “Thickness” to “S” or as you prefer.
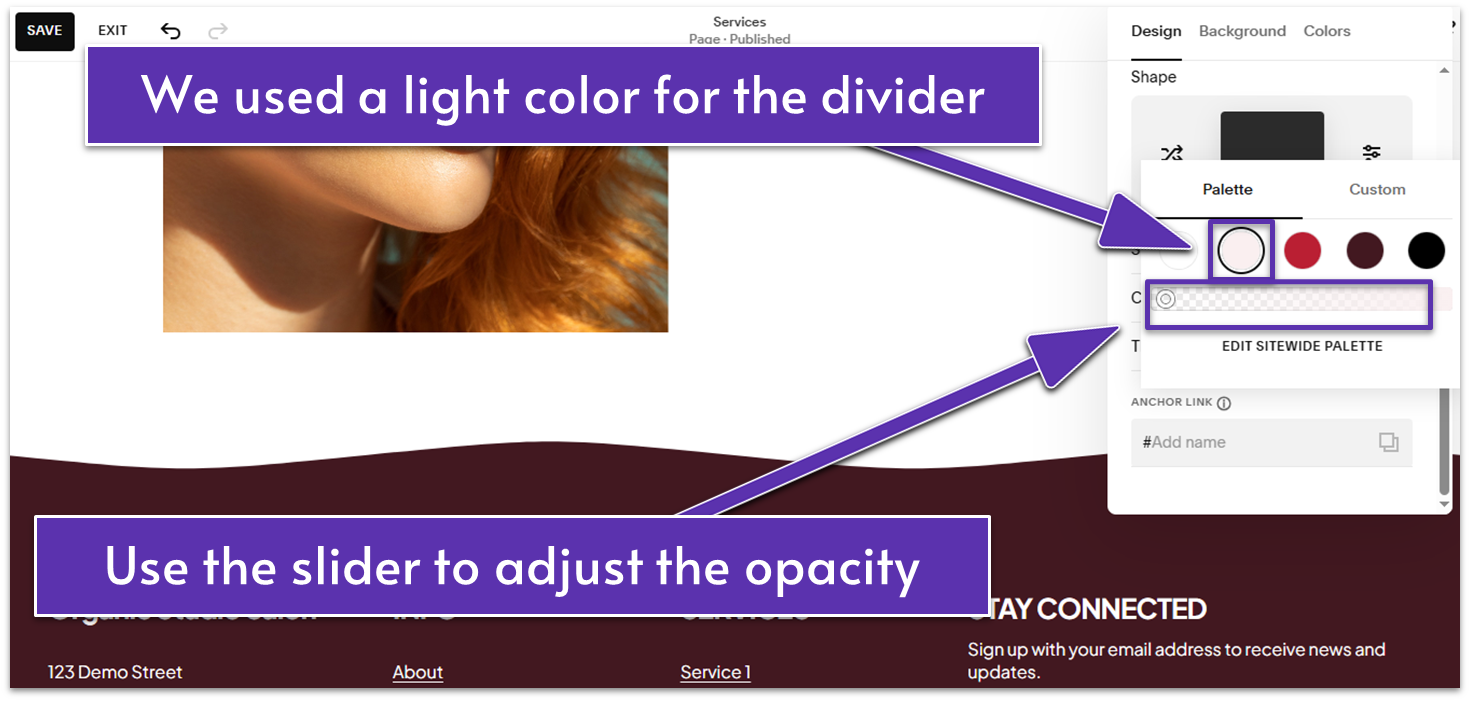
- In the “Design” tab, change the color of the divider line to a light one or as desired. You can move the color slider down to make it more transparent. We set it to be fully transparent on our website.
4.3 List Your Services (Second Section)
Now, you’ll add a new content section to showcase your offerings. You can choose one of the “Meet the Team” section layouts and swap out the team member items for your services.
Step 1: Click “Add Section”
Step 2: Add a “Meet the Team” section layout with images
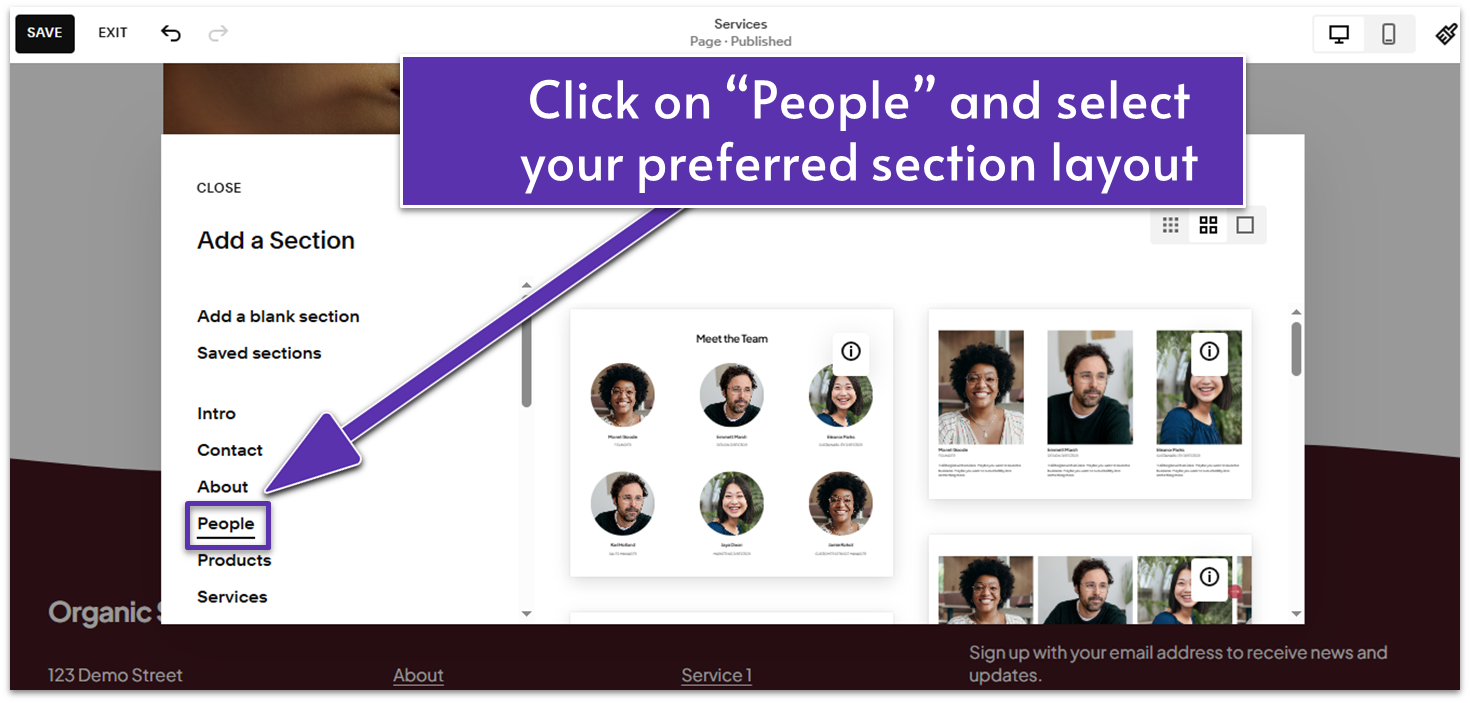
- In the “Add a Section” menu, click “People.”
- Select your preferred section layout. We chose the one with the round images.
Step 3: Change the section’s title
- Go to “Edit Content.”
- Click the “Content” tab.
- Click the “Title” sub-tab under “Section.”
- In the “Text” field, change the section’s “Meet the team” title. We wrote “Our Services, Your Satisfaction.”
Step 4: Replace the team member items with your services
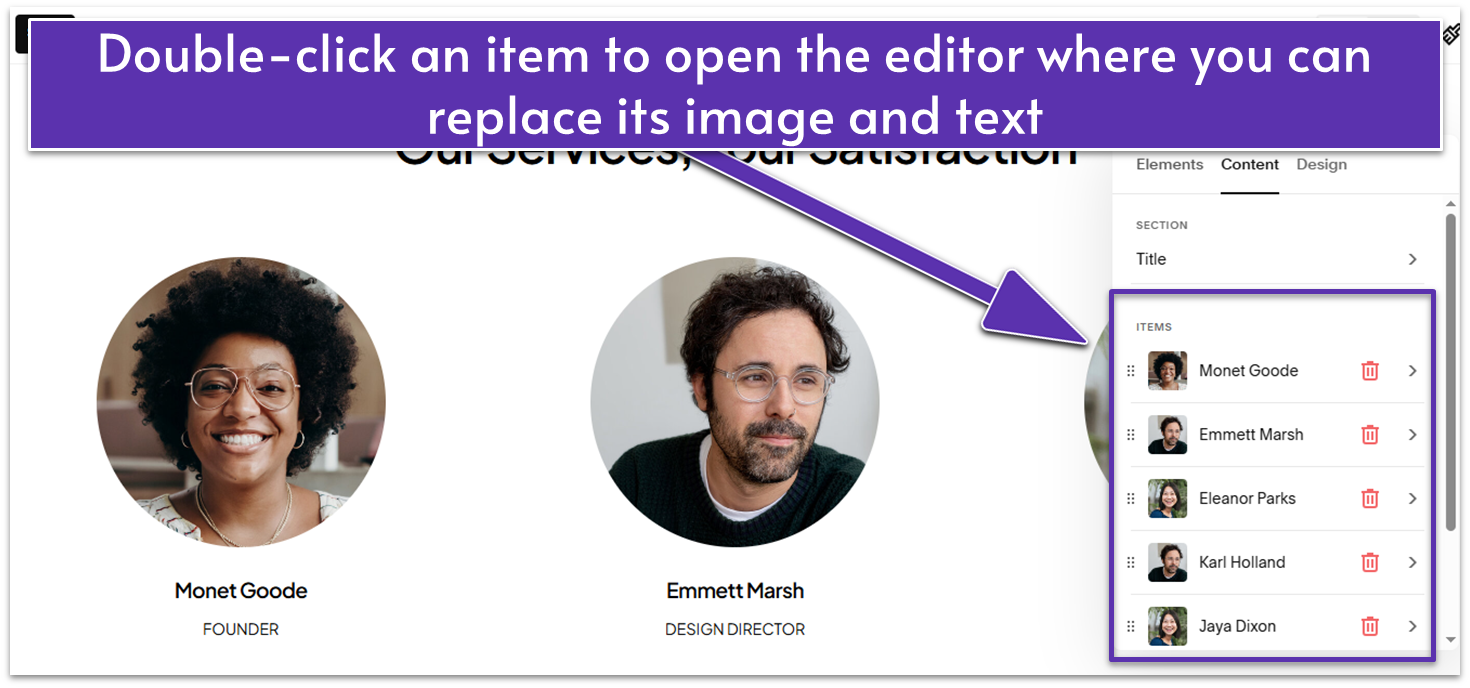
- Go back to the “Content” tab.
- Under “Items,” click any listed name to open the item editor.
- Click “Replace” to upload a new image relevant to the service your selected item represents.
- Scroll down to the “Title” field and replace the name with the service name (e.g., haircuts, color, nail care). Ensure the image matches the service name.
- In the “Description” field, you can add the service’s starting price or a brief description.
- Return to the “Content” tab to update the rest of the items.
- Use the trash can icon to ( ) delete items if needed. Click “Add” at the bottom to add more services.
Step 4: Adjust the “Size & Space” settings
The section’s current look may work well as is. But if you want to adjust spacing and element sizes to match what we did, you can follow these steps:
- Go to the “Design” tab
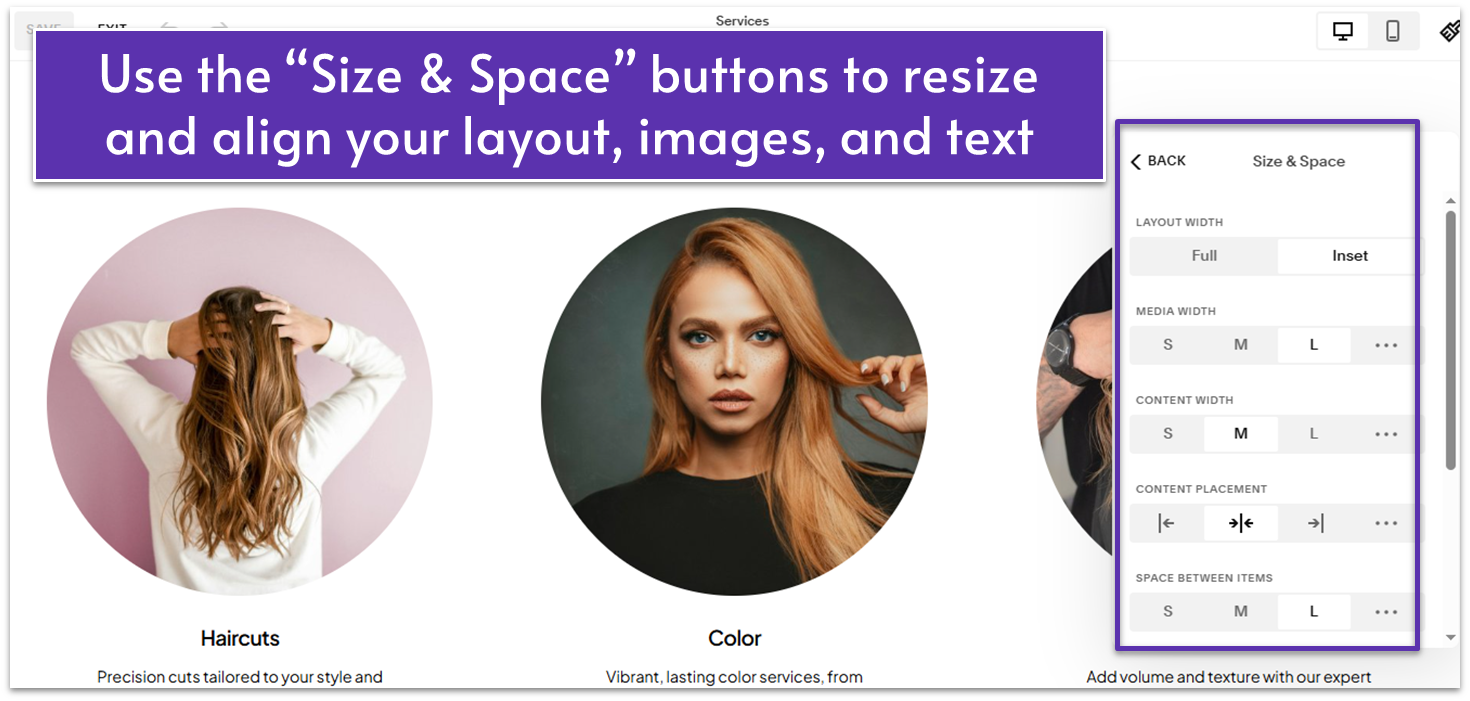
- Under “Size & Space,” set “Layout Width” to “Inset” to add margins on either side of the section.
- Set “Media Width” to “L” (large) to make the images larger.
- Set “Content Width” to “M” (medium) to keep your text centered.
- Click in the “Content Placement” field to center-align the text.
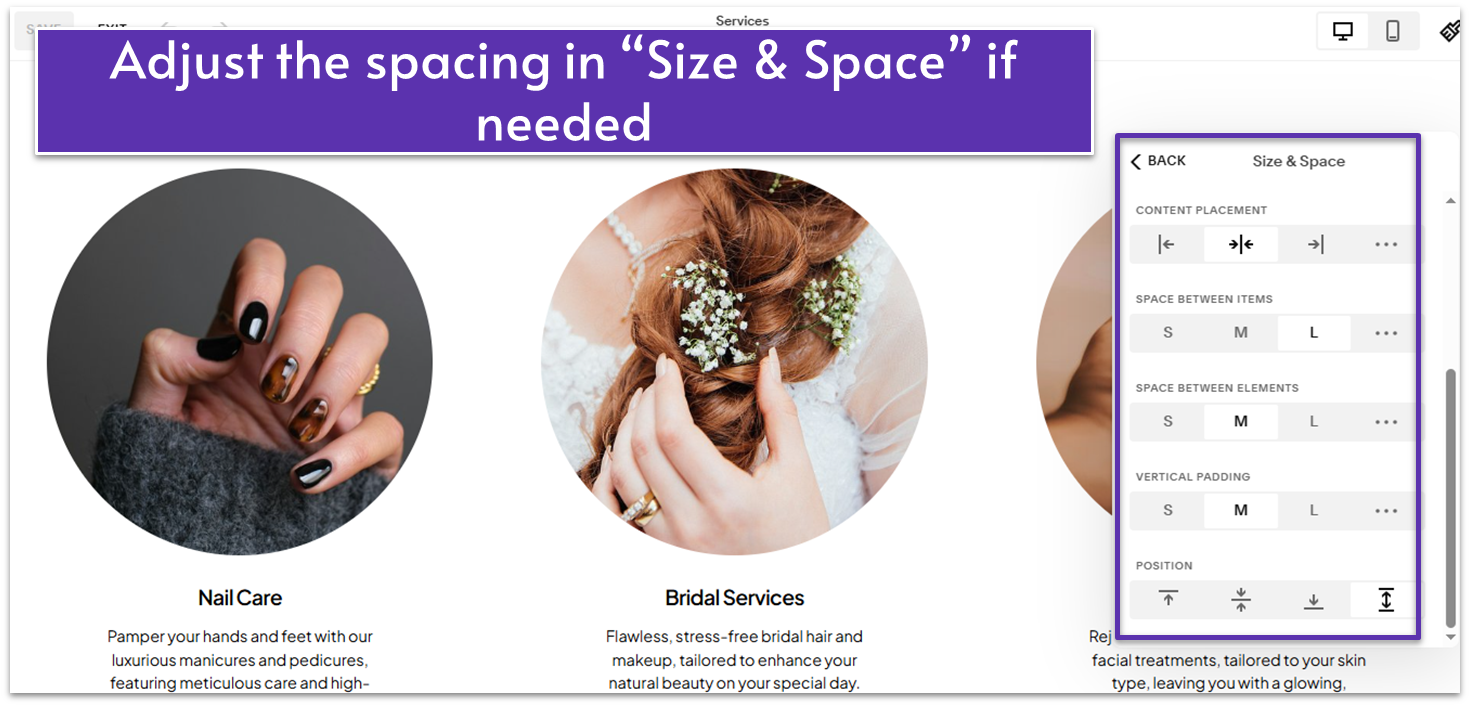
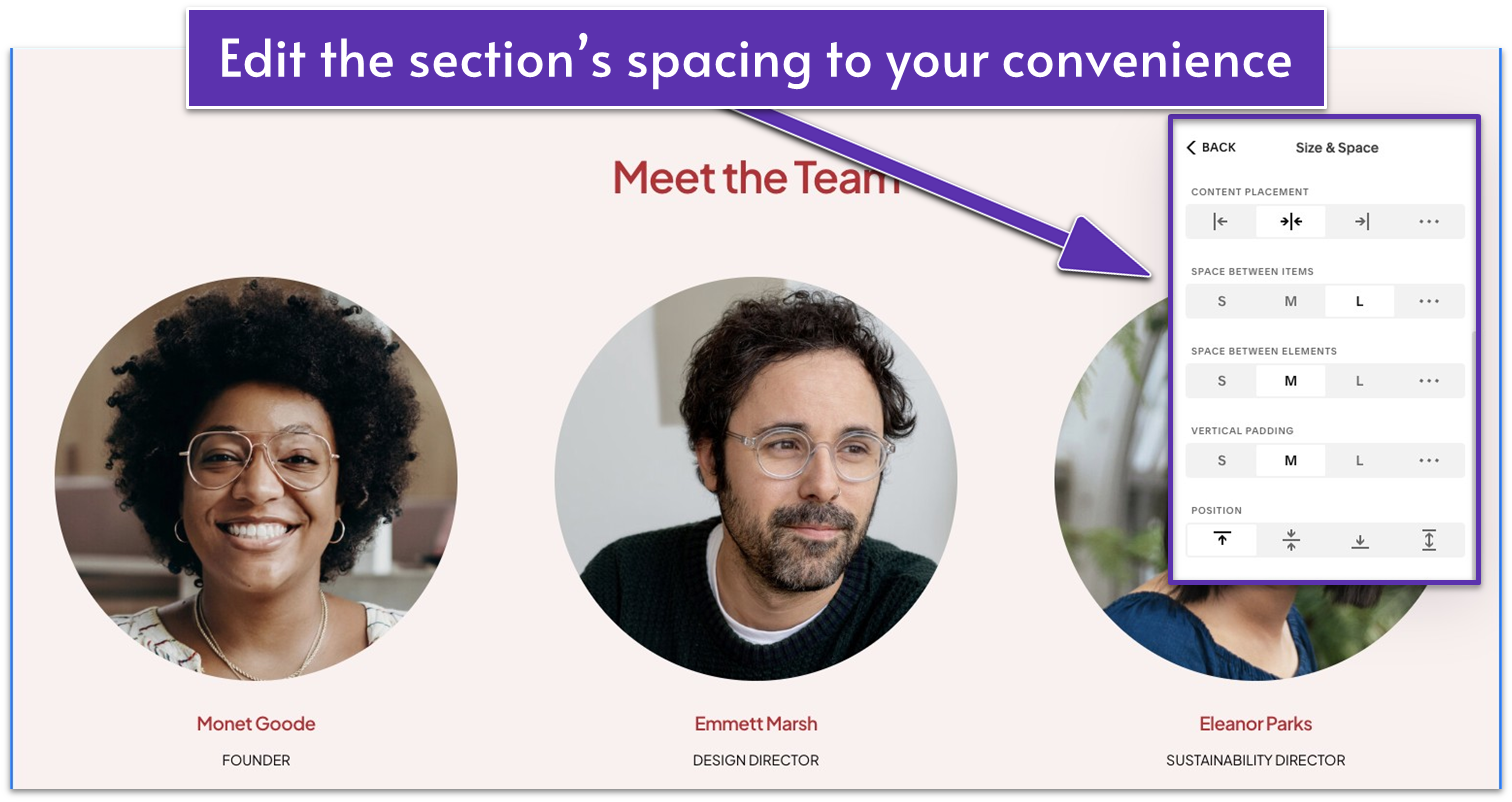
You can make further adjustments as you scroll down the “Size & Space” settings.
- Set “Space Between Items” to “L”.
- Set “Space Between Elements” to “M”.
- Set “Position” to “Stretch” ( ) so the content covers the entire section’s height.
These are all just examples – you can make custom adjustments as you prefer. If you’re not happy with the default options, you can click the three dots icon ( ) to adjust it manually.
4.4 Add a Booking Section (Third Section)
Now you’ll build a new section to allow customers to book your services. Instead of reusing saved layouts, you’ll add a blank section.
Step 1: Open the page editor and click “Add Section”
Step 2: Add a blank section
Step 3: Add a text block
Step 4: Write your booking section title
- Add a title to your booking section. We wrote “BOOK” in capital letters, formatted in “Heading 2”.

- Click the pencil icon ( ) in the main block toolbar.
- Click the “Scale Text” icon ( ) to make the text larger, filling the entire block.
Step 5: Drag the block to the center of the section
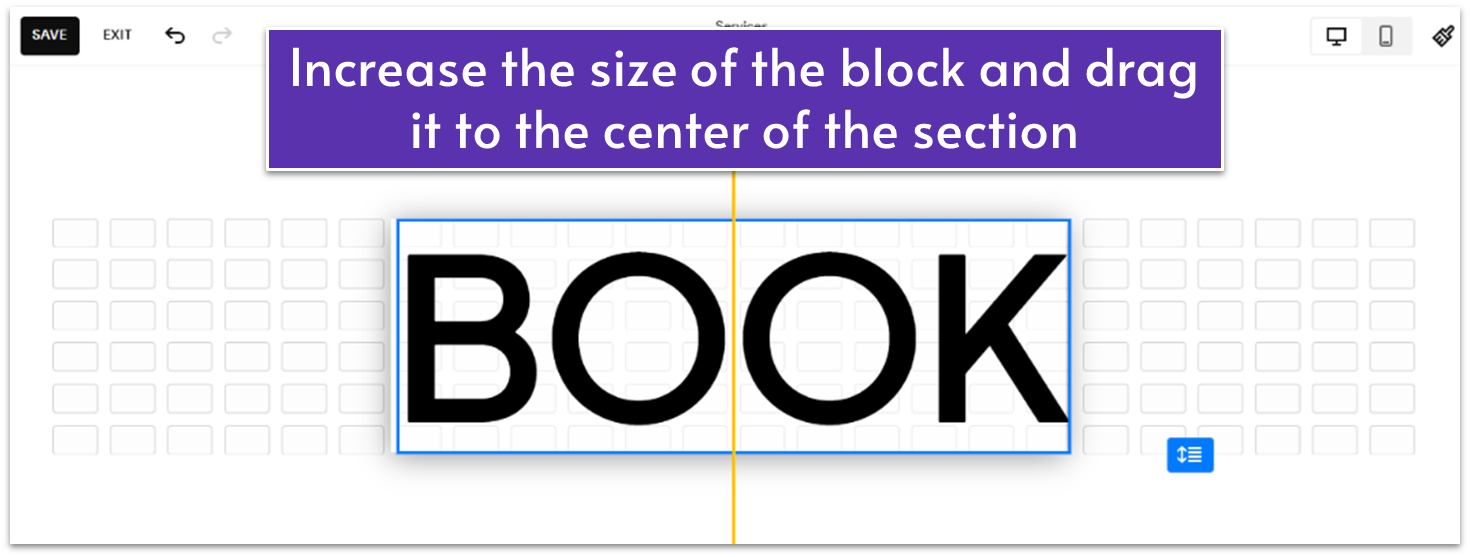
- Increase the size of the text block as desired.
- Drag the text block to the center of the section.
Step 6: Add a description text block
- Add a text block for the description text.
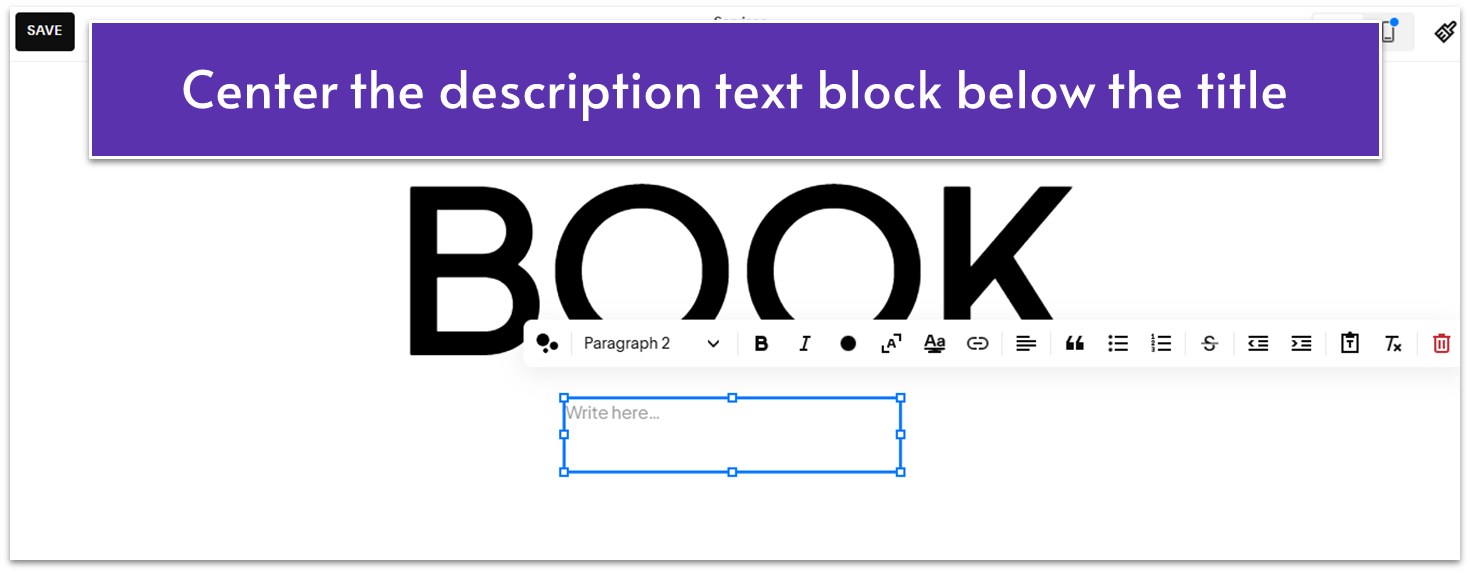
- Center it below the heading block.
Step 7: Write a booking description
- Write a description to prompt potential clients to book your services. We wrote “Schedule an appointment with a specialist today,” formatted in “Paragraph 1”.
- Center-align the text with .
- Resize the text block if needed.
Step 8: Add a “Book Today” button
- Click “Add Block” and select “Button.”
- Place the button below the description text block.
- Change the button text to “Book Today.”
- Link the button to the “Book” Contact page you created in Module 2.
Step 9: Add a video background
- Go to “Edit Section” and click the “Background” tab.
- Click on “Video.”
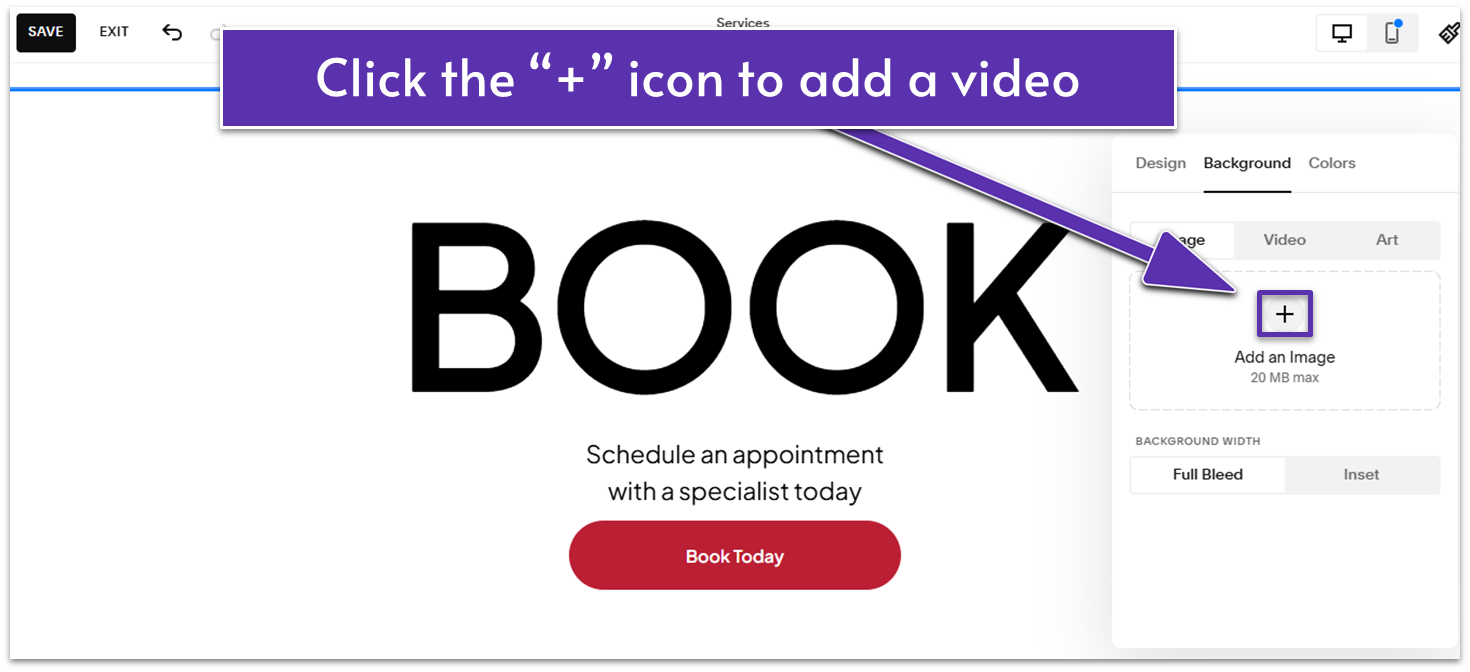
- Click the “+” in the middle of the video block to add your video.
In addition to video, you can use an image from the “Image” tab or one of the options from the “Art” tab as background.
Step 10: Customize the video background
You can adjust the video settings under the “Background” and “Colors” tabs to see what works best for you.
To replicate what we did, you can follow these steps:
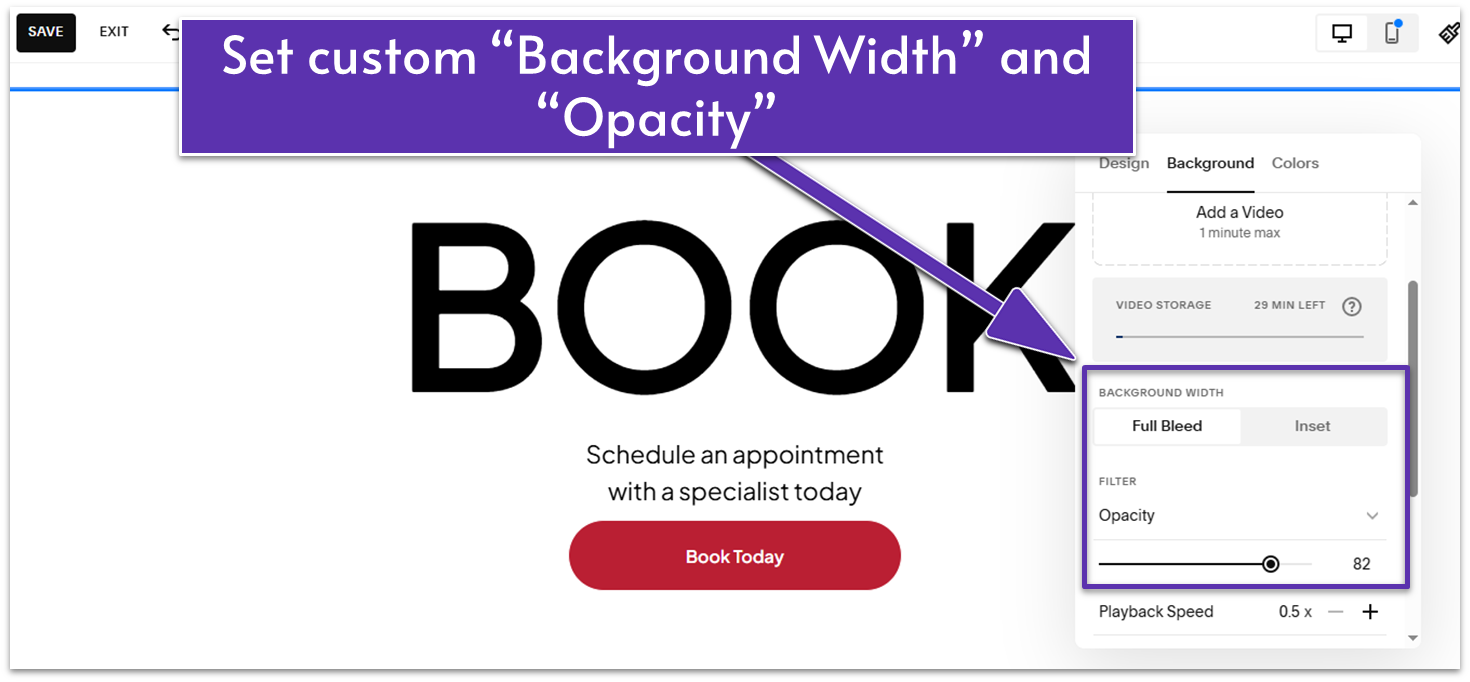
- Set “Background Width” to “Full Bleed.” This means the background will span the entire page width, reaching from edge to edge.
- Click the dropdown menu under “Filter” and choose “Opacity.”
- Drag the slider to adjust opacity as you prefer. We set it to 82.
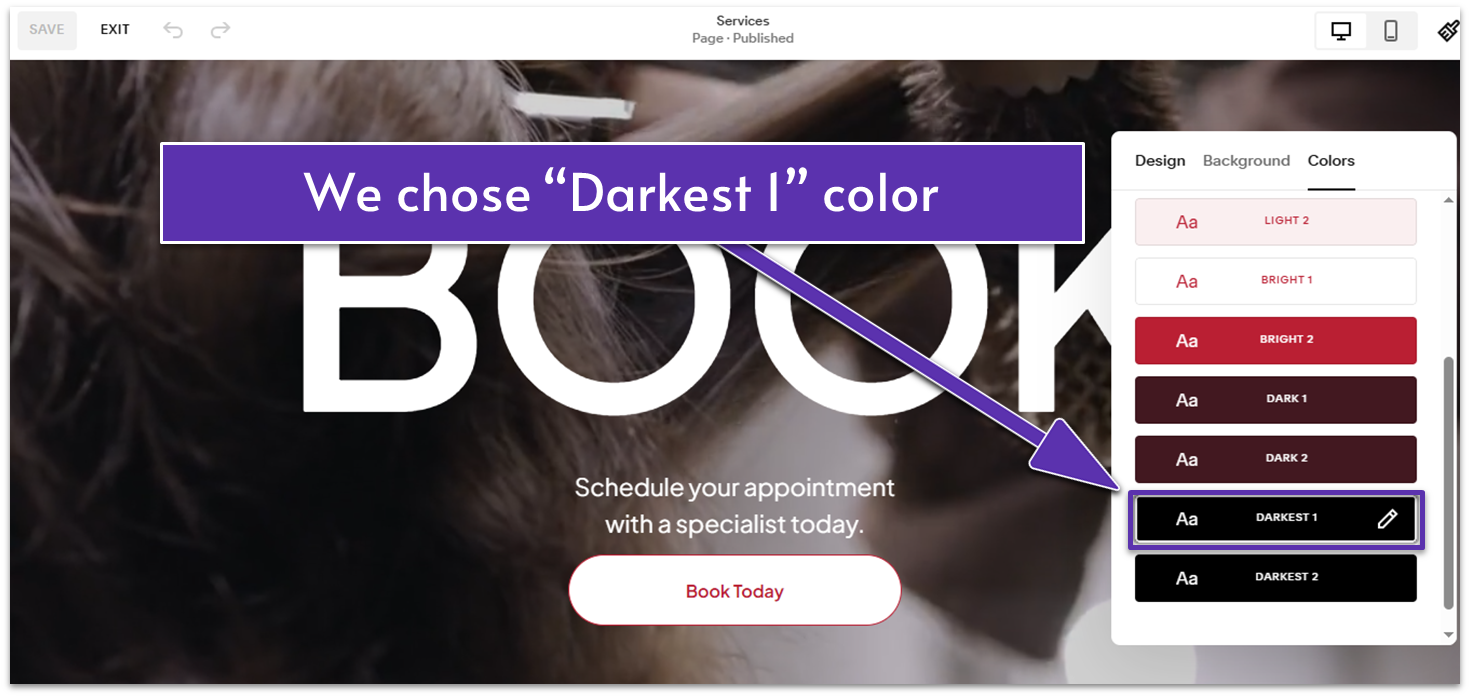
- Go to the “Colors” tab and select a dark color theme to make the text and button more visible. We selected the “Darkest 1” color for our video background.
Hooray! You’re almost done creating your Services page!
4.5 Optimize for Mobile
Now all that’s left is ensuring your Services page looks great on smaller screens too. If you’ve noticed any elements that seem out of place, feel free to adjust them. Your mobile view can be just as clean and polished – it’s up to you.
Here’s the final result of our page:
Now, let’s take a look at what you can do and the changes we made to our Services page’s mobile view:
Step 1: Go to “Mobile View” ( )
Step 2: Optimize the first section for mobile
The first section looked off because the shape meant to be behind the image went on top of the page. The image also seemed too small. If you face the same issue, try this:
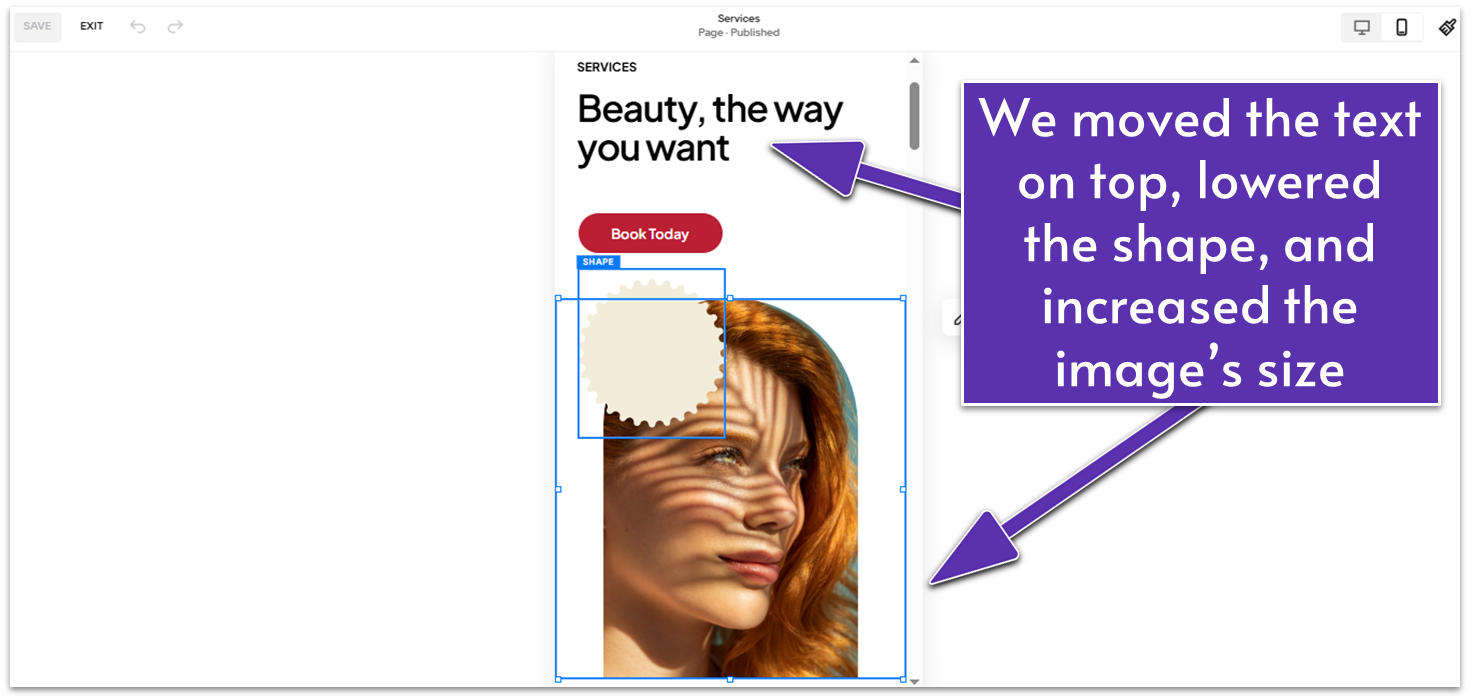
- Move the text blocks (title and headline) and the button up to the top of the section.
- Drag the shape down close to the upper-left side of the image. Click the “Move Backward” icon ( ) to move it behind the image.
- Slightly increase the image’s size.
- Rearrange and resize the elements further if necessary.
Step 3: Optimize the third section for mobile
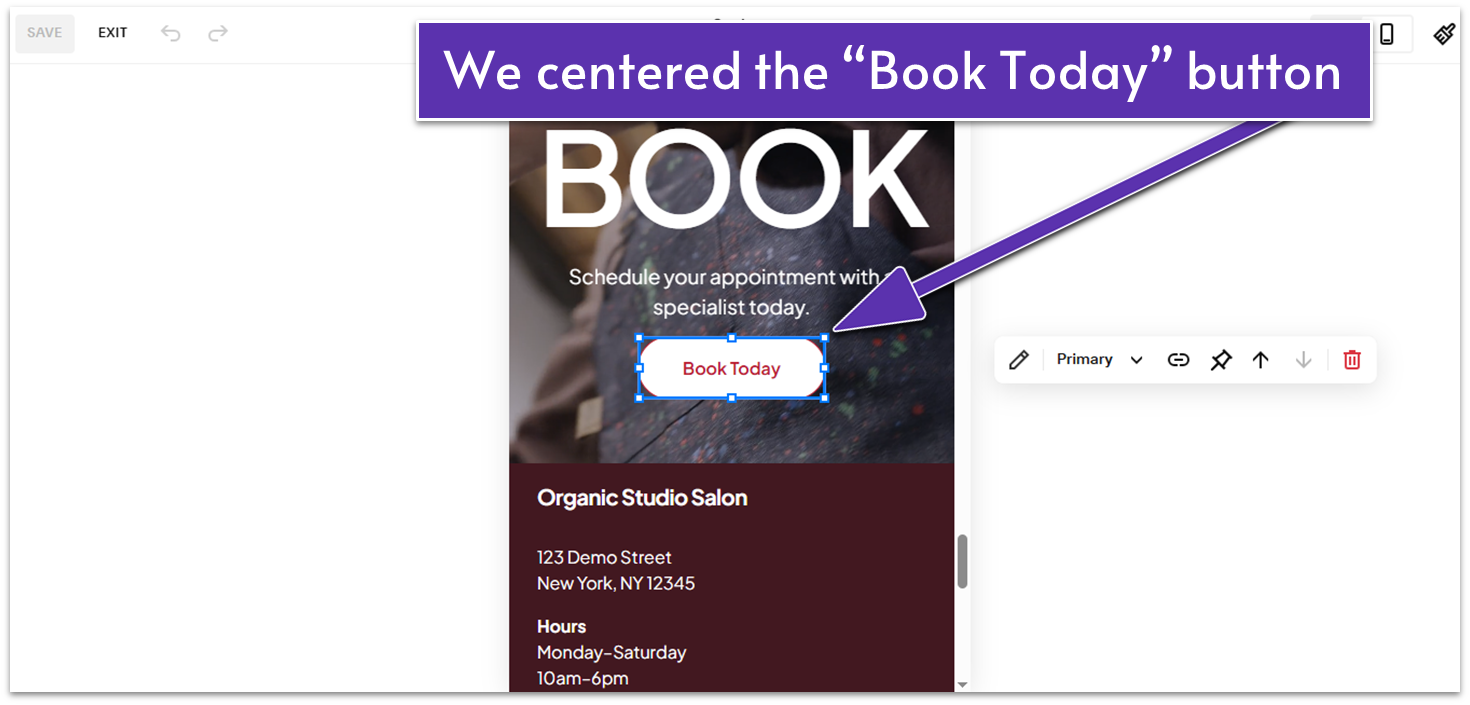
- Center the “Book Today” button, which was aligned to the left.
And that’s it! The rest of the sections look great, but you can always make small adjustments to spacing, positions, or more if necessary to improve the mobile experience.
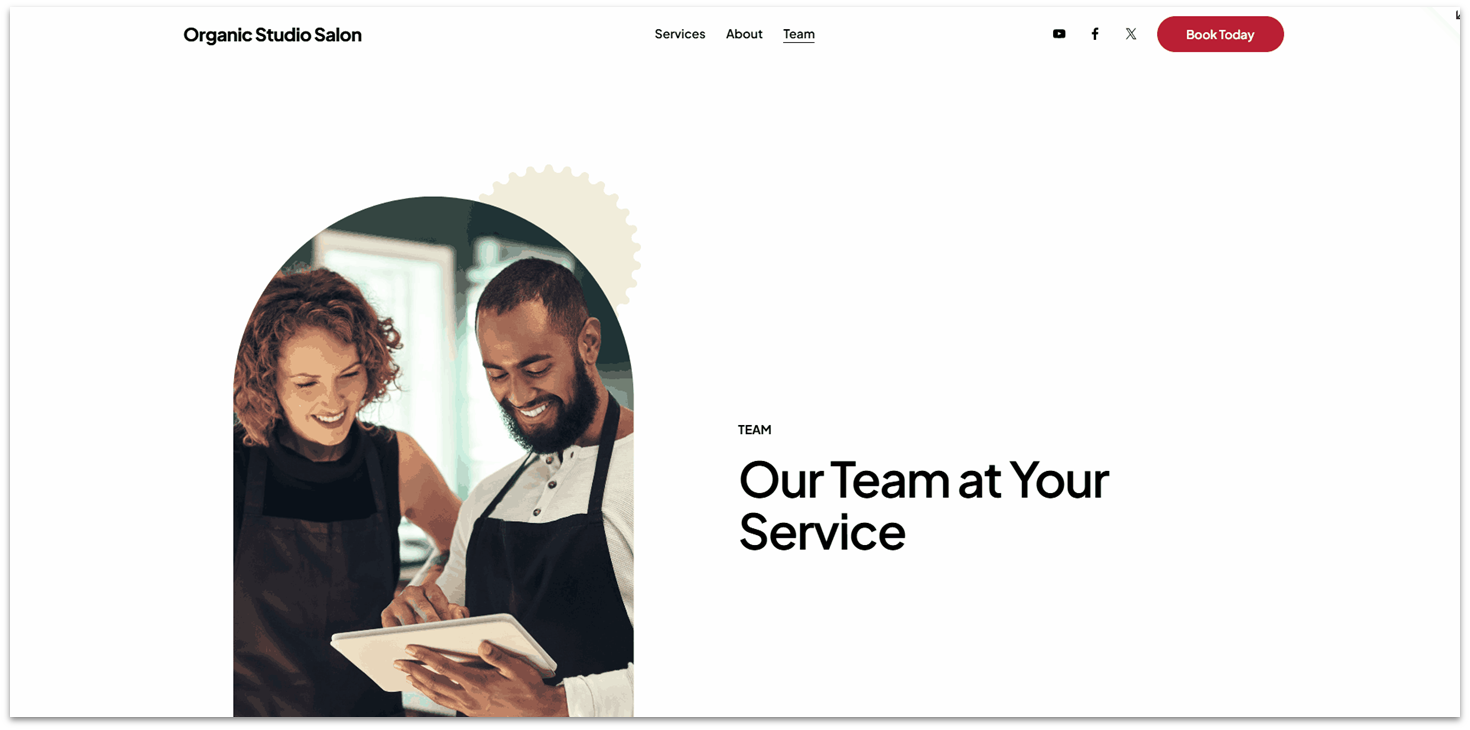
4.6 Bonus Page: Teams
You’ll benefit a lot from having a simple page that introduces your visitors to your team members. It both fosters a genuine connection and lets visitors know you’re a trustworthy business (sketchy online portals don’t usually advertise the people behind them).
There’s also something to be said about having an “our team” page just because almost everyone else has one. I’m not one to blindly follow trends, but in this case, it creates associations between your site and other professional, trustworthy websites.
This is a straightforward page to create, so let’s get straight to it.
4.7 Add a New Page
Step 1: Add a new blank page
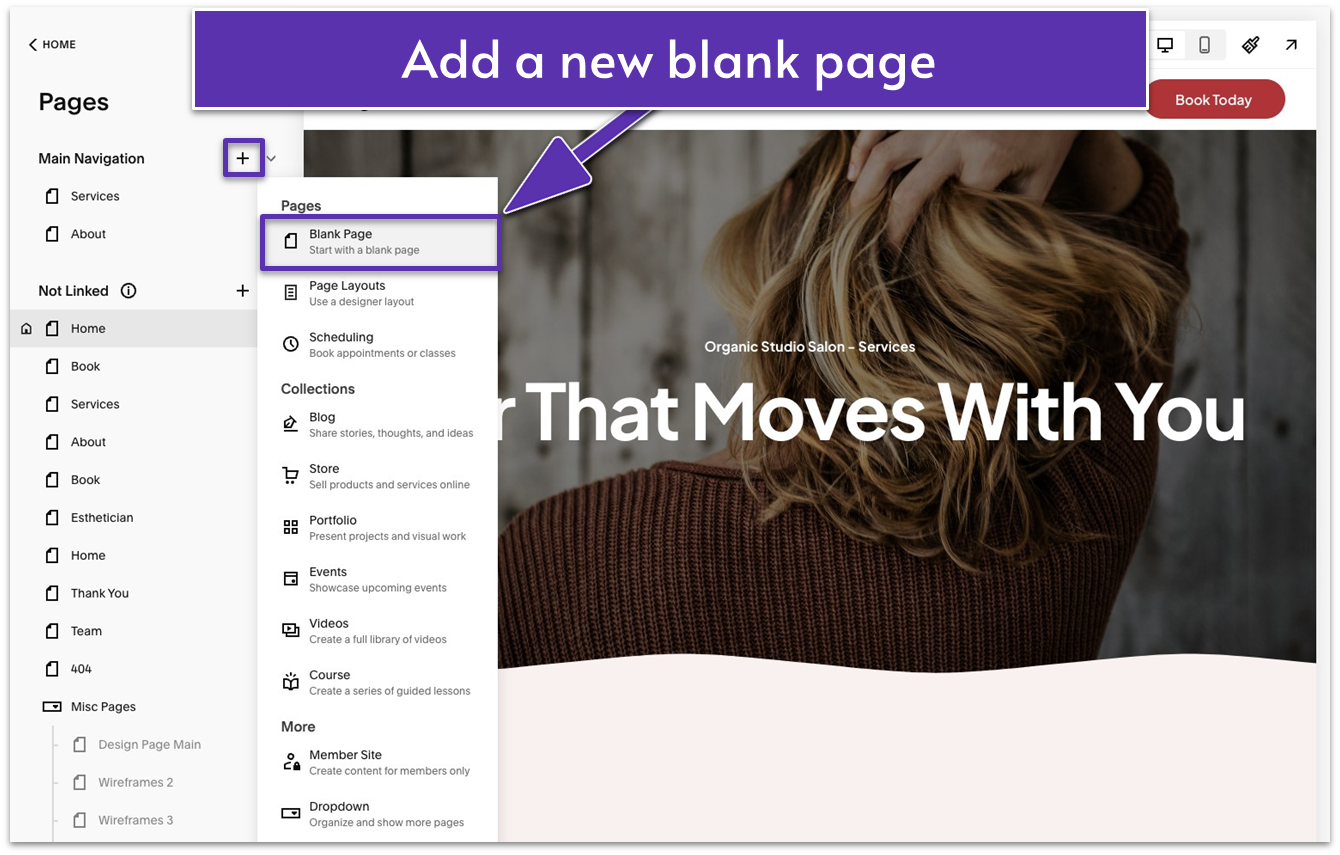
- In the “Pages” menu, click the plus icon ( ) next to “Main Navigation.”
- Select “Blank Page.”
- Rename the blank page to “Team.”
4.8 Introduce the Page (First Section)
You’ll start with a simple section to ease visitors into the page and label its purpose. Just like what you did for other pages, you can create an introductory section that’s both simple and attention-grabbing.
Step 1: Add a blank section
- Click the “Edit” button on your new blank page.
- Since the page is currently blank, you should see an “Add Section” option in the center. Select it.
- Select “Add a blank section.”
Step 2: Add an image
- Click “Add Block.”
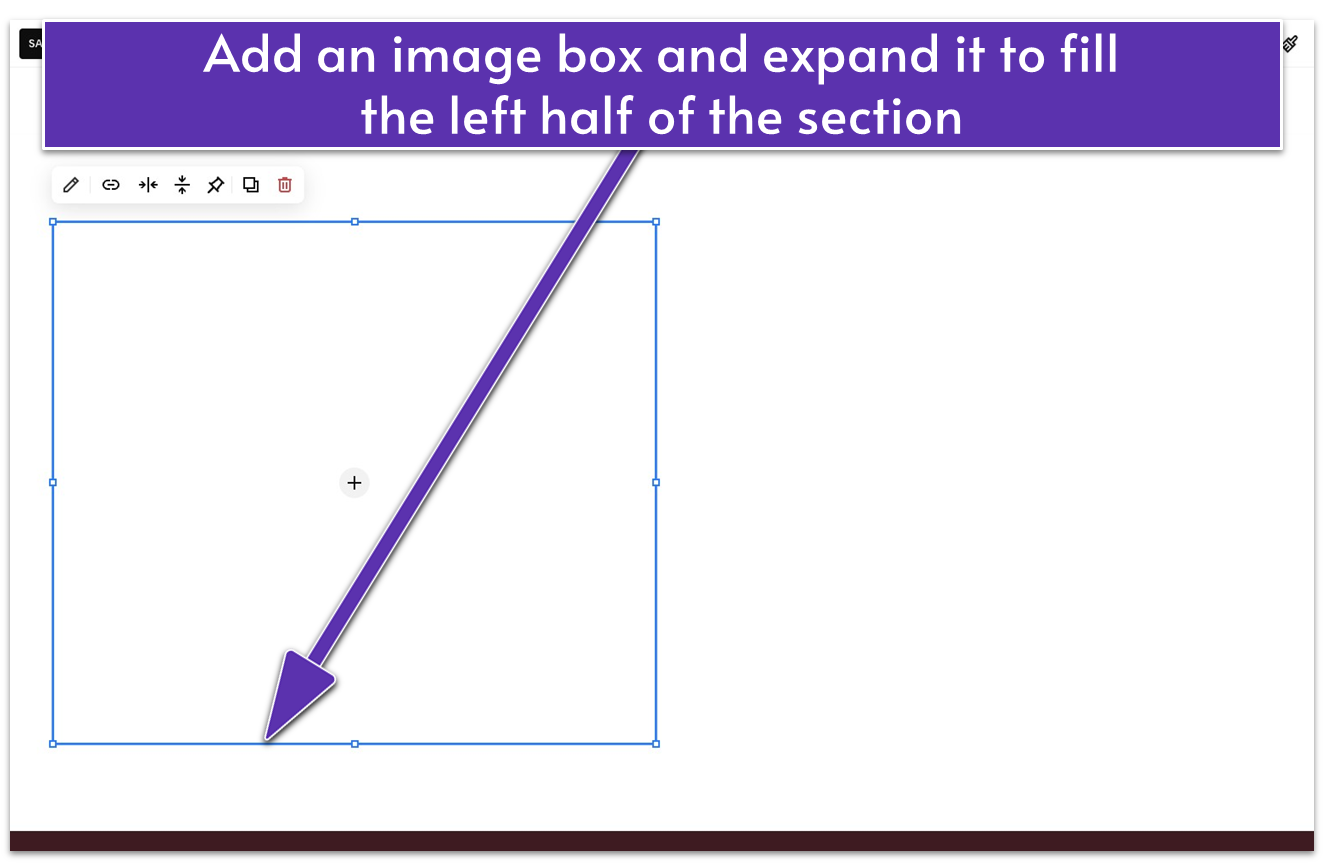
- Select “Image” to add an image block.
- Drag the corners of the image box so it fills the left half of the section.
- Click the pencil icon ( ).
- In the “Content” tab, click the “Add an Image” button ( ).
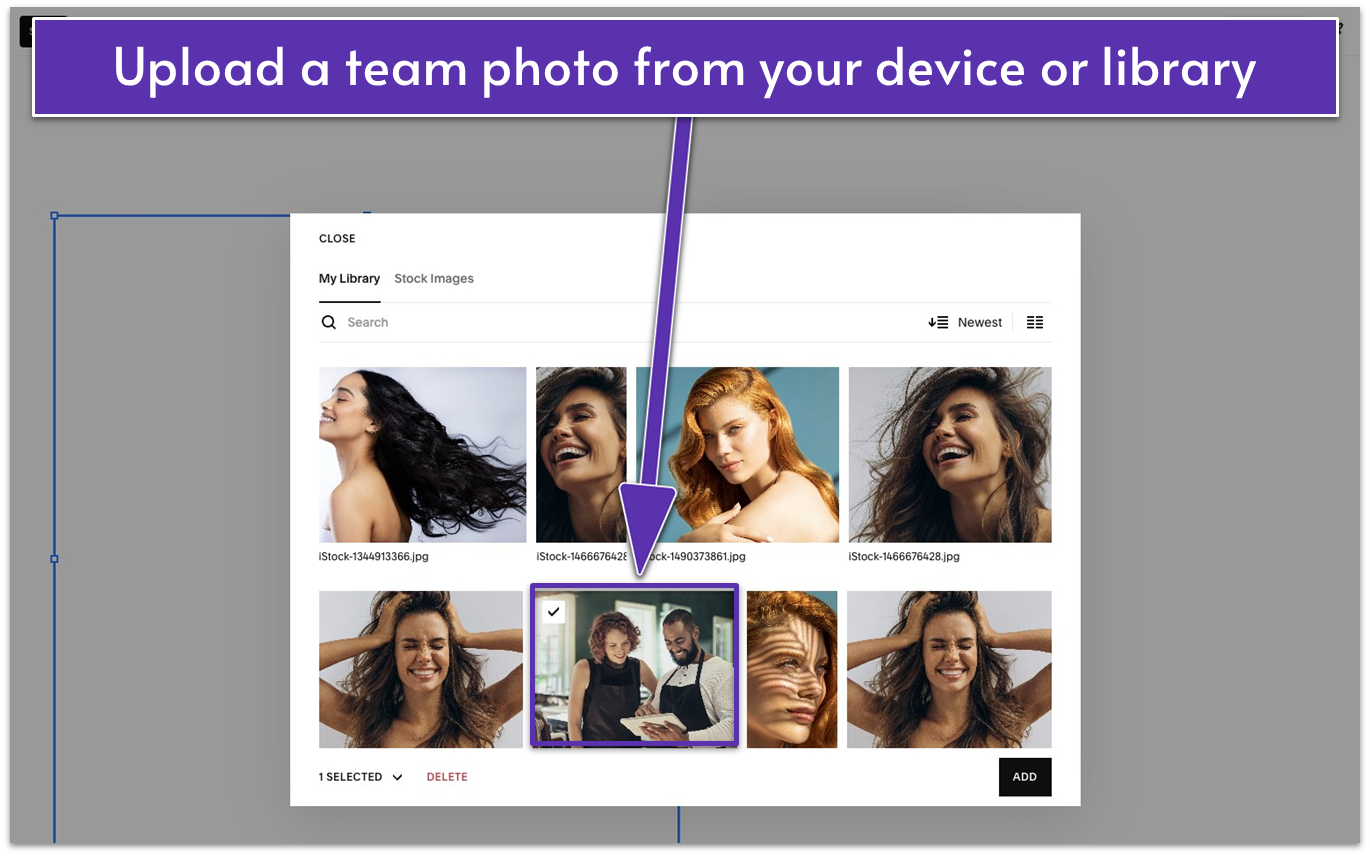
- Add a photo of your team. You can upload a new image from your device or select an existing image from your library. In our example, we went with one that shows two team members (imaginary team members, that is, these are stock images) working together.
Step 3: Edit the image
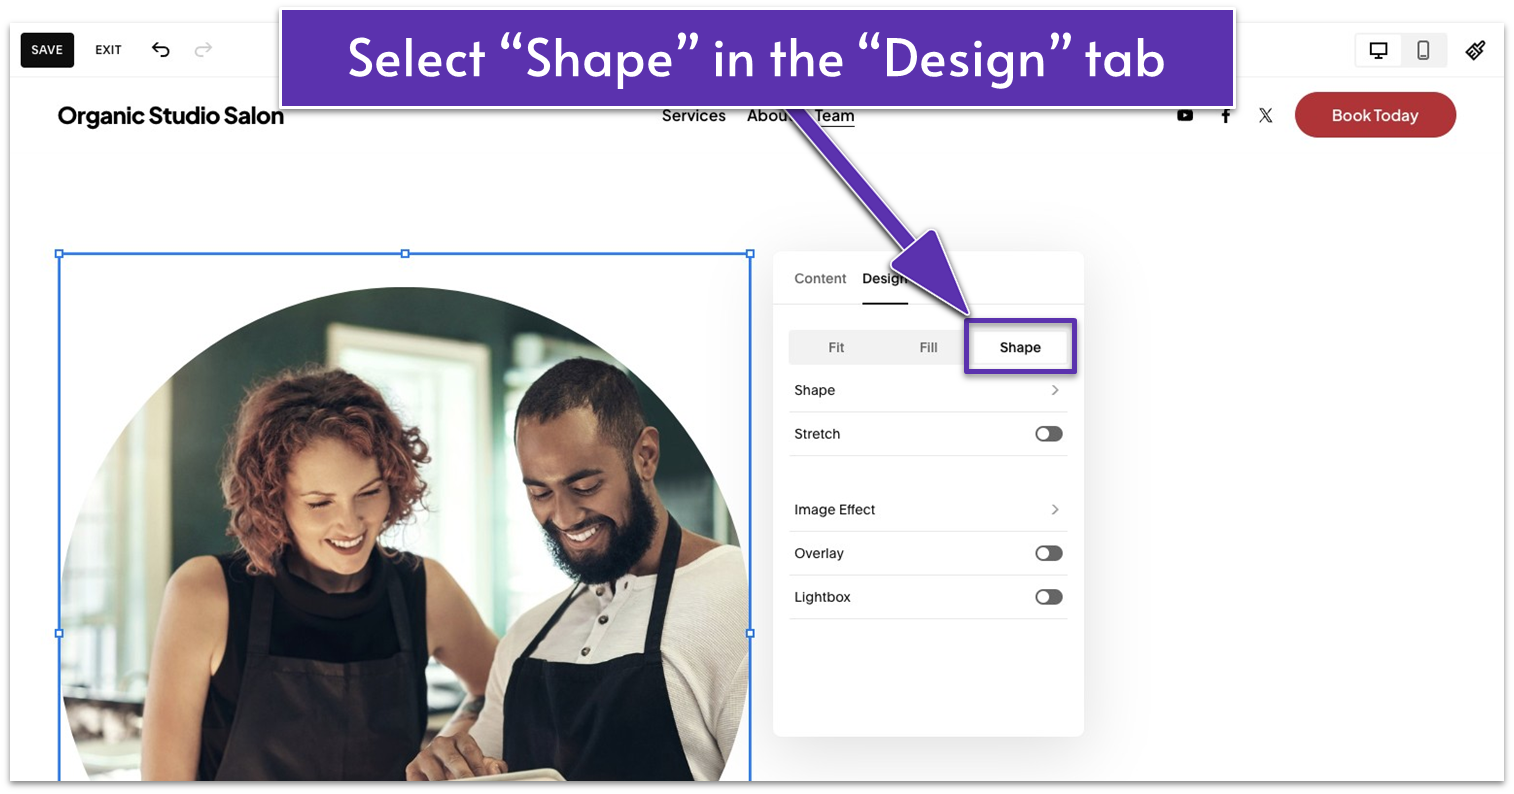
- Go to the “Design” tab in the same editing panel.
- Select the “Shape” option.
- Click the “Shape” menu button with the.
- On the “Shape” menu, select an aspect ratio (1:1, 2:3, 3:2). We chose “2:3” for our example. This means that for every 2 units of width, there are 3 units of height, cropping the image into a vertical shape.
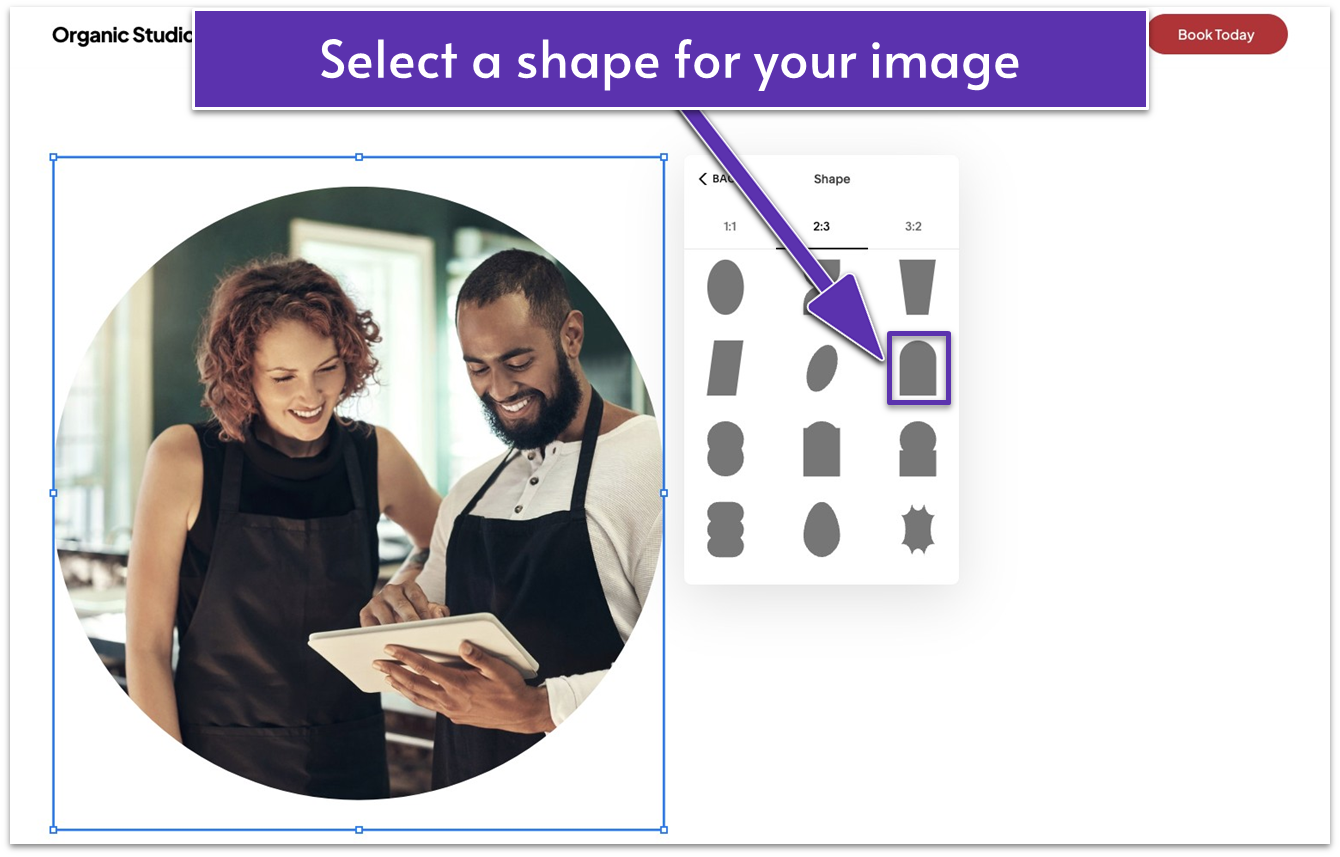
- Select a shape you like. We went with the “Arched window” shape ( ) for this example.
- Select the “Back” option to go back to the original editing menu. Feel free to use the other design tools to modify the image further.
Step 4: Change the image’s focus point
- On the same image edit panel, go back to the “Content” tab.
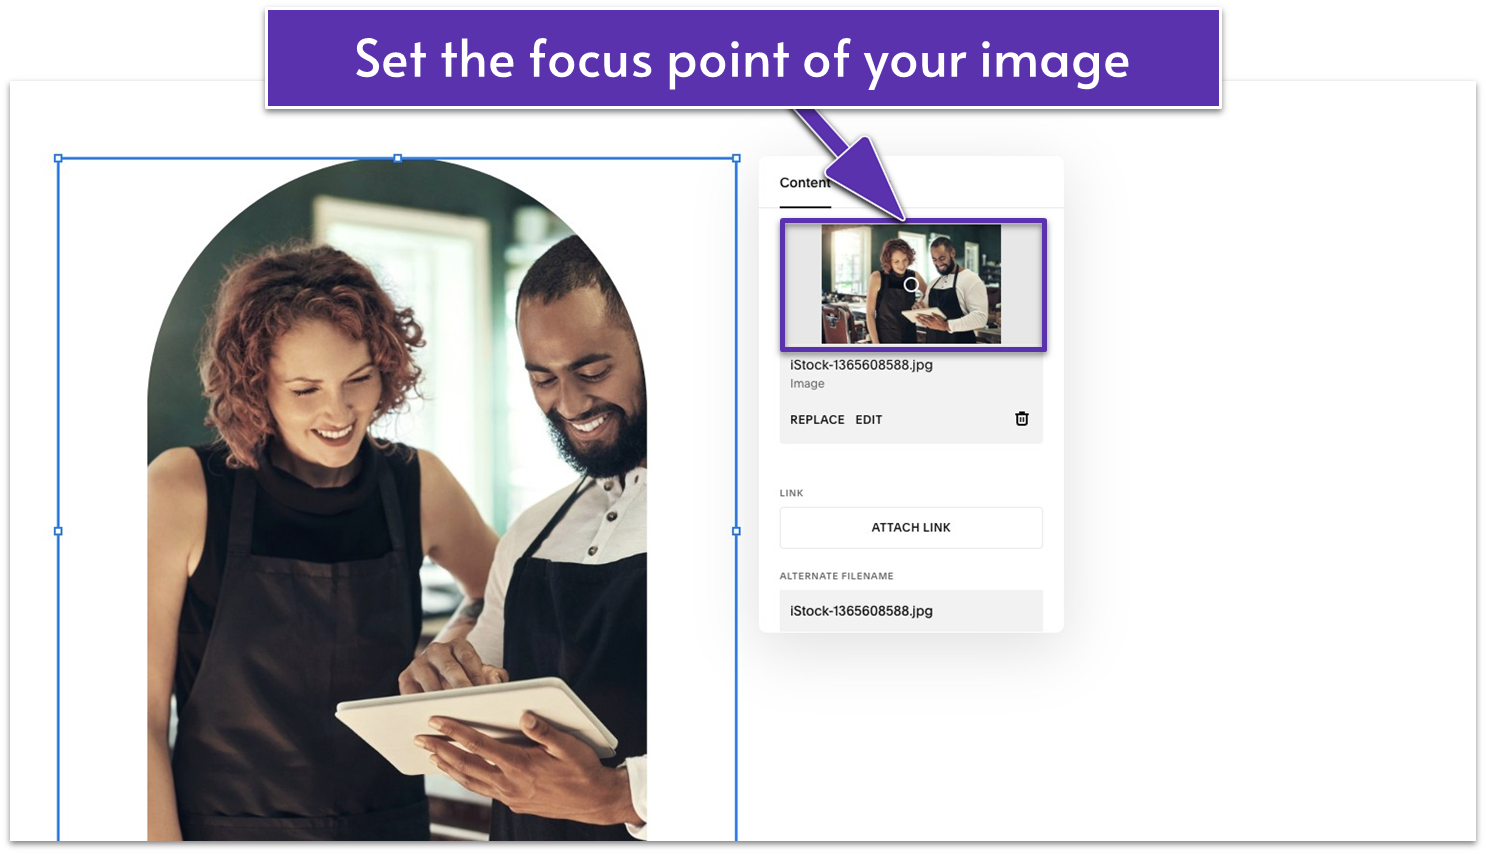
- Move the small circle (focus point) on the image preview to center the image. We centered the two team members on our sample image and cropped them as little as possible.
You might use a different image for your website, but always remember to try to focus on people’s faces when you’re cropping an image for any purpose. We’re psychologically primed to respond to faces, so centering that instead of, say, a close-up of someone’s hands on your “Team” page will help people instinctively connect with your team members.
Step 5: Adjust the image
- Resize the image to your desired size.
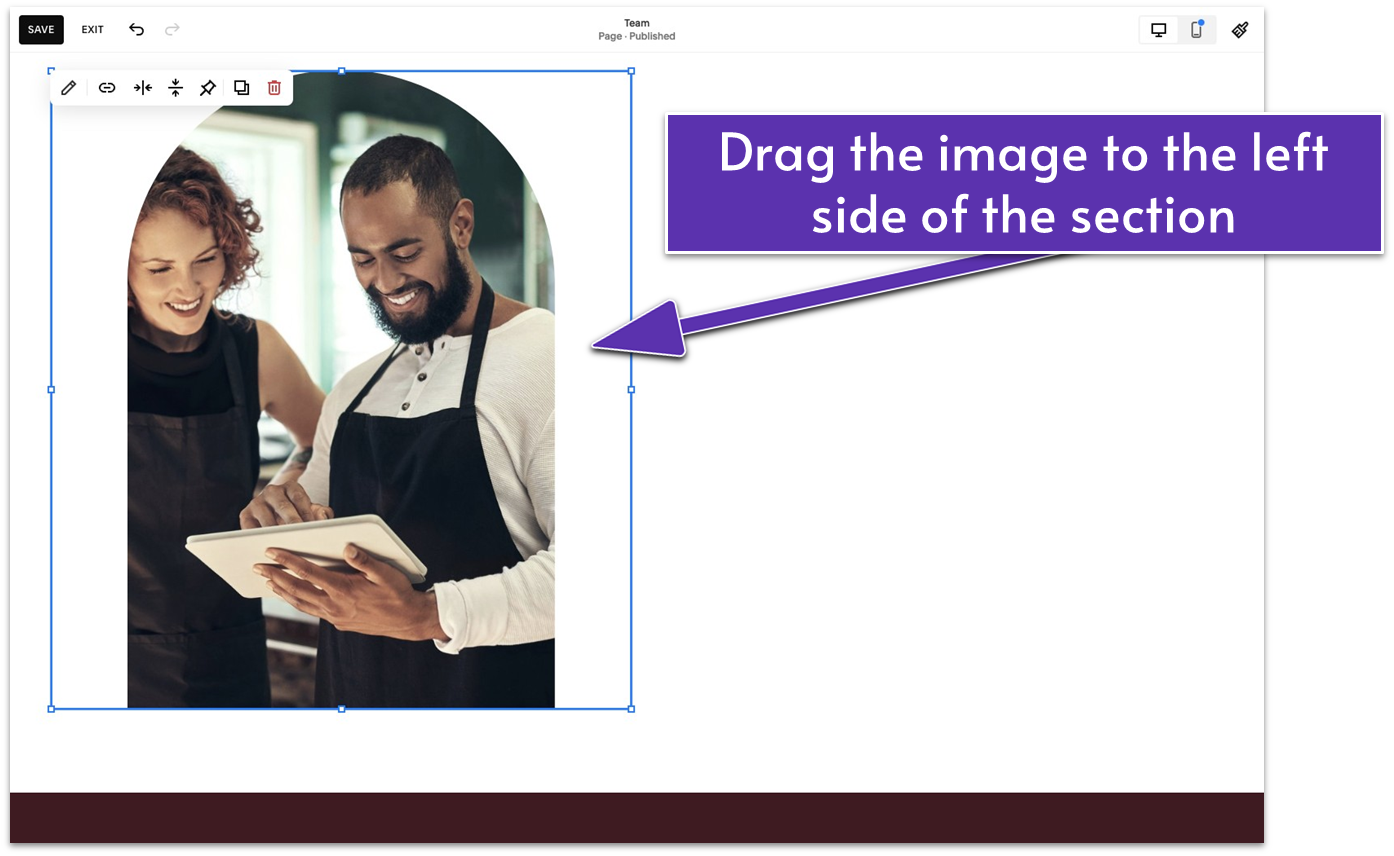
- Drag the resized image to the left side of the section.
Step 6: Add a decorative shape
- Click “Add Block.”
- Select “Shape” to add a shape block. The default shape will be a rectangle.
- Click the shape to display the main block toolbar. Select the pencil icon ( ) to open the shape editing panel.
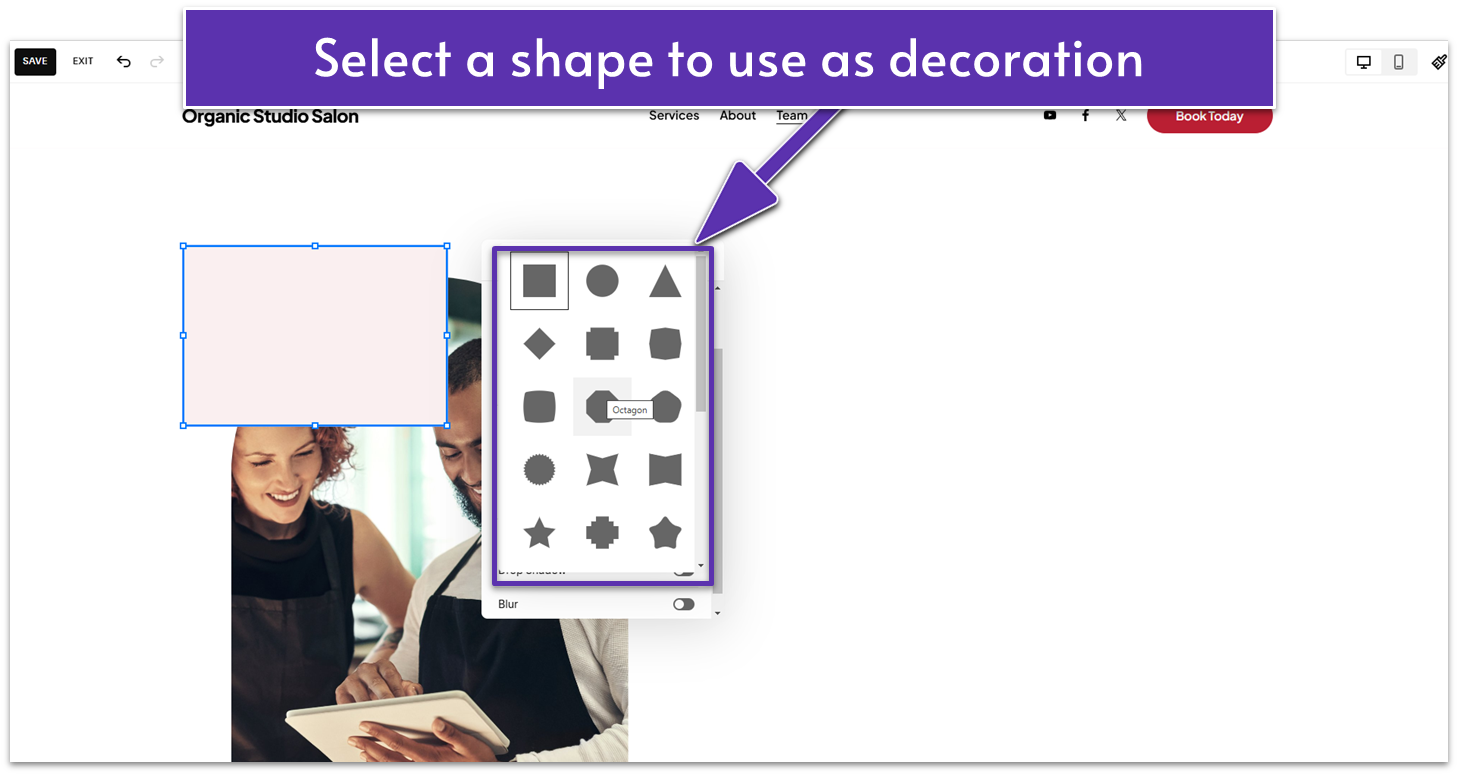
- Click the “Shape” menu box and select a shape. We selected the “Gear” shape ( ).
- Turn on “Stretch” to make the shape fill the block. But in our case, we turned it off to keep the shape’s original size.
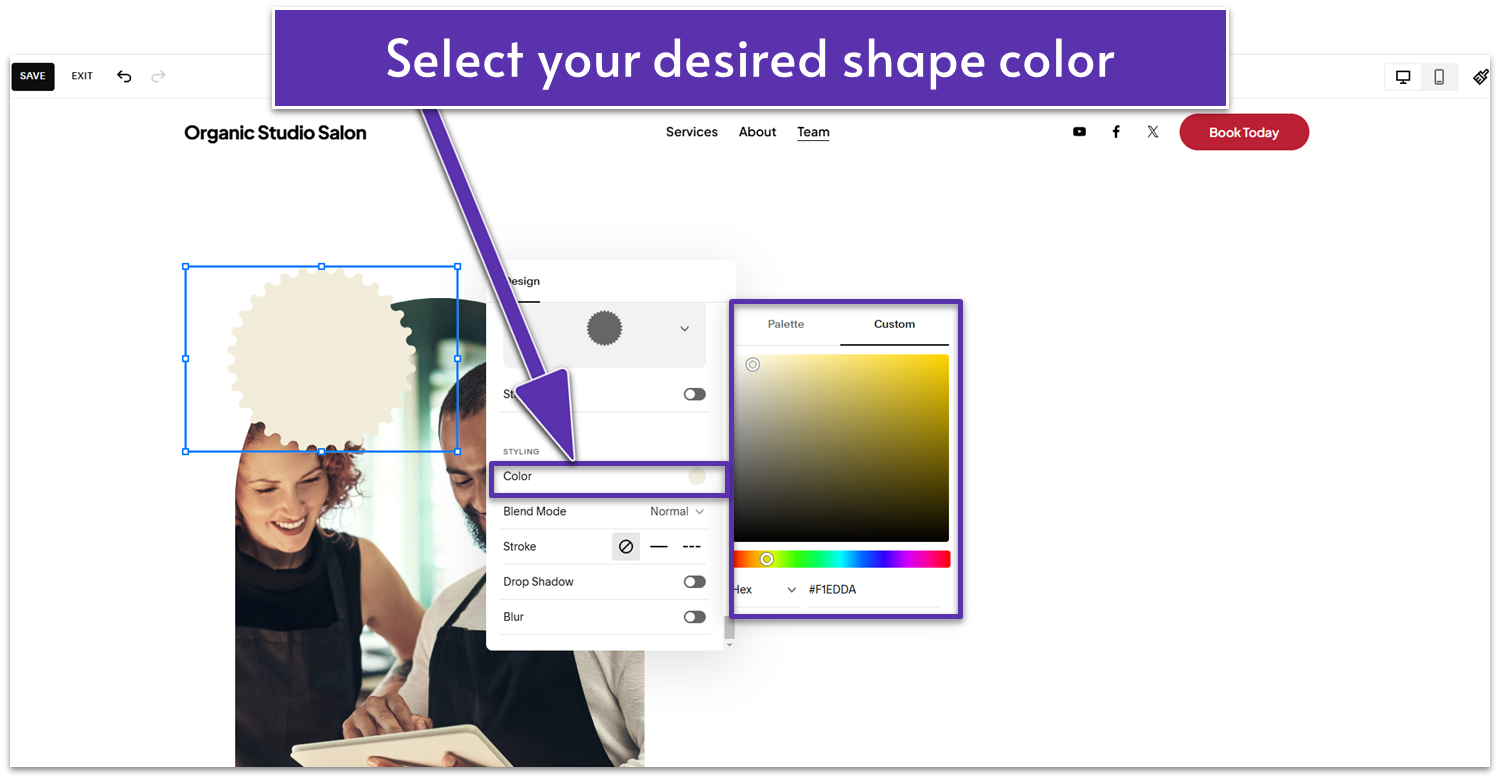
- Click “Color” under “Styling” to set your desired shape color. We chose a light grayish-yellow color (#F1EDDA HEX color) from the “Custom” tab.
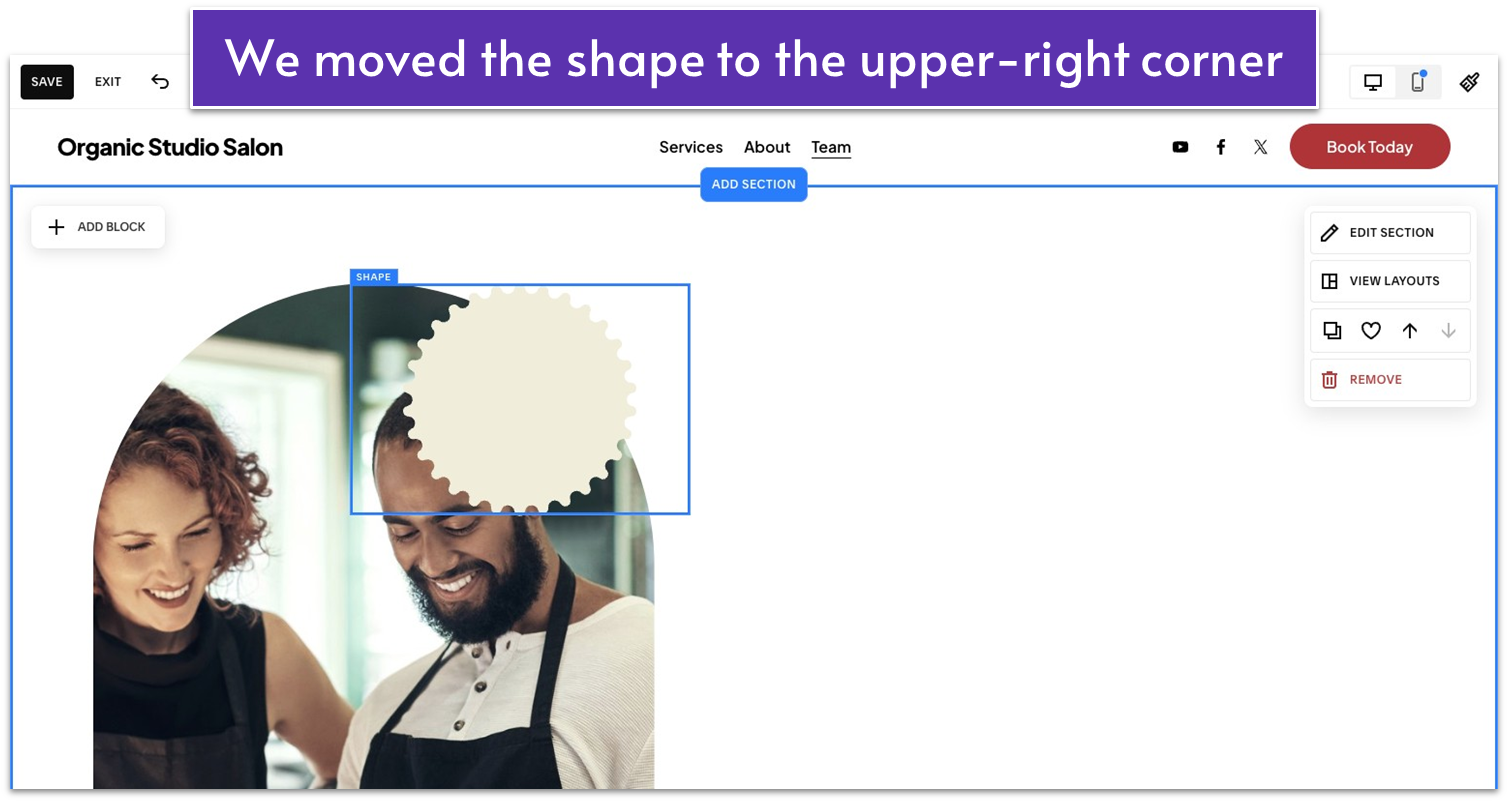
- Move the shape to any corner or edge of the image. We placed it in the image’s upper-right corner.
- Click “Move Backward” ( ) in the main block toolbar to place the shape behind the image.
- Adjust the positioning of the image and shape until it looks right for you.
Step 7: Add a section title
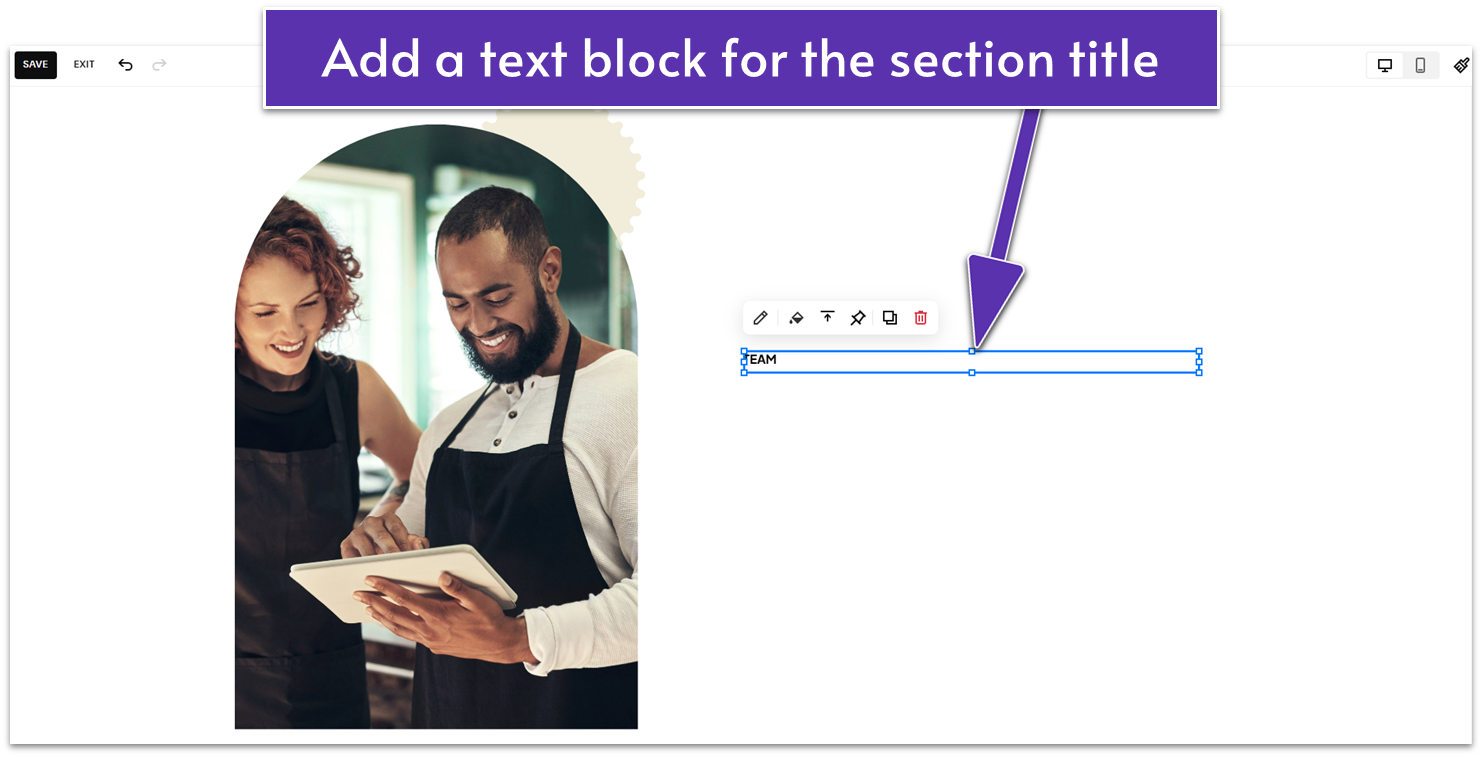
- Click “Add Block” and select “Text” to add a text block.
- Move the text block to the center-right of the section.
- Type in a clear and concise title that describes the page, such as “TEAM.”
- Set the text to “Paragraph 2” and bold.
Step 8: Add a section headline
- Deselect and select the section title text block again to display the main block toolbar.
- Click to duplicate the text block. Move the duplicate just below the original.
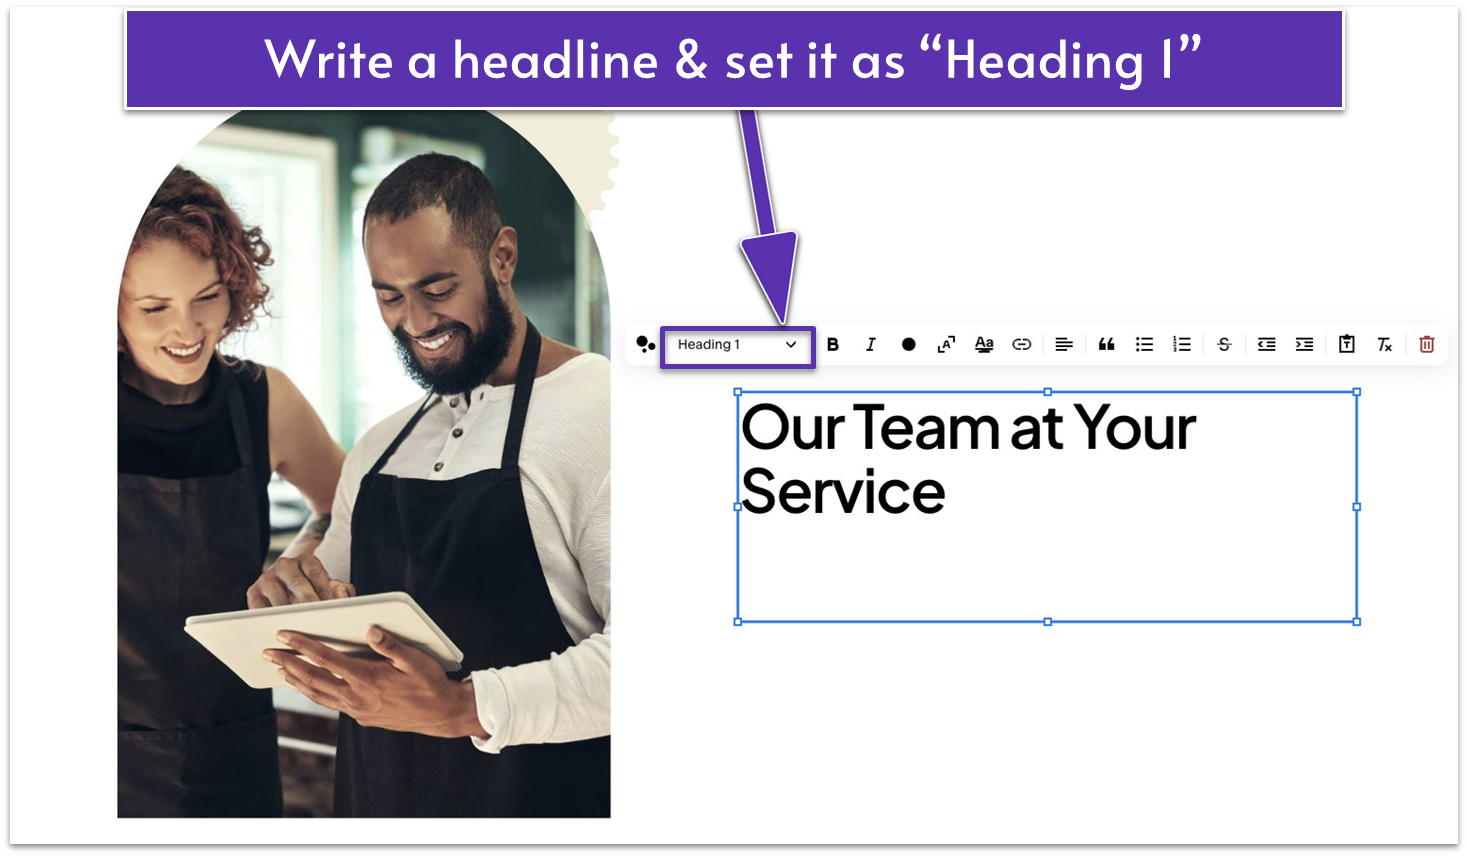
- Type in your headline. We wrote “Our Team at Your Service.”
- Select “Heading 1” as the text’s heading style.
- Resize the text block to align the text properly.
Step 9: Move the text blocks to your preferred position
- Click and drag over the two text blocks (title and headline) to select them.
- Drag the selected text blocks to your desired position within the section. For our example, we centered the text blocks with the image on the left.
Step 10: Add a section divider
- Click anywhere on the section and select “Edit Section” on the pop-up menu.
- In the “Design” tab, toggle “Divider” on.
- Click the shape preview or in the “Shape” menu box to open shape settings.
- Select a shape. We chose “Wavy Shape” ( ).
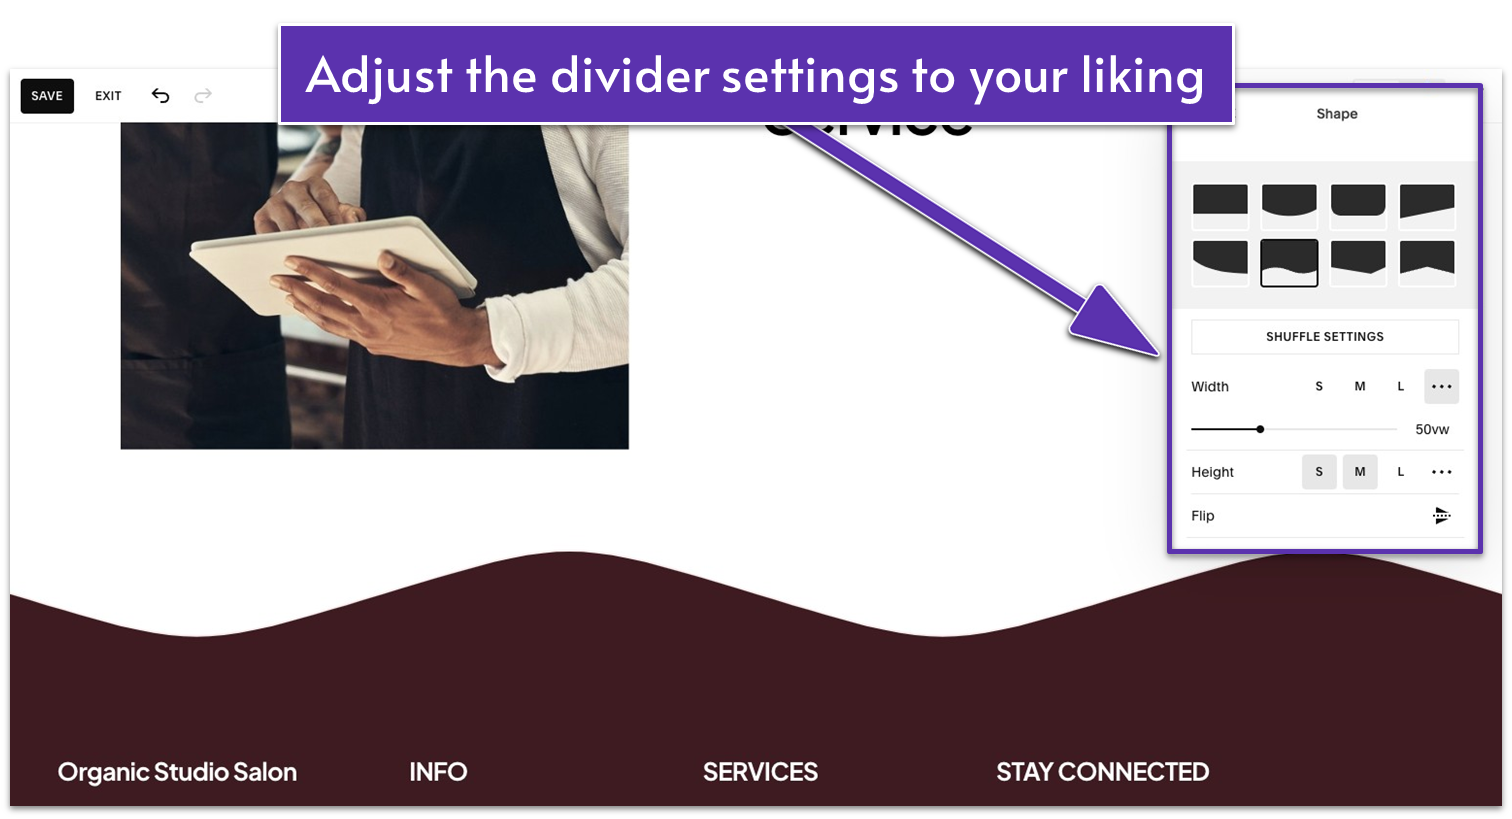
- Adjust the divider width by selecting the preset sizes or setting a custom width ( ). We set it to 50 vw.
- Adjust the divider height. We set it to “S” (small).
- Go back to the editing panel and click “Color” under “Styling.”
- Select your divider’s color from the palette or enter a custom color. We chose the subtle pink color from our palette.
4.9 Present Your Team (Second Section)
Now, we’ll introduce the body of this page, which will consist of a simple section with the profile pictures, names, and job titles of your team members.
Step 1: Add a new section to the page
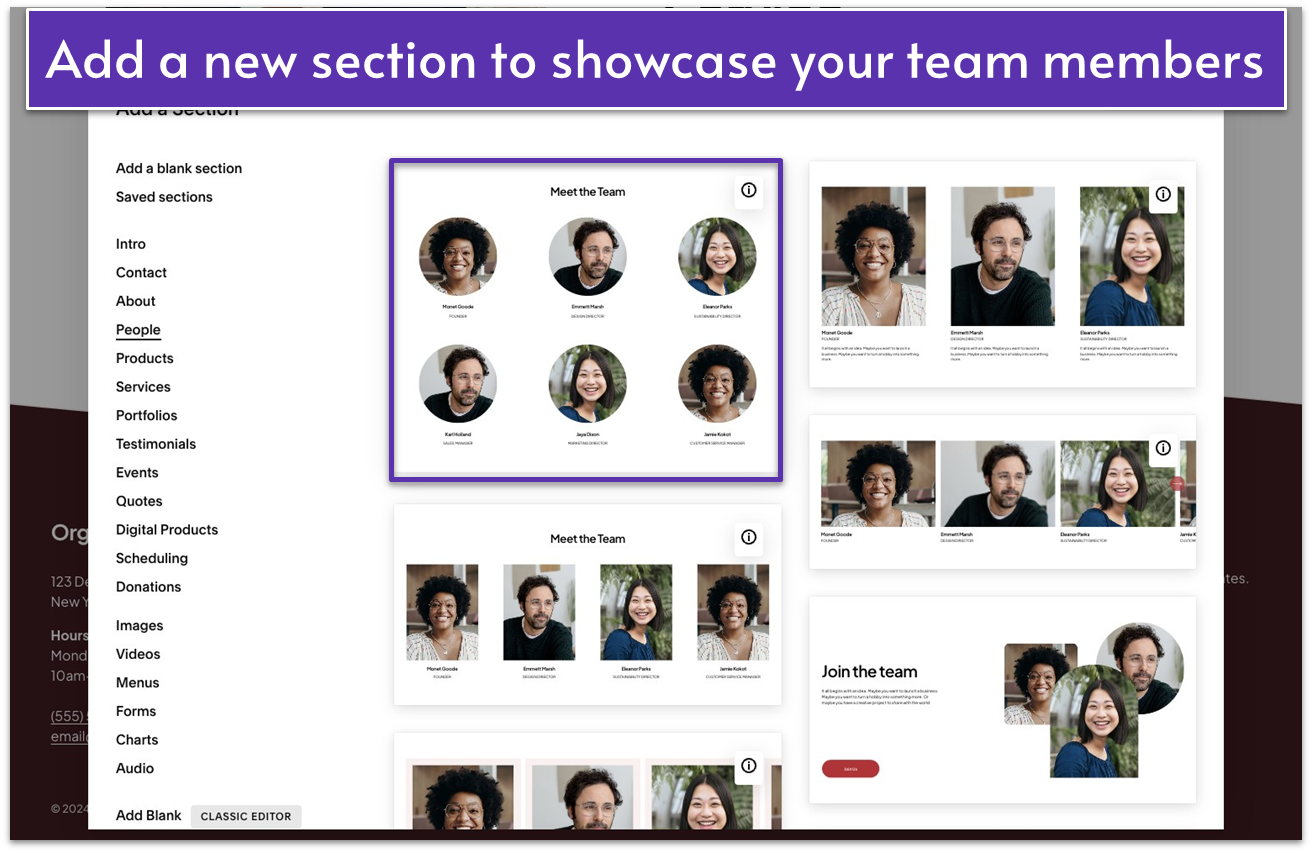
- Select “Add Section” below the intro section.
- On the section menu, select “People.”
- Select your preferred “People” section layout. We chose a layout featuring a centered title and a grid of circle-cropped images, names, and job titles.
Step 2: Edit the section’s background color
- Click anywhere on the section and select “Edit Section.”
- Select the “Colors” tab in the editing panel.
- Choose a section background color that matches the first section’s divider. We selected “Light 2.”
Step 3: Change the section’s title
- Click anywhere on the section and select “Edit Content.”
- Select the “Content” tab.
- Click on the “Title” option.
- You can change the section title to something you like. For this example, we chose to keep the default “Meet the Team.”
Step 4: Update the team member items
Under “Items,” click any listed name to open the item editor.
- Go back to the “Content” tab.
- Under “Items,” click any listed name to open the item editor.
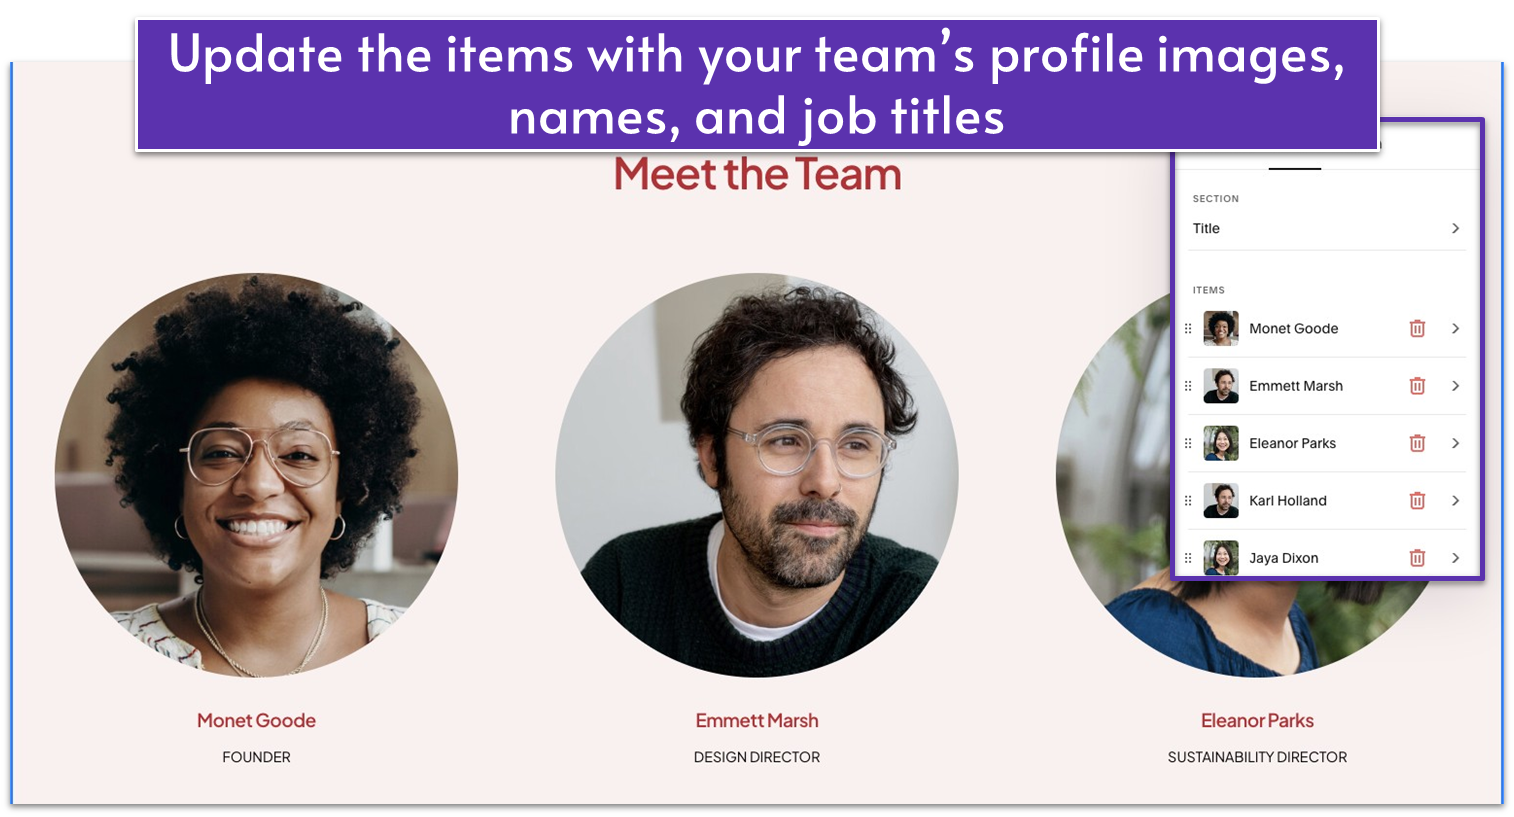
- Click “Replace” and upload your team member’s profile image from your device or library.
- Scroll down to the “Title” field and replace the name with your team members. Ensure the name matches the team member image you’ve uploaded.
- In the “Description” field, replace the text with the correct job title.
- Return to the “Content” tab to update the rest of the items.
- Use the trash can icon ( ) to delete items if needed. Click “Add” at the bottom to add more team members.
Step 5: Edit the section’s design
- Go back to the “Edit Content” panel.
- Select the “Design” tab.
- Select “Size & Space” to adjust the size and spacing of images and text. For this example, we only set the “Media Width” to “L” (large). We also selected under “Position” to spread the images and text evenly over the section’s full height.
4.10 Optimize the Page for Mobile Viewing
Let’s make sure the page works well on mobile devices. Your Team page on mobile should look like this:
Step 1: Click “Mobile View” ( ) on the editor
Step 2: Optimize the first section
Rearrange the misaligned image and shape so they match the desktop version. If you used the same elements from our example, you can make the following edits:
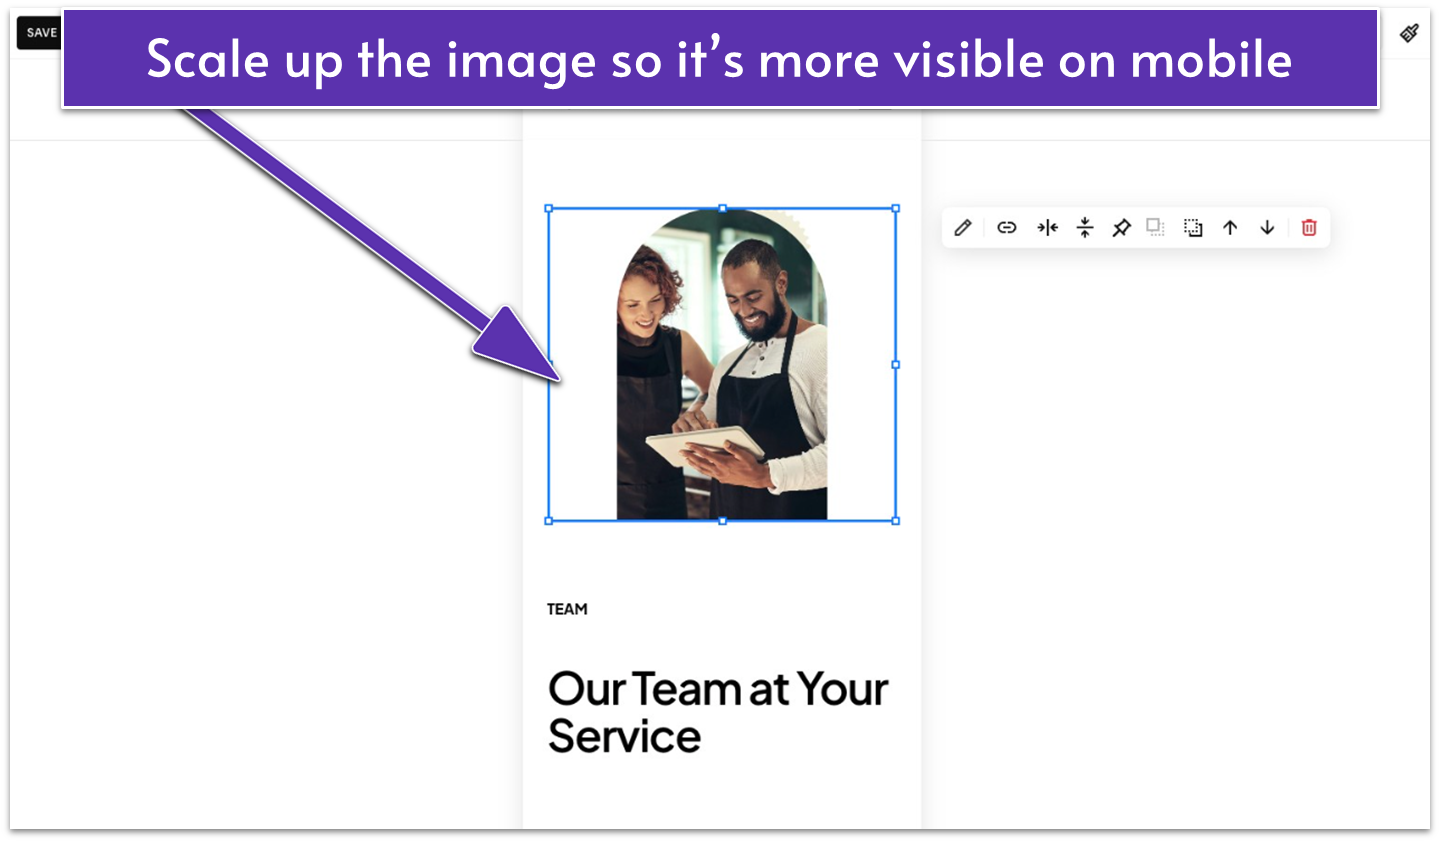
- Make the image larger for better visibility in mobile view.
Select the shape block that appears above or below the image. Resize it to be smaller than the image.
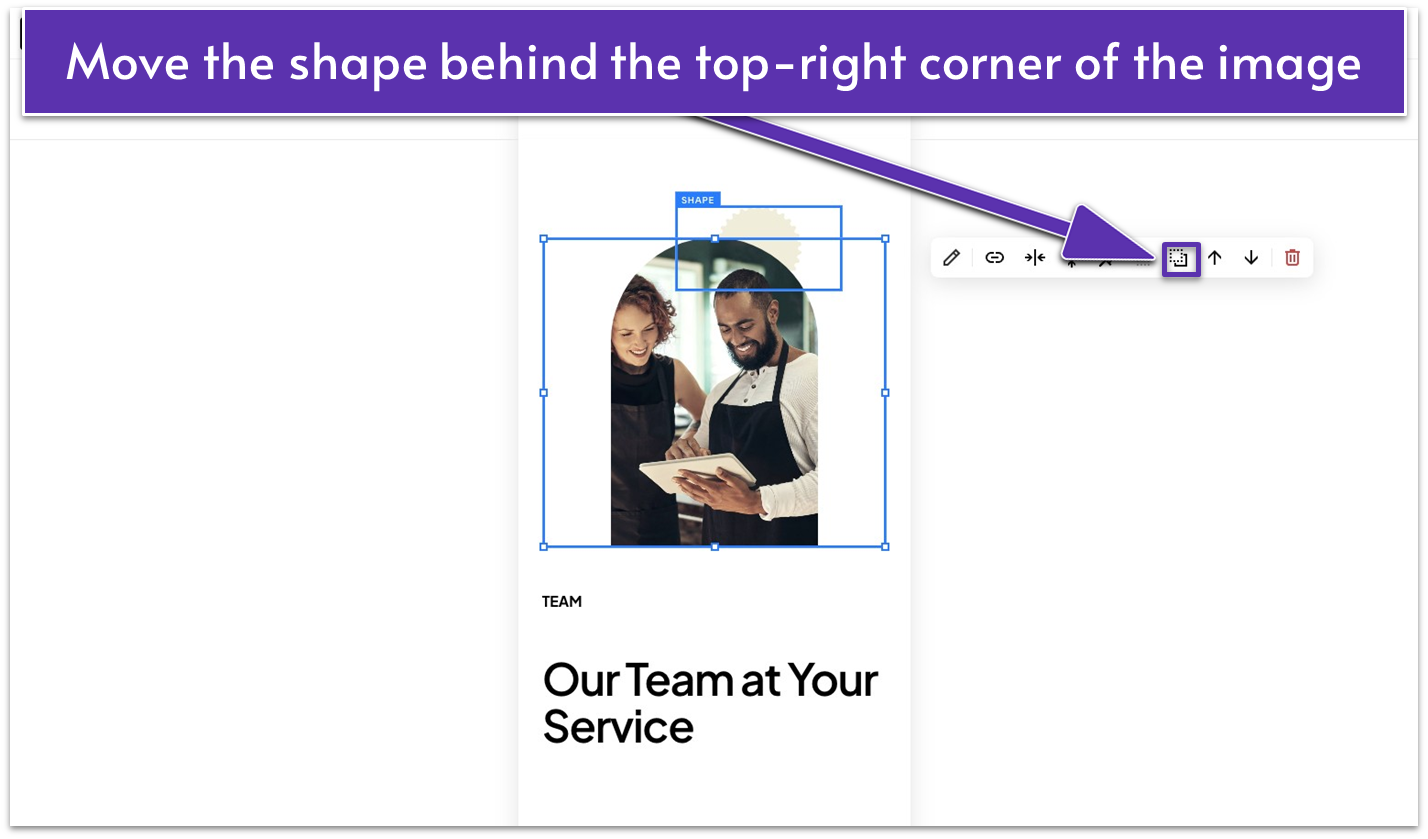
- Drag and place the shape in the top-right corner of the image.
- Click “Move Backward” ( ) in the block toolbar so the shape is behind the image.
For the two text blocks (title and headline) that appear below the shape and image, here’s what you can do:
- Resize the title text block to remove the extra white space at the bottom. This will allow you to tighten the space between the title and the headline.
- Resize the headline text block to break the text line as needed.
- Left-align the two text blocks.
- Move the headline text block up so it’s just below the title text block.

- Select both title and headline text blocks. Move them above the image and shape.
- If you don’t have enough space, stretch the section’s height using so the text doesn’t overlap with the image.
You can make further adjustments if you need to.
Step 3: Optimize the second section
In our example Team page, we liked the default mobile version of our second section, so we didn’t need to make any substantial changes. But feel free to edit the mobile version of this section as you like. To do so, simply hover over the second section, then click “Edit Content” or “Edit Section” to adjust the layout, text, or images.
Onward to the next step – building your Homepage!
