Inside this Article
Step #1: Choose a Great Name and Domain for Your StoreStep #2: Choose the Right Website Builder and PlanStep #3: Pick a Template That FitsStep #4: Customize Your Car Parts WebsiteStep #5: Add Items to Your StoreStep #6: Update Your Store SettingsStep #7: Connect a Payment MethodStep #8: Update the Shipping and Tax RulesStep #9: Connect a DomainStep #10: Preview Your WebsiteStep #11: Promote Your Awesome ProductsConclusion: A Successful Business Is Closer than You ThinkFAQ
Step #1: Choose a Great Name and Domain for Your Store
The right name could do wonders for your store. It’s no coincidence that we call tissues “Kleenex” and “Google” things on the internet.
When choosing your name, it’s important to consider what you want your store to be and who your potential customers are. “Optimus parts” might be a fun name if you’re a Transformers fan, but no one will know what you’re actually selling. On the other hand, a very direct name might be clearer, but it’ll also sound generic. And I hate to break it to you, but carparts.com is already taken.
Try to be pragmatic. If you’re a local business owner, nothing beats a familiar identity like “Smith’s Auto Parts.” If your store specializes in a certain brand or part, mention this in its name. Customers will know exactly what you’re selling with a name like “Headlight City.”
Warning. Remember that if you’re starting a business, you’ll need to register it in compliance with your local laws and tax requirements. You could get in a lot of trouble otherwise.
With a kick-ass name, it shouldn’t be too hard to choose a custom domain for your store. If you need inspiration, you can always try out our free domain generator.
Pro tip. A great brand is more than just a name. The right logo can make you unforgettable in the minds of customers. Check out our article on designing a fantastic logo for your brand.
Step #2: Choose the Right Website Builder and Plan
Not everyone is a professional web designer, but you don’t have to be one to make a great website. With a website builder, you do all your editing directly on the page, without touching a single line of code. A (good) builder will let you add, remove, and rearrange elements with only a few clicks, giving you the freedom to create just the site you want. That said, you’ll need a plan with integrated e-commerce to sell car parts on your site. I recommend going for the cheapest e-commerce plan available to begin with and upgrading later if you need more features as your business grows. These plans usually come with domain hosting as well, so you can manage all aspects of your business in one place. Here are the builders I recommend for your store. Each offers a free trial or a free plan, so you can try them for yourself before making a commitment.1. Wix – Best for Full Control over Your Store
- Drag-and-drop editor. You can drag elements wherever you want on the page, and you get plenty of other options for adapting your template’s design to suit your needs.
- Great product manager. It only takes a couple of minutes to add any product to your store. You can edit categories, shipping options, product descriptions, and even create custom coupons, all on the same platform.
- Powerful marketing tools. You can send emails with specific promotions to everyone on your mailing list. Wix’s SEO and blog features will also help you get noticed and establish your brand.
Save up to 50 % on your Wix plan!
Sign up for an annual plan and enjoy the savings.
Plus get a free custom domain for 1 year!
9264 users used this coupon!
2. SITE123 – Easiest Builder for Beginners

- Incredible ease of use. SITE123’s intuitive interface makes building a website simple, even if you’ve never built one before.
- Fully mobile responsive. Every SITE123 template is mobile responsive, meaning it will automatically adjust to look as good on desktops, mobiles, and tablets.
- Great app market. If you need to expand your site’s functionality, you can install various apps from SITE123’s extensive app market.
Get 40 % OFF SITE123
Save 40 % when you sign up for SITE123's annual plan
143 users used this coupon!
3. Squarespace – Great for Elegant, Modern Designs
- Intuitive and responsive editor. Adding pages and elements to your site is incredibly easy. You can also preview any changes you make in real time, so you always know how your site is going to come out.
- Great store features. It only takes a couple of really simple steps to add products to your store and edit details like availability, variants, and related items.
- Lots of extensions. You can install dozens of third-party extensions to add useful features and integrations to your site. For example, Smart SEO helps to increase your Google ranking and TaxJar will automatically calculate sales tax on transactions for you.
Save up to 36 % on your Squarespace plan today!
Plus get a free domain for one year!
1510 users used this coupon!
4. Square Online – Best Builder for Square Users
- Sales-ready free plan. Square Online is the only website builder that allows you to sell products on its free plan, so long as you only process payments via Square.
- Fast website creation. Instead of offering a variety of templates, Square comes with a single template you can customize. This means you can get your online store up and running in practically no time, so long as you don’t mind having a fairly barebones site.
- Automatic inventory updates. If you also have a physical store, Square’s point of sale system can automatically update physical sales to your website’s database – no need for manual updates.
| Standout Feature | Transaction Fees | Cheapest E-commerce Plan | |
|---|---|---|---|
| Wix | Full creative control | 1.9% – 2.9% | $17.00 |
| SITE123 | Incredible ease of use | 0% | $12.80 |
| Squarespace | High-quality templates | 0% – 3% | $23.00 |
| Square Online | Best Square integrations | 1.9% – 2.9% | Free |
Step #3: Pick a Template That Fits
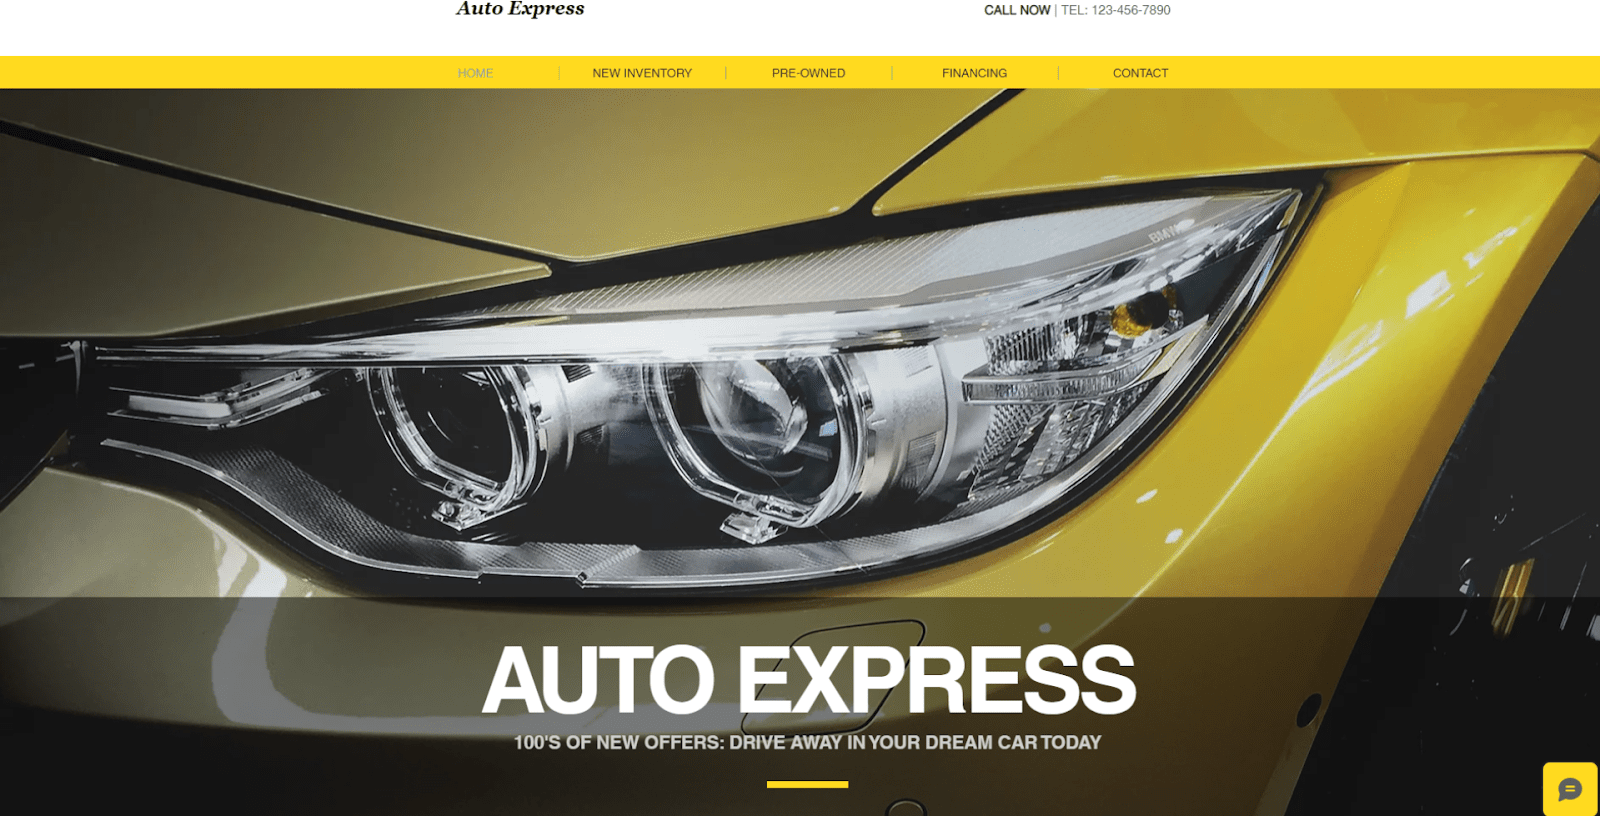
Now that you’ve found the perfect builder for your store, it’s time to choose a template. Think of your template as your starting point. Your final website doesn’t have to look exactly like your initial template (it shouldn’t), but you’ll want to find the one that’s closest to your vision. I strongly recommend starting with a store template. You can add store functionalities to pretty much any template, but store templates will already have the basic structure you need. Remember, your template’s job is to minimize the amount of work you need to do to create your perfect site. That being said, focus more on the feel of the template than on the kind of site it’s “intended” for. Most builders don’t have a specialized “car parts store” template anyway, but you can always change text and swap out photos and products. Choosing your template is all about finding a structure you like that you can easily adapt to your needs. I used Wix to create my site, and I was first drawn to its “Vintage Car Garage” template. It looks elegant and comes pre-configured with most of the elements you’re likely to need, such as location, about, and contact tabs. I also checked out the “Accessories Store” template because I liked its bold style and products-first design.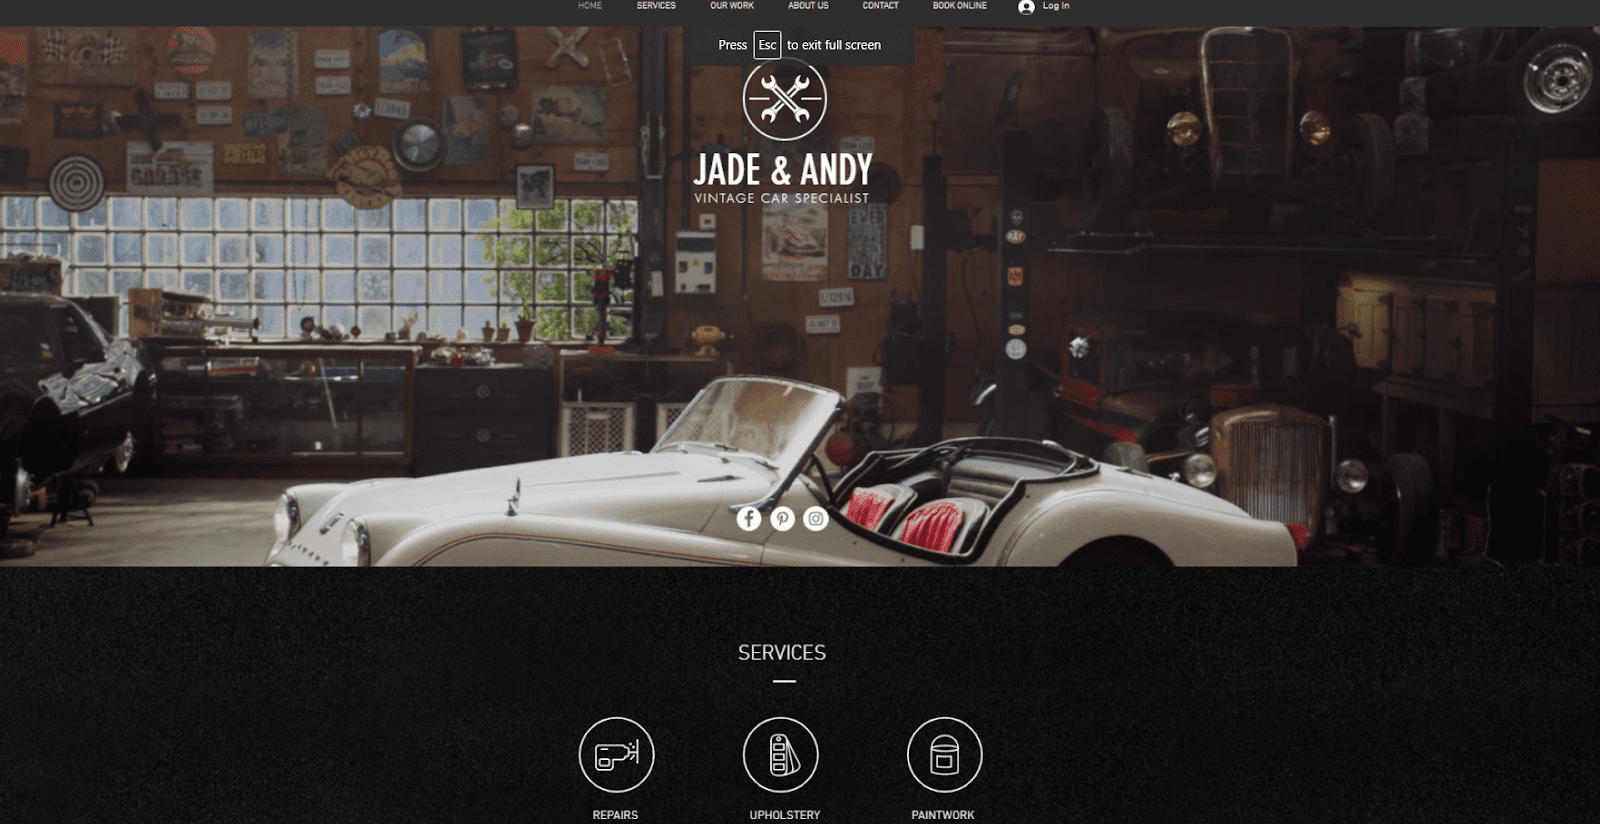


Short on time?
Take this one-minute quiz to learn which website builders are best for your project.
Step #4: Customize Your Car Parts Website
Now that you’ve chosen a great template, it’s time to turn it into a site unique to your business. This process will vary depending on the builder you choose. Some builders, like SITE123, make it far easier to customize your site, but offer fewer options. I chose Wix, which gave me all the design freedom I wanted, even if this meant building my site took a little longer.Pro tip. Don’t forget the mobile version of your site. Wix isn’t mobile responsive, so I had to edit the desktop and mobile versions of my site separately. Different builders handle mobile editing differently (some even take care of it for you).
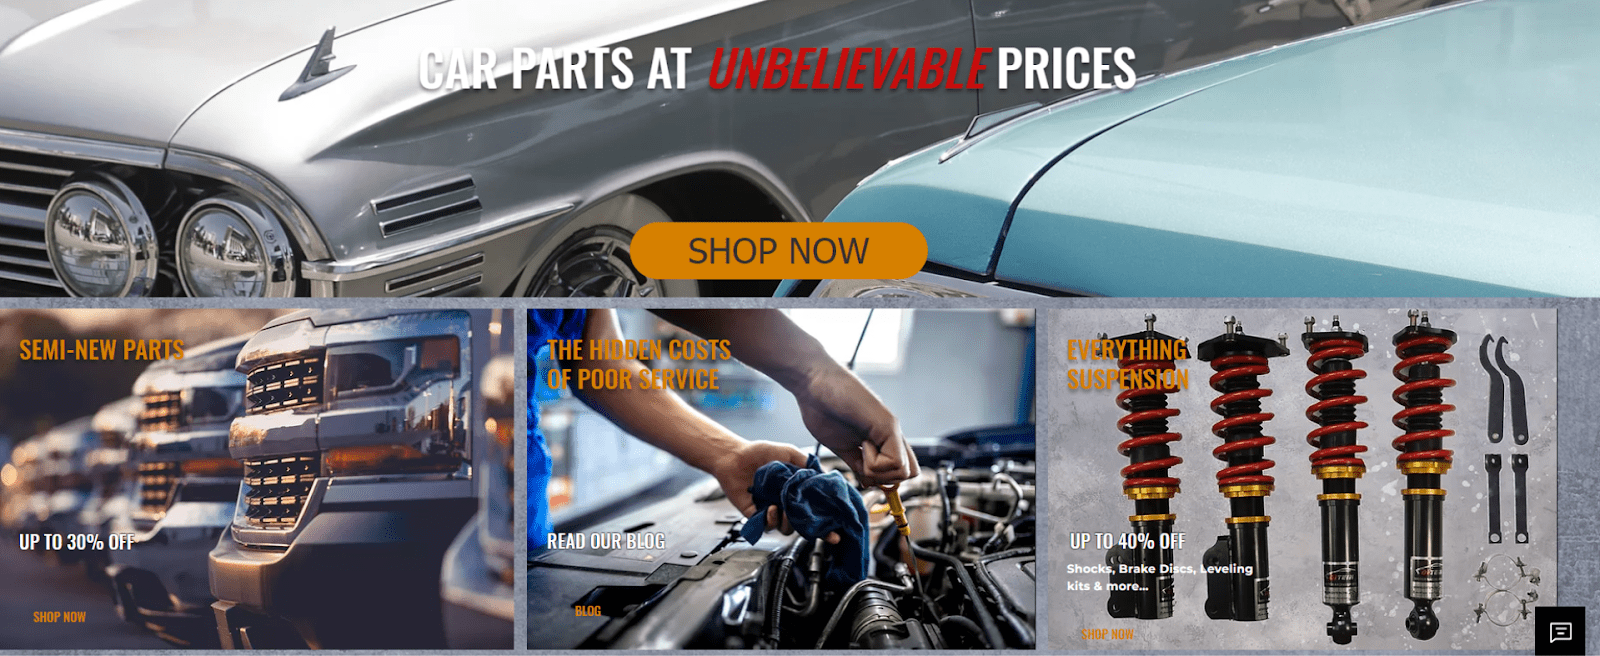
I started by rearranging my site’s structure. The “hardware store” template had a lot of useful elements, so instead of deleting them, I just gave them a fresh coat of paint. I also added a nice call-to-action header to make my site feel more dynamic and direct visitors to my online store.
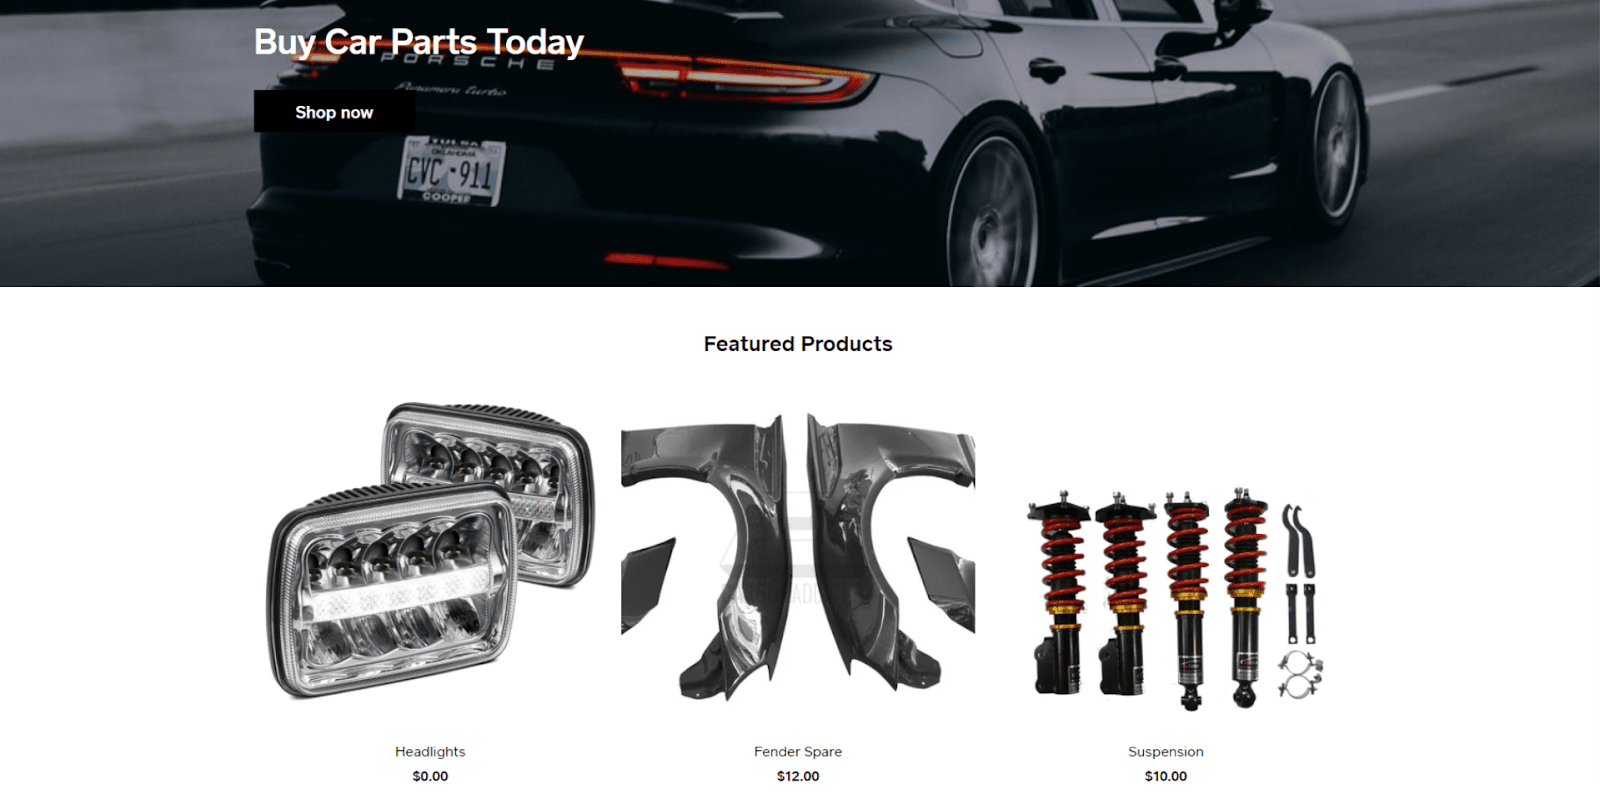
Step #5: Add Items to Your Store
Now that you have the perfect store, it’s time to add your products. Your store’s dashboard will be populated with mock products to begin with. I recommend deleting these and starting from scratch.
Step #6: Update Your Store Settings
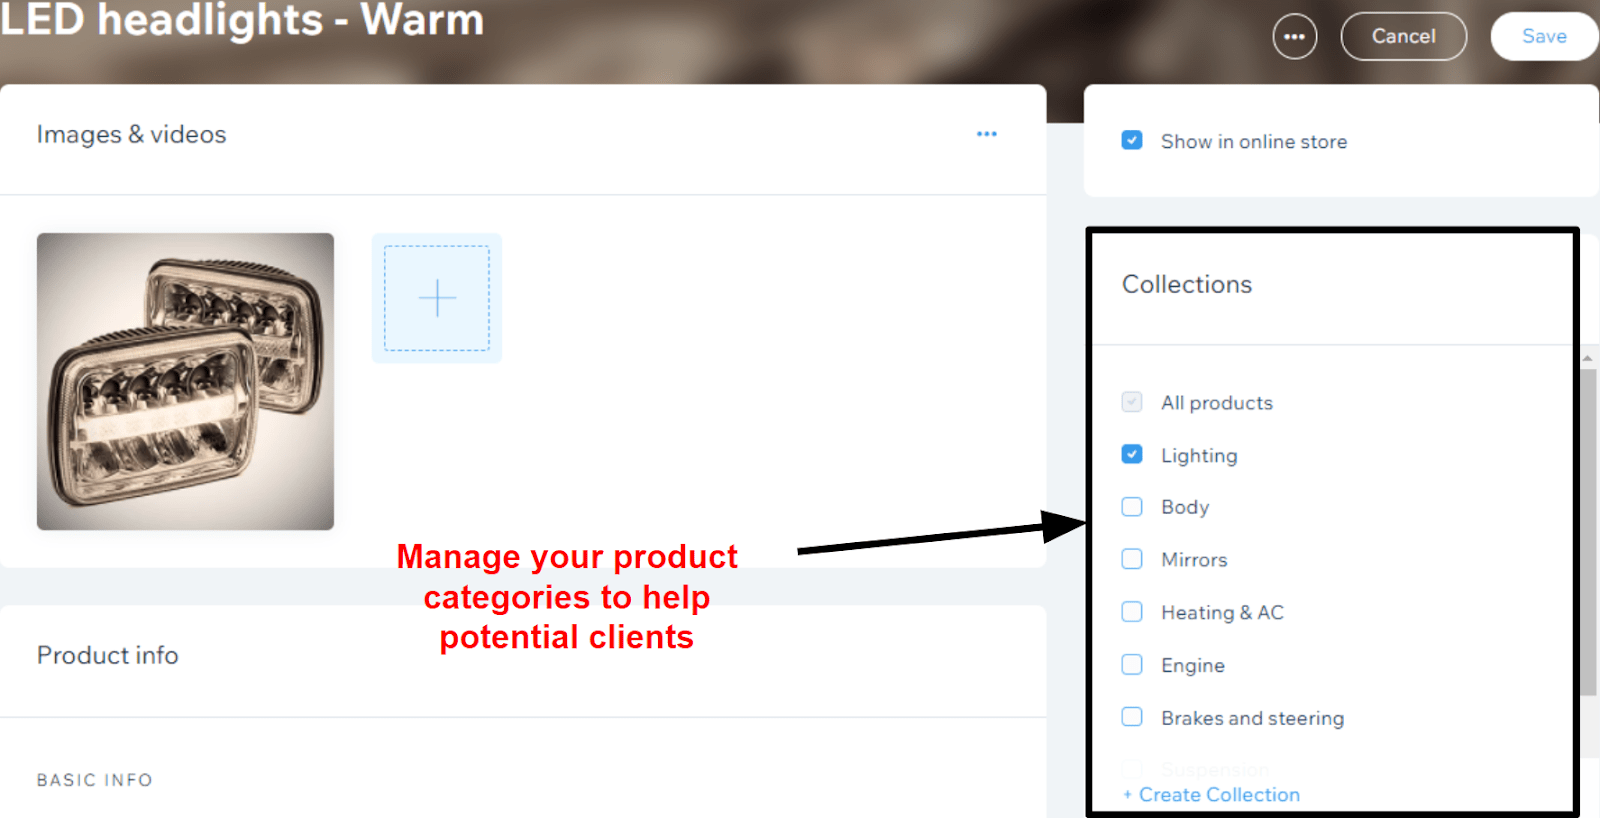
Now it’s time to deal with the slightly more technical side of things. Go to your store’s dashboard and click settings. You’ll find a lot of information you need to update, and I can’t emphasize enough how important it is that you go through each step of the process carefully. In Wix, the relevant categories in its general settings are:- Website settings. Here’s where you’ll change things like your site’s name, URL, and favicon (the little image that appears next to your site’s name on search bars and tabs).
- Business info. Here, you can edit your business’s name, logo, contact info, and location (even if you just sell online, you still need a business address).
- Language & region. This is where you can set location-related information such as language, time-zone, and currency.
- Roles & permissions. If you have more than one person working on your site, you can edit how much each person can see and edit. You can also specify who is in charge of what.
- Video settings. Here, you can enter information relevant to any videos on your site. If you plan to upload videos of your products or anything else, it’s important you take your time to research these settings properly.
- Accept payments. This covers everything about how you’re going to accept payments and get paid. More on this below.
- Shipping & fulfillment. Here, you can update important information about your shipping rules. More on this below.
- Tax. This is where you enter information about taxes on any sales made through your site. More on this below.
- Checkout settings. Here, you’ll define relevant parts of your checkout process. What information do you want your customers to see at checkout? What information would you like them to input?
- Order settings. You can decide when you want your inventory to be updated after an order is made (when it’s placed or when it’s paid), set price ranges for product variations, and choose whether to create automatic invoices.
- Order email notifications. Here, you can choose if customers receive order and shipping confirmation emails, as well as customizing what these say.
- Checkout policies. You can edit important policies that your customers will see at checkout.
- Product price settings. Select whether you want pricing and tax info to be shown with each product.
- Invoices & quotes. You’ll find everything you need to manage, well… invoices and quotes.
Step #7: Connect a Payment Method
One step you won’t want to miss is connecting one or more payment methods to your store. Otherwise, you’ll be giving away your parts for free. Very charitable, but not what we’re going for…
To connect a payment method on Wix, all you have to do is go to “Accept payments” on the settings page. Make sure that your business location is correct, as some payment methods aren’t available everywhere. You can then choose between Stripe, PayPal, and manual payments (such as cash or cheque) and follow the instructions on screen.
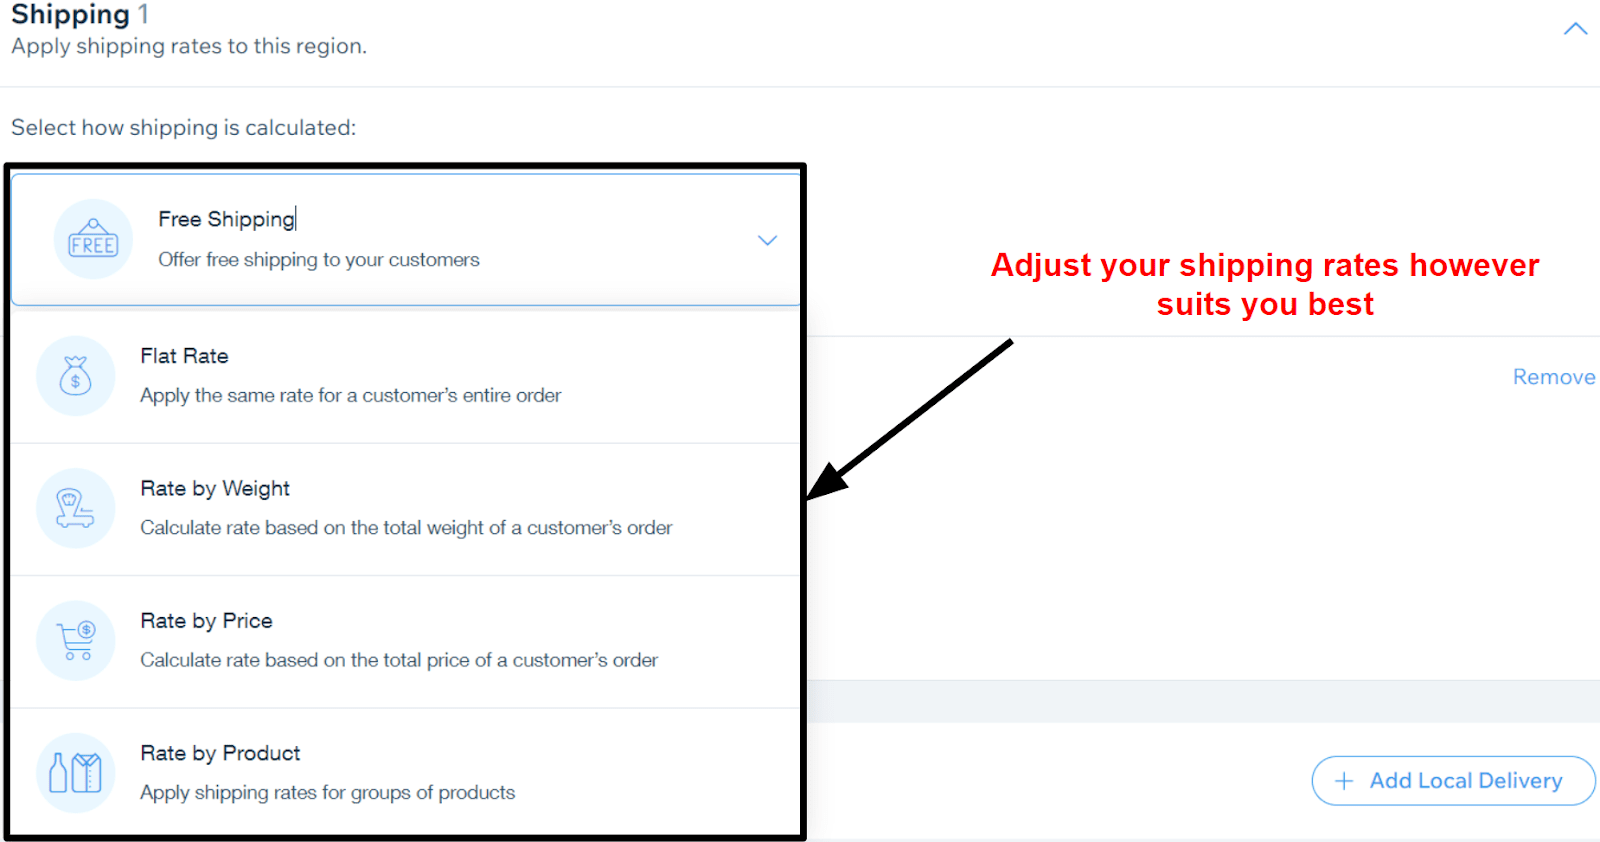
Step #8: Update the Shipping and Tax Rules
It’s very important that you pay attention to shipping and tax rules. Taking the proper time to configure these correctly could save you a lot of trouble further down the line. Wix lets you apply custom rules depending on the country you’re shipping to. For instance, you can decide how you want shipping to be calculated (e.g. by product weight, price, or type) and add average delivery times for each country you ship to.
Step #9: Connect a Domain
If you’re using a website builder, connecting a domain couldn’t be easier. Just go to your site’s dashboard, and under settings click on “connect domain.” If you haven’t yet purchased a domain, you can buy one right there. If you have, just click “connect a domain you already own” and follow the instructions on the screen.Step #10: Preview Your Website
Before you launch your store to the world, take it for a test drive. Make sure that all your links work, that your text is typo-free, and so on. I also recommend you go through all the steps of buying a product, even if you cancel at the end (though I mean… you’d only be buying from yourself). That way, you can make sure that there are no missing or unnecessary steps in the process.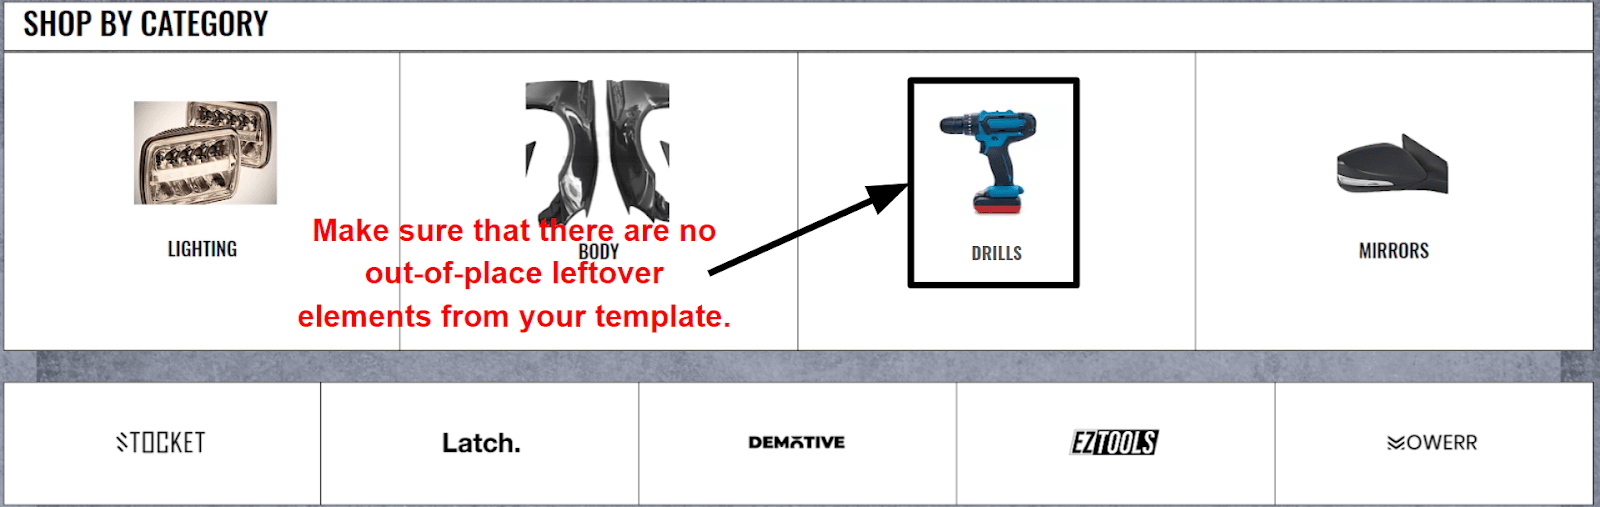
Step #11: Promote Your Awesome Products
Now that your store is ready to go, it’s time to show your products to the world. Wix provides robust SEO tools that assist you in achieving higher rankings on search engines. Additionally, it enables you to initiate email marketing or Facebook ad campaigns, thereby expanding your customer base and fostering business growth. If you want to collect valuable marketing information, I recommend using Wix’s Google Analytics integration. After all, attracting new customers is easier when you know which campaign is working and which isn’t. Email marketing can do wonders for turning occasional customers into recurring ones. If you’re interested in email marketing, you can check out our Sendinblue and AWeber reviews to learn more (spoiler: it’s much easier than it sounds).Pro tip. Getting a marketing campaign off the ground all by yourself takes time and effort. Luckily, there are professionals that can take care of it for you. You can hire amazing digital marketing specialists on Fiverr at very reasonable rates.