Inside this Article
How to Install WordPress on SiteGround
The first time you log in to SiteGround, you’ll be able to run through this handy setup wizard. If you don’t want to set up your first WordPress website right away, you can also skip it until your next login – just click the link at the bottom of the page. You can choose to start a new website, transfer an existing website, or set up WordPress manually. First, I’ll show you how to install and set up WordPress using the wizard: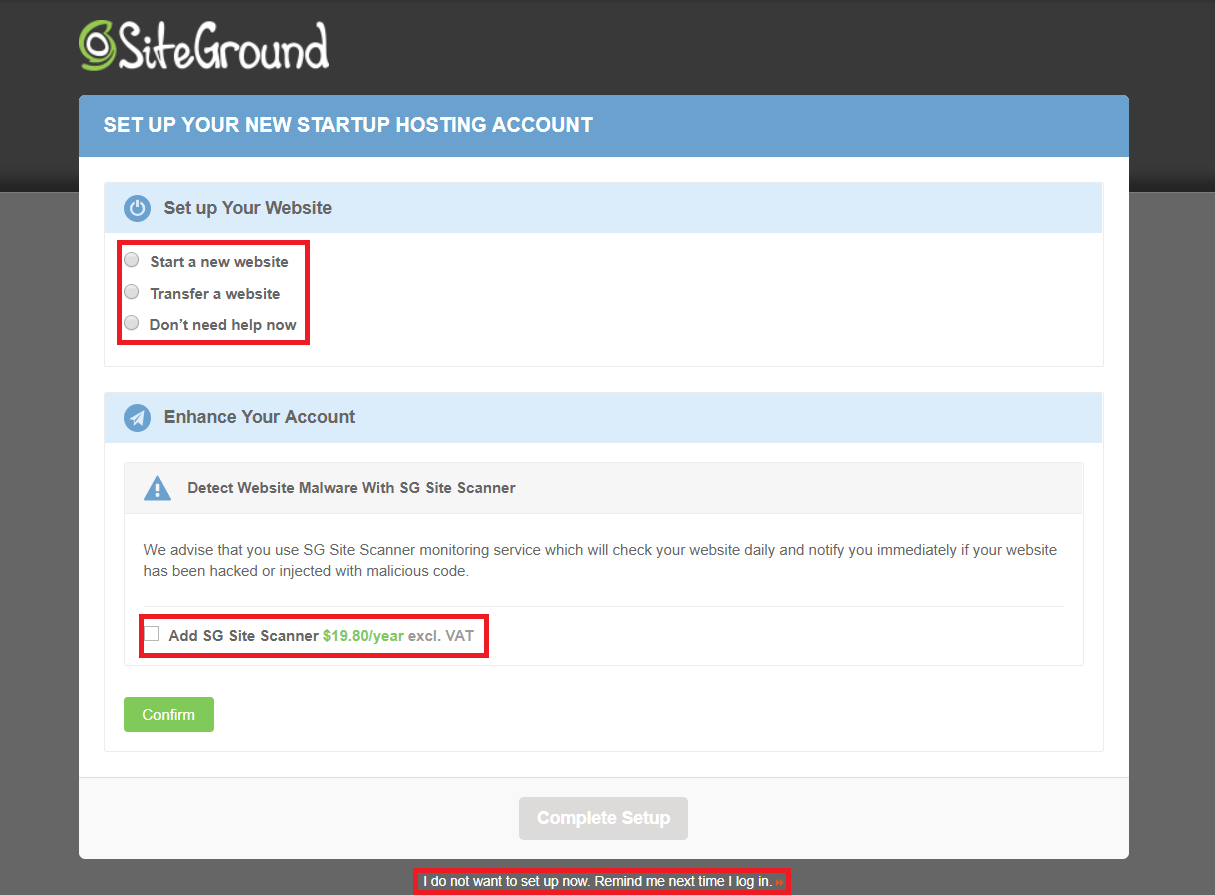 Once you select ‘Start a new website’, you can choose which CMS (Content Management System) you’d like to install:
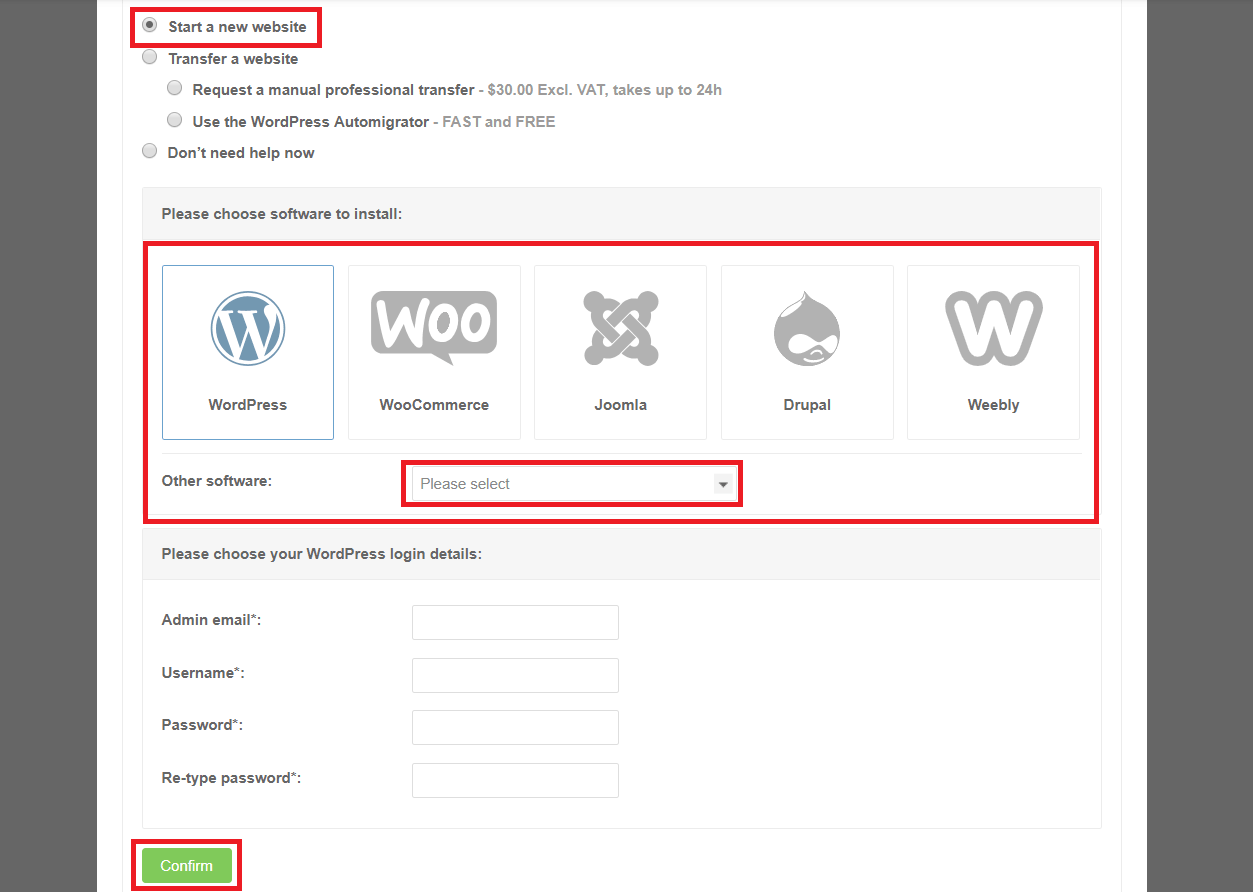 Select WordPress. Then, you’ll have to enter some basic details that you’ll need later to log in to your admin account. When you’re done, click ‘Confirm’.
On the confirmation page, you’ll also need to confirm whether you do or don’t want SG Site Scanner.
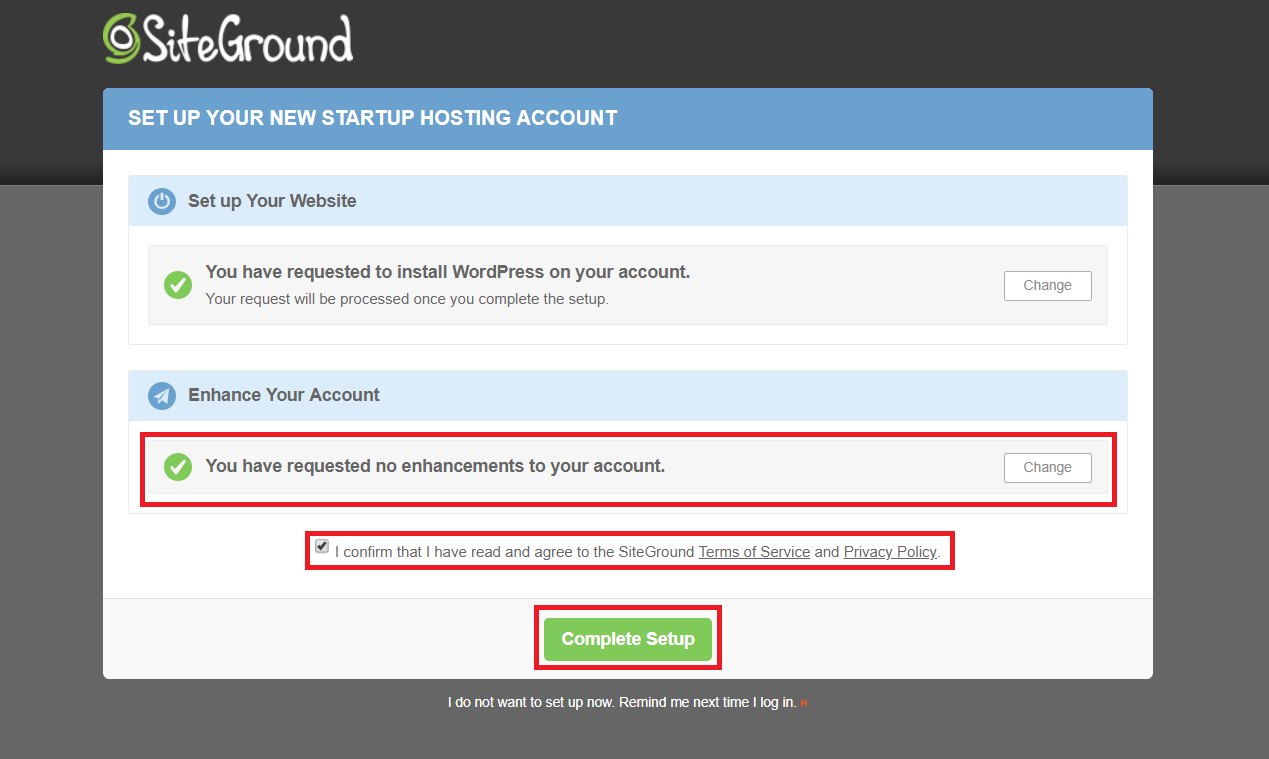
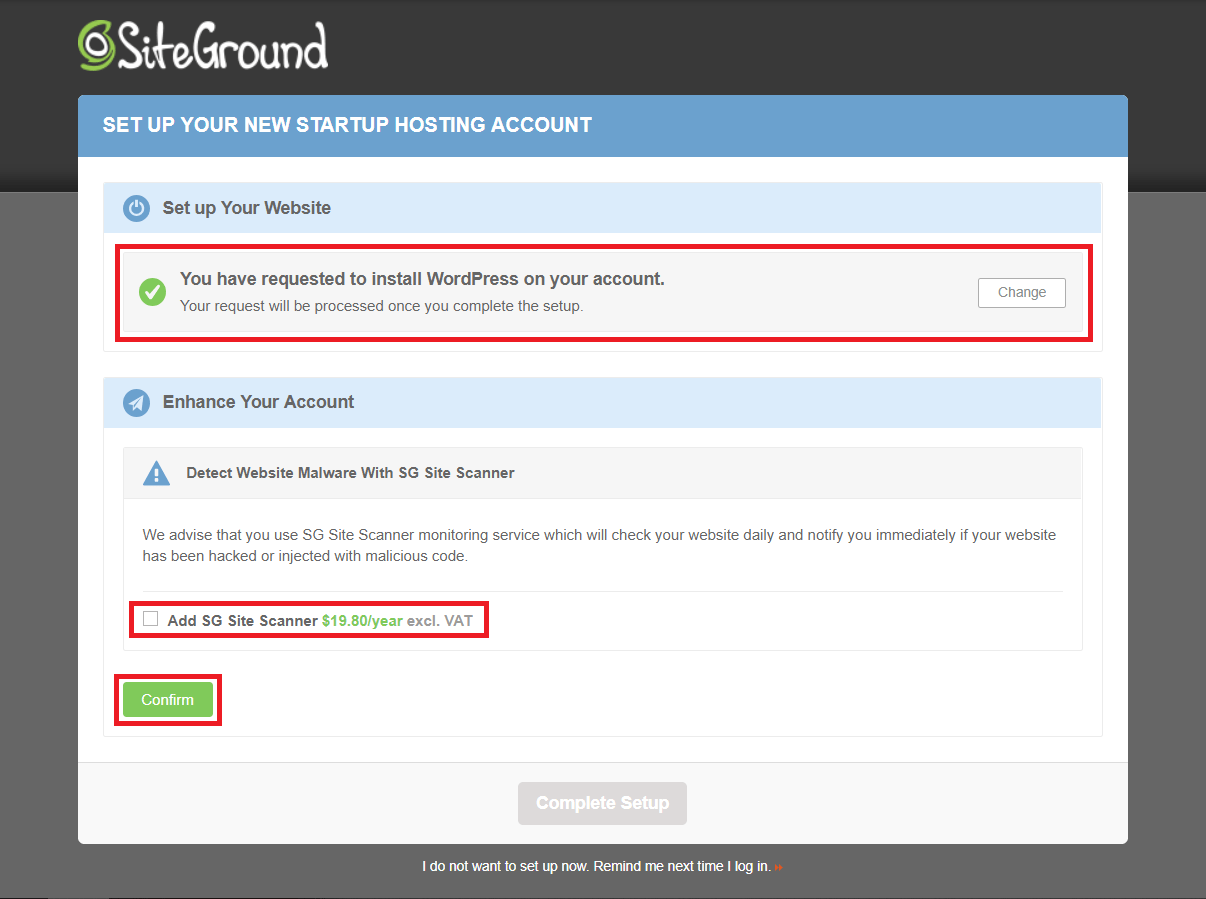 After you click the ‘Confirm’ button, accept the Terms and Conditions (always a good idea to read them first) and click ‘Complete Setup’. This will start the installation of WordPress (and SG Site Scanner, if you selected it).
 Once it’s done, you’ll see this message. My installation took just a few seconds, so you shouldn’t have to wait long.
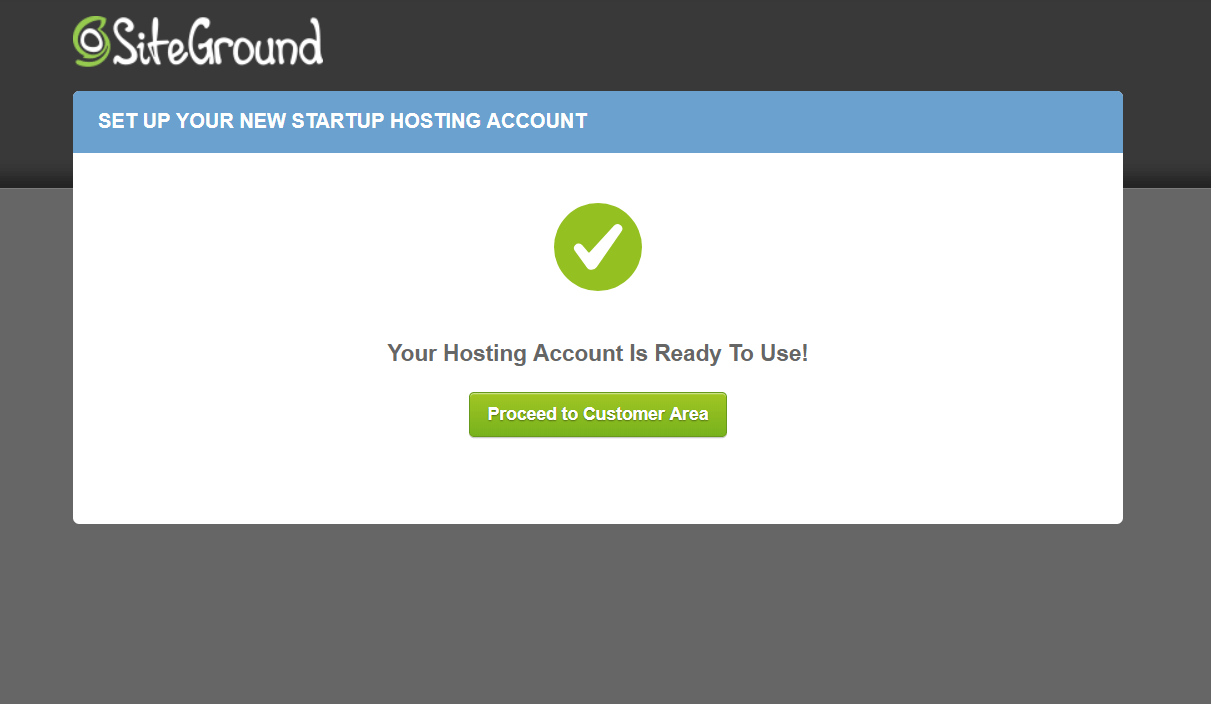 Click ‘Proceed to Customer Area’.
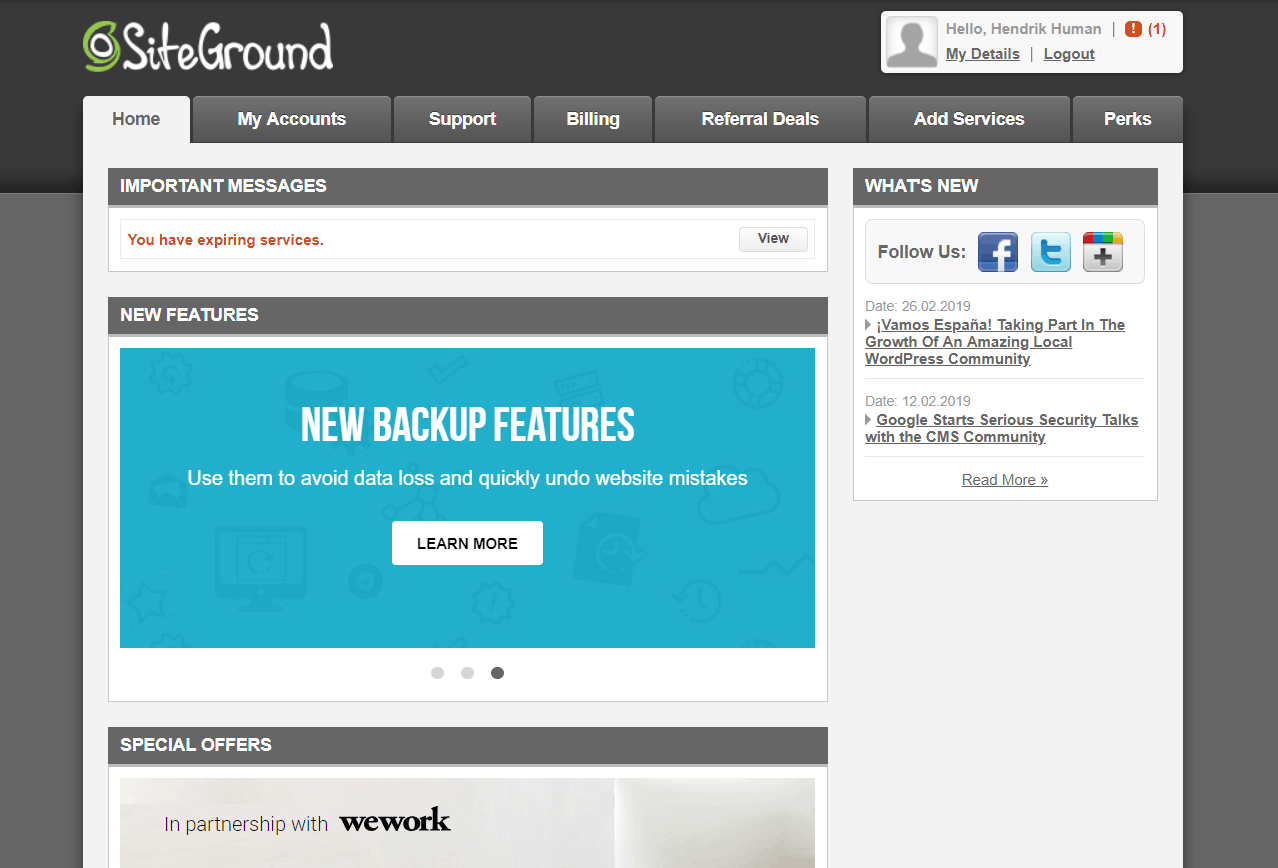
Welcome to your dashboard:
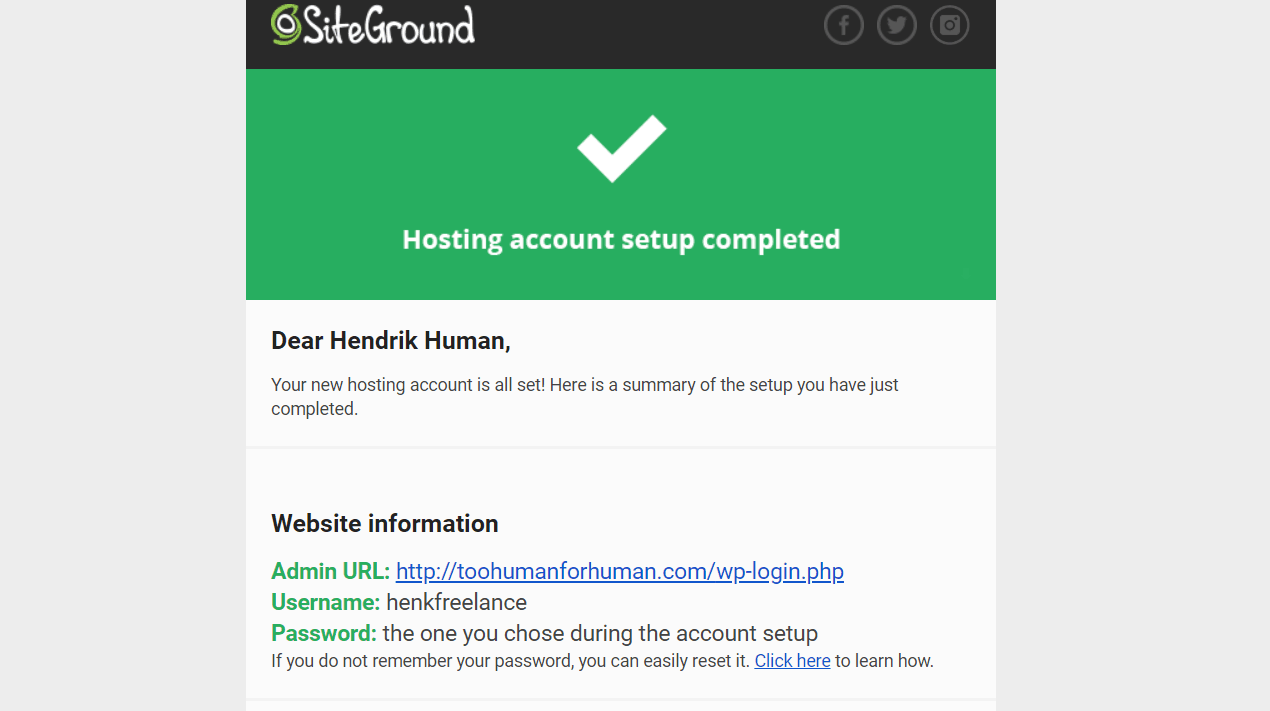
 You’ll also receive an email to confirm that your WordPress website has been created:
 Now, you can access your WordPress website by clicking ‘My Accounts’ in the dashboard:
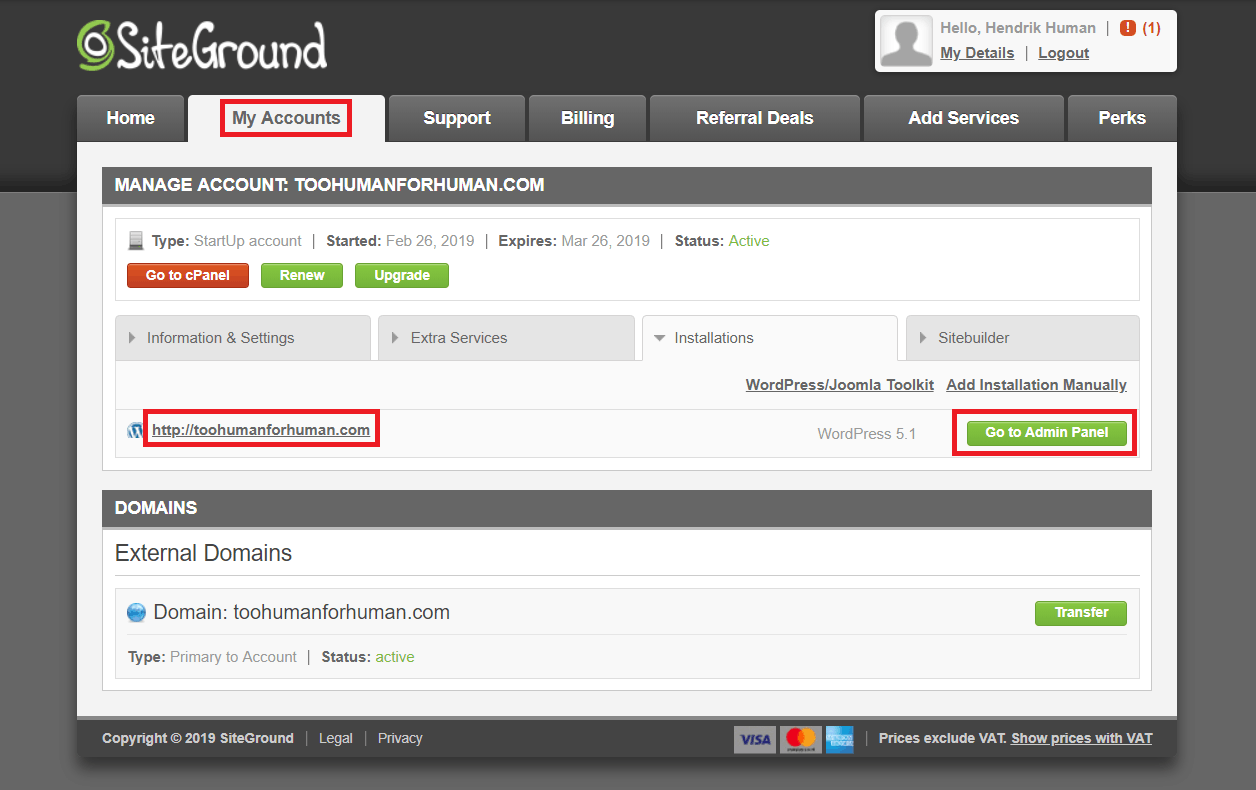 Under ‘Installations’, you’ll see a link to your WordPress website. Click the link to go to your website’s frontend, or click the ‘Go to Admin Panel’ button to go to your WordPress admin dashboard.
The first time you do this, a setup wizard will be waiting for you:
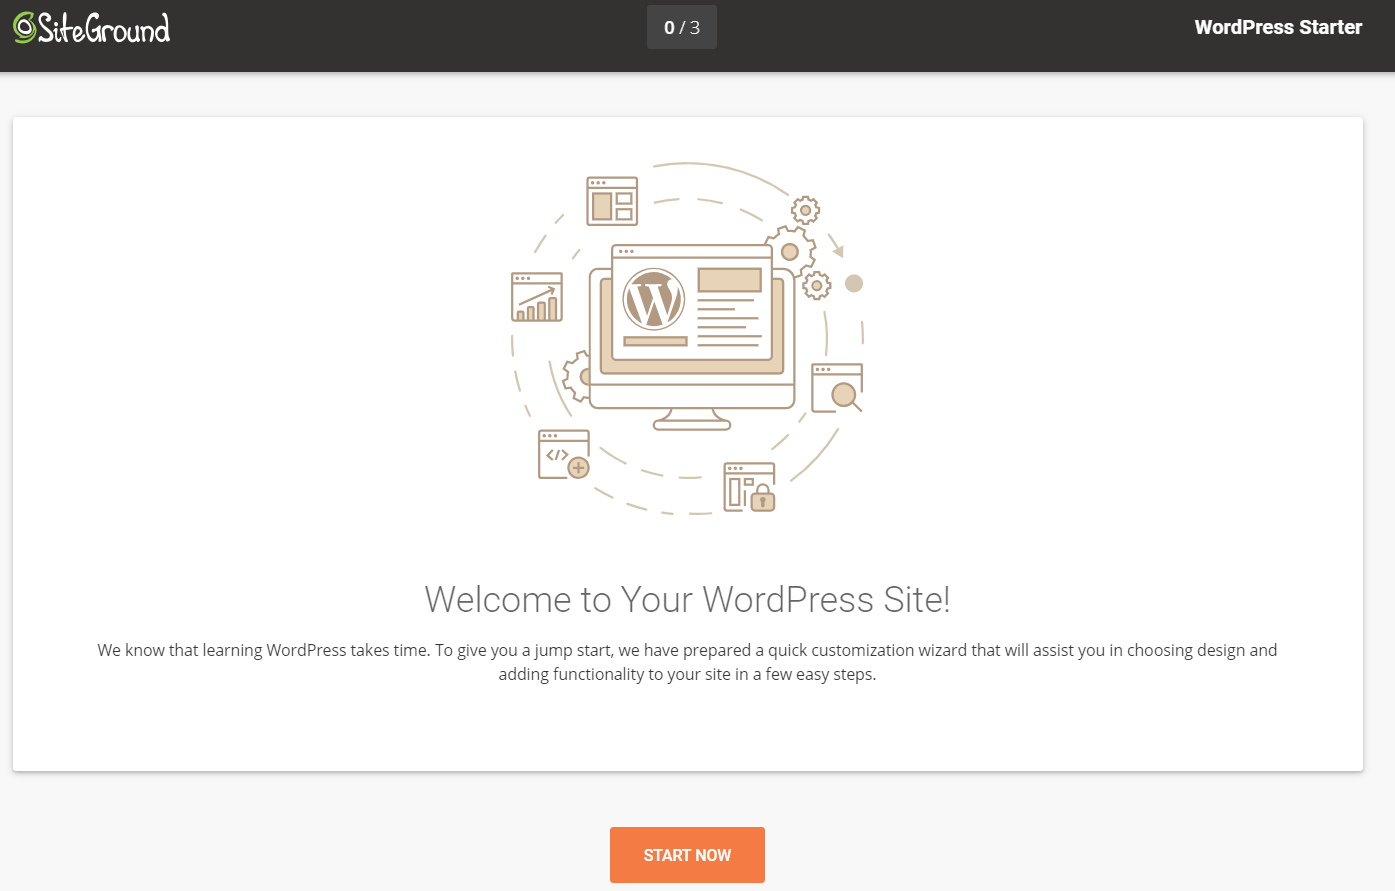 Click ‘Start Now’.
The first step is to choose a theme from a curated list:
 If the template is tied to a certain website building tool, such as Elementor, the plugin will automatically be installed for you so that you get to keep the demo content. If you don’t want the plugin, click the orange ‘Selected’ button.
Just keep in mind that if you choose not to install the plugin, you might get an empty template without any images or text:
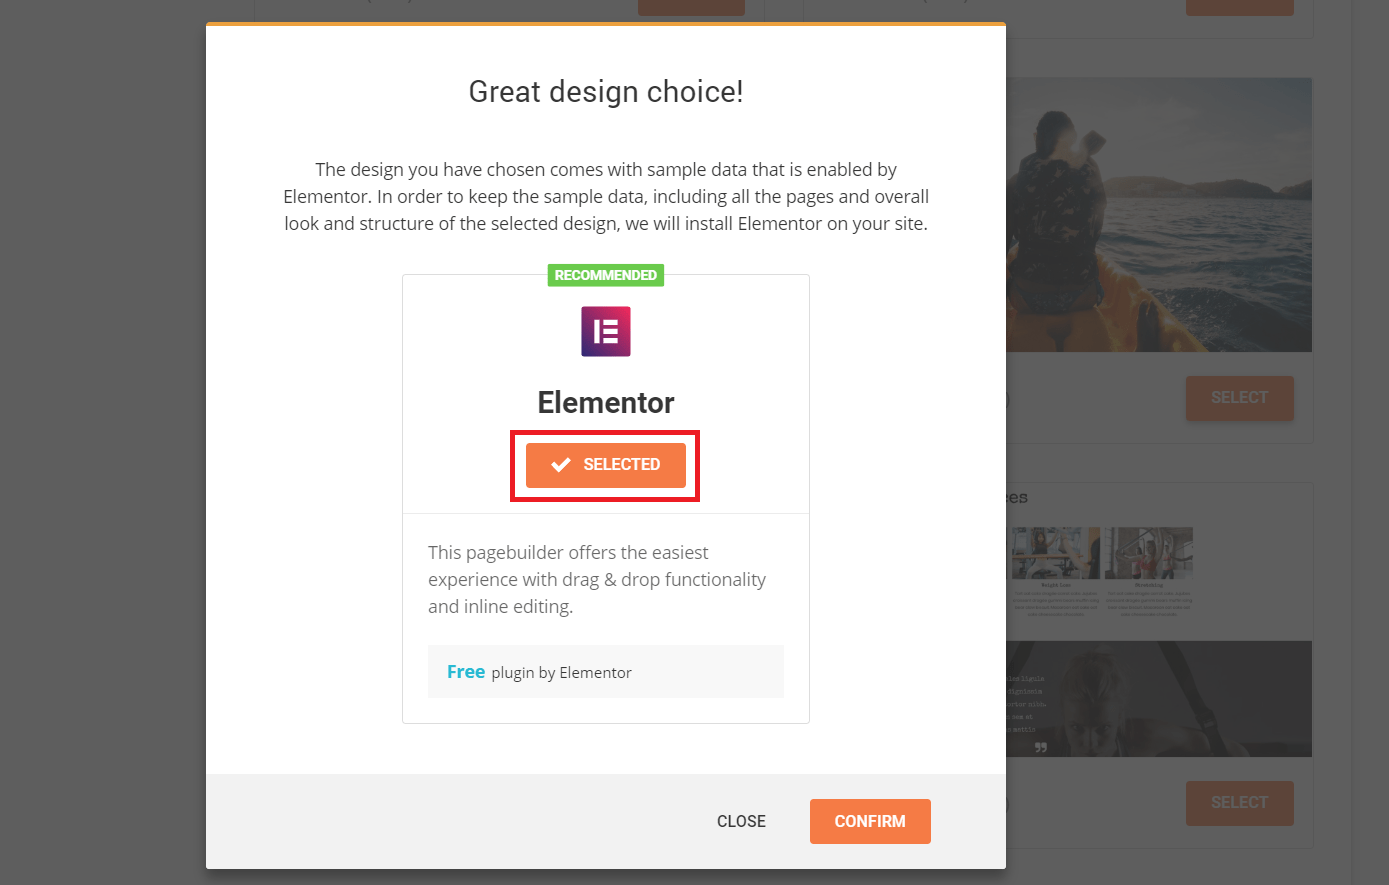 On the next screen, you can choose to automatically install some useful utility plugins on your site. You’ll get the free version of the plugins you select.
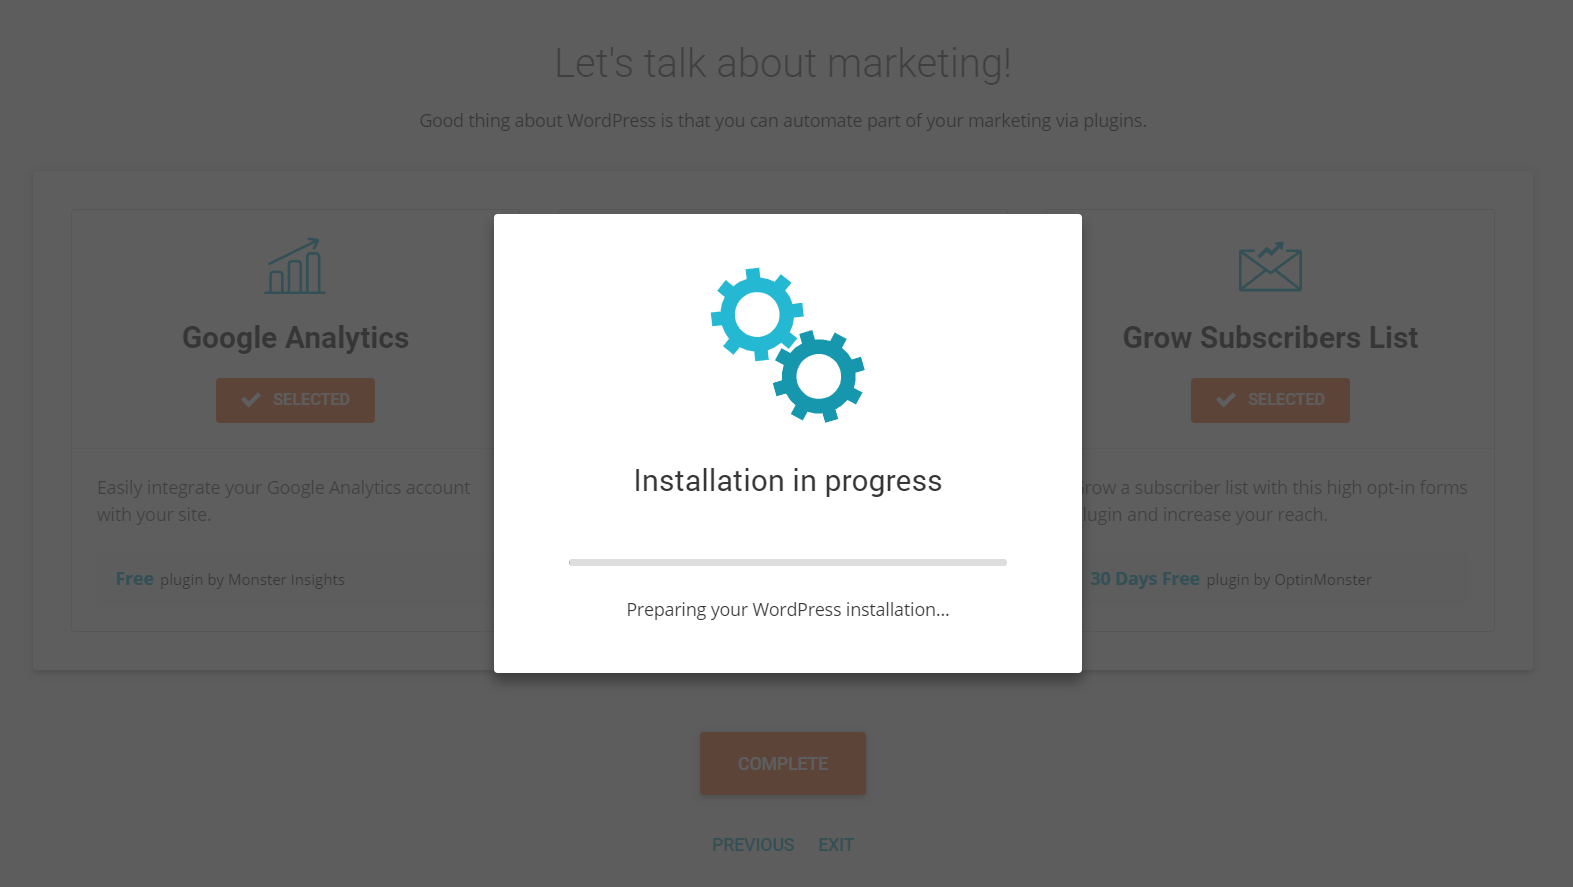
 In the final step, you can choose to automatically install some marketing plugins:
 Once you click ‘Complete’, SiteGround will need to install everything based on your choices. I took all the plugins, just to test it out, and I was impressed that the installation only took about 30 seconds:
 When it’s done, it will show the message below and you can click either ‘View Site’ to see what it looks like as a visitor or ‘Go To Dashboard’ to go to the admin backend:
 If you’ve used WordPress before, you’ll notice that it looks a bit different than your standard dashboard. That’s because of the SG Optimizer plugin, that connects your WordPress website with SiteGround’s WordPress management and optimization features.
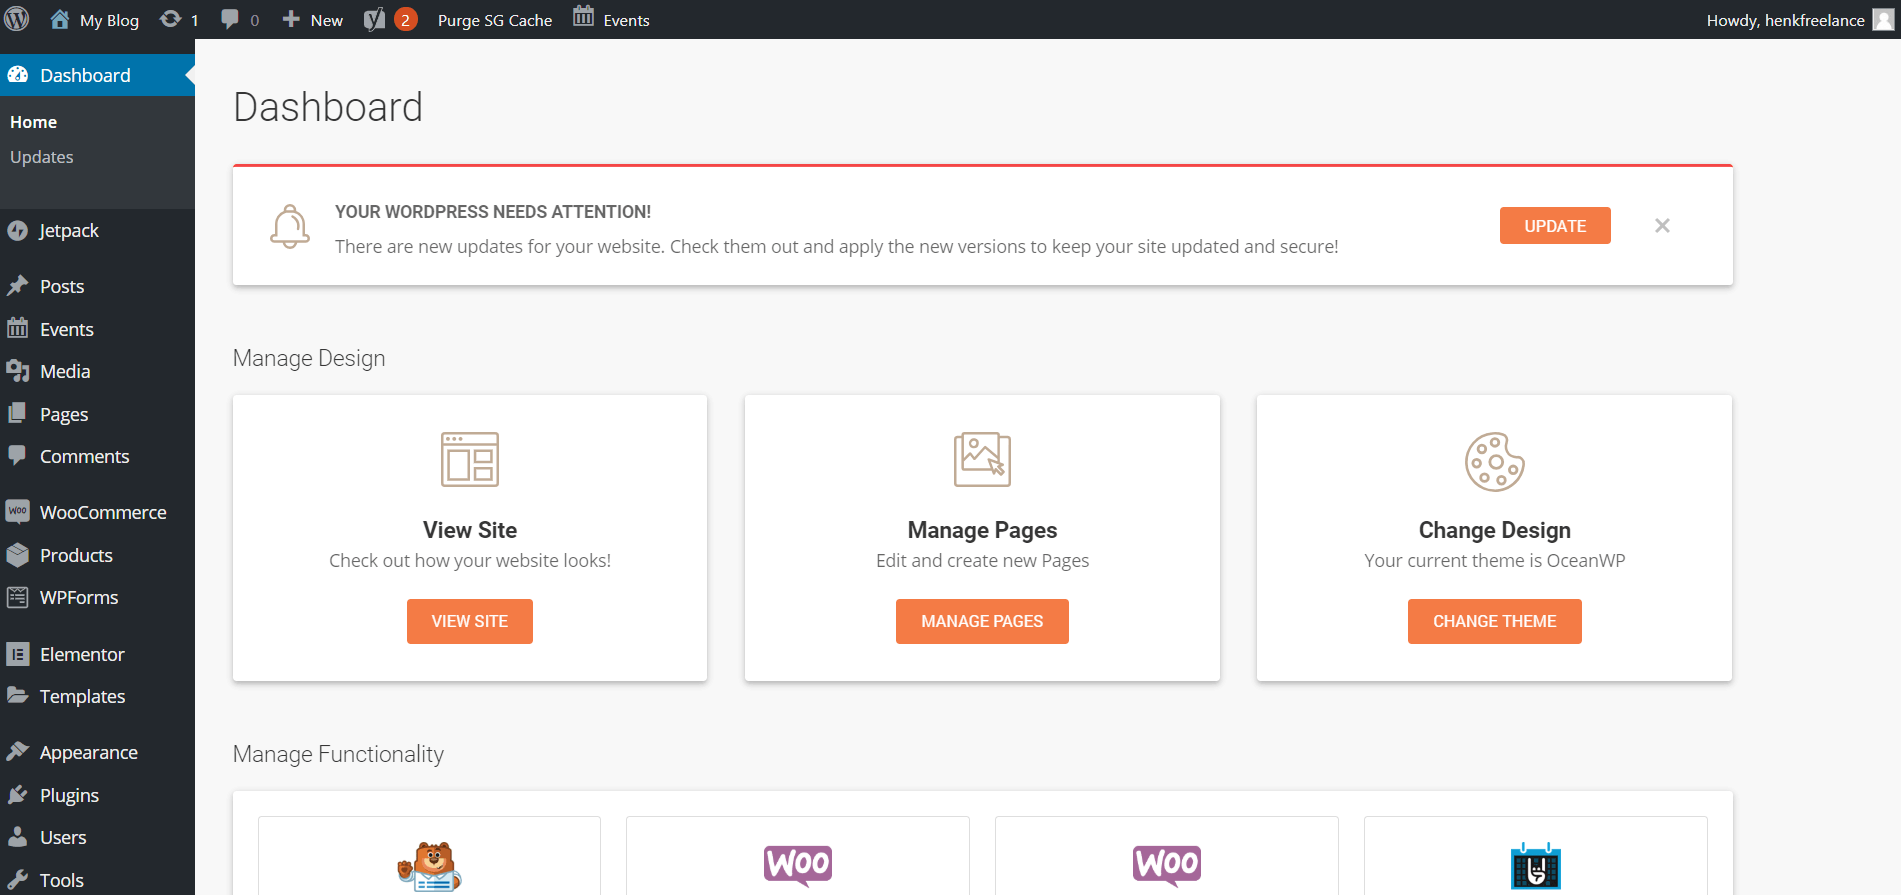 Note that SiteGround will automatically create and publish two posts on your WordPress website:
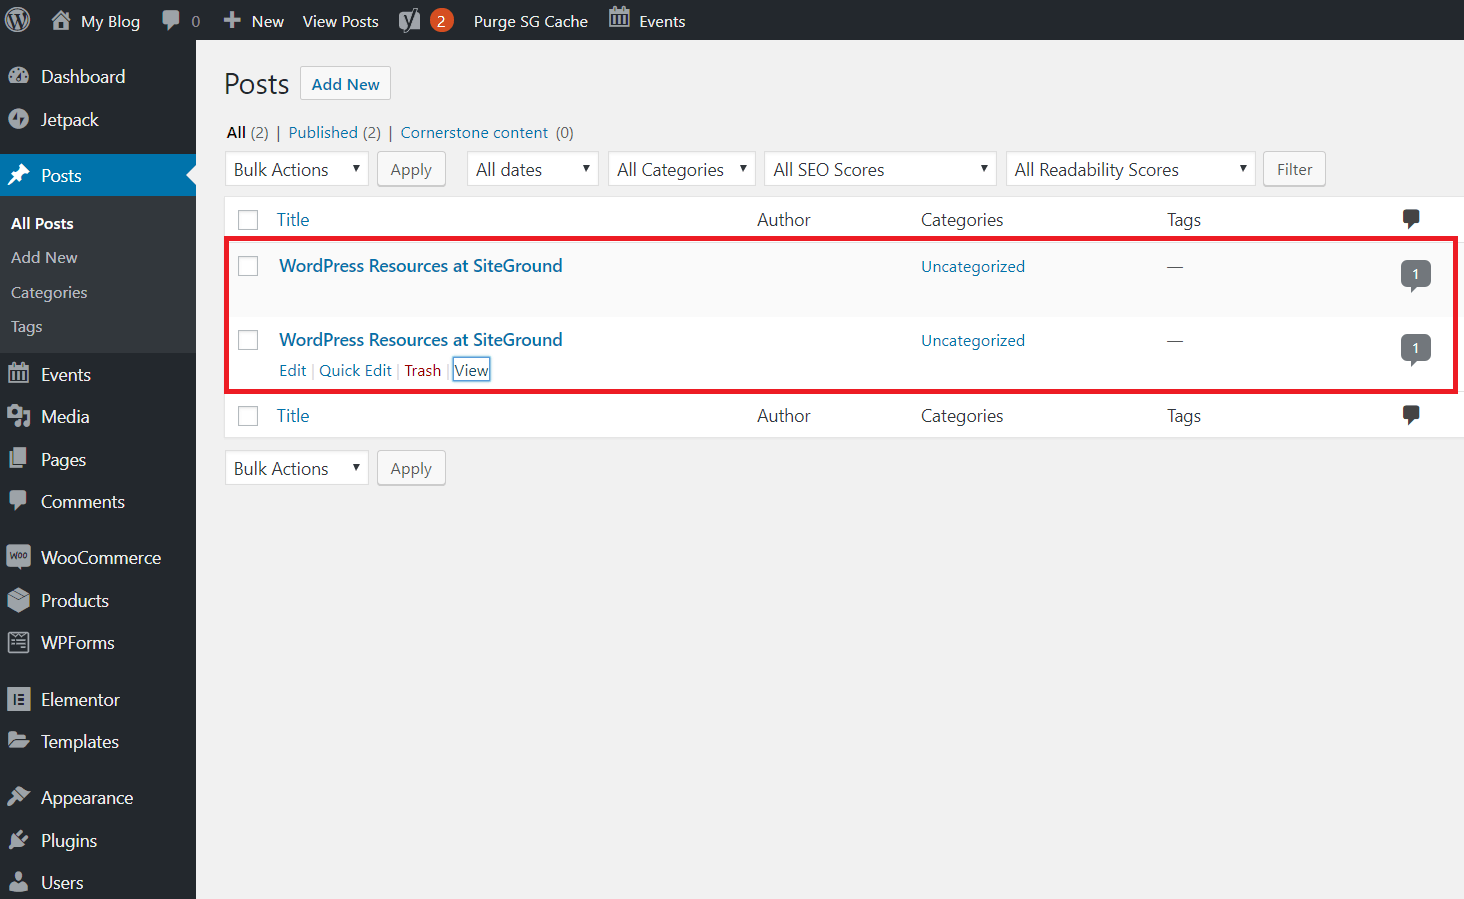 Although this may seem harmless, these posts will be live on your website, meaning anyone visiting your site will find them in your blog.
I’m not a big fan of this practice. You don’t want these promotional posts just hanging around on your blog, for obvious reasons. Also, it may affect your search engine ranking, as the pages contain exact match anchor text. Be sure to delete these two pages as soon as you can.
Connecting Your Domain on SiteGround
You’ll find information on how to point your nameservers to SiteGround in one of the onboarding emails: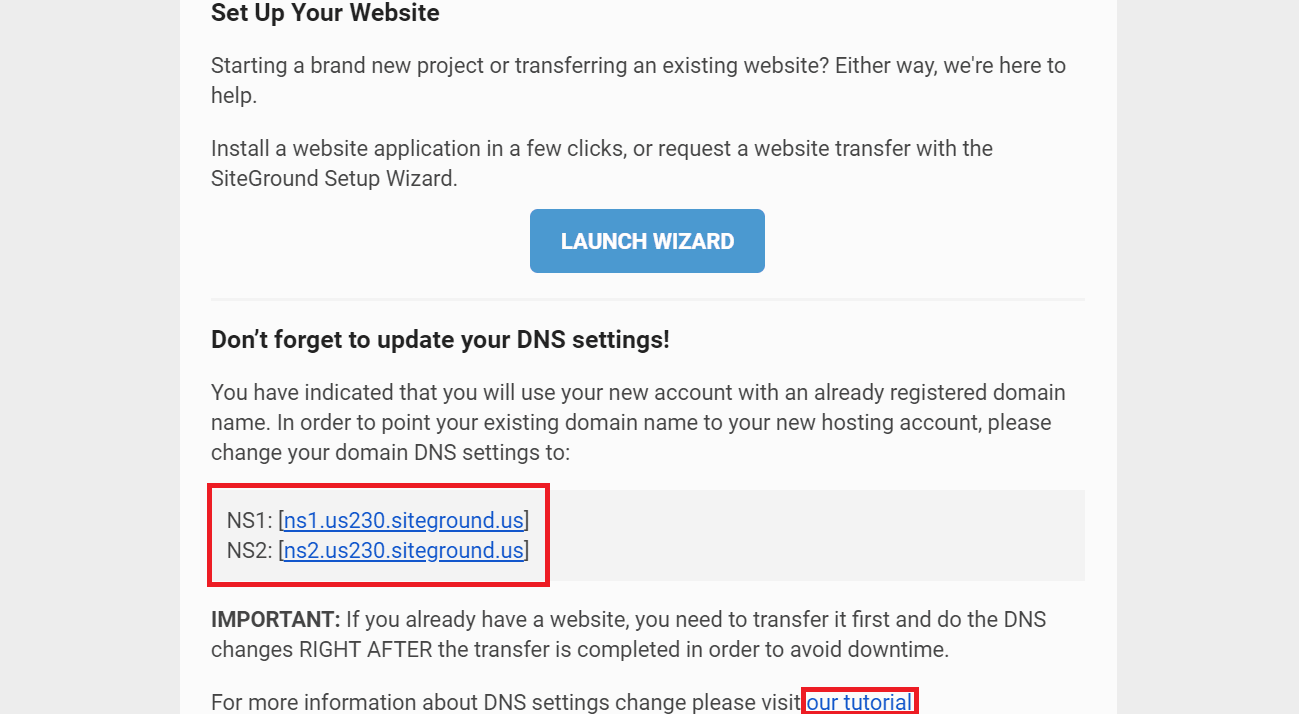 There’s also a link to a tutorial, but it mostly covers how to handle the email associated with your domain. SiteGround doesn’t provide any specific tutorials on how to change your DNS settings with specific registrars, such as GoDaddy.
Documentation aside, it’s a pretty convenient process. All you have to do is change your nameservers at your registrar to the nameservers provided by SiteGround in the email. They take care of the rest.
SiteGround also makes it very easy to transfer your domain to their servers. Also, the documentation is much easier to follow.
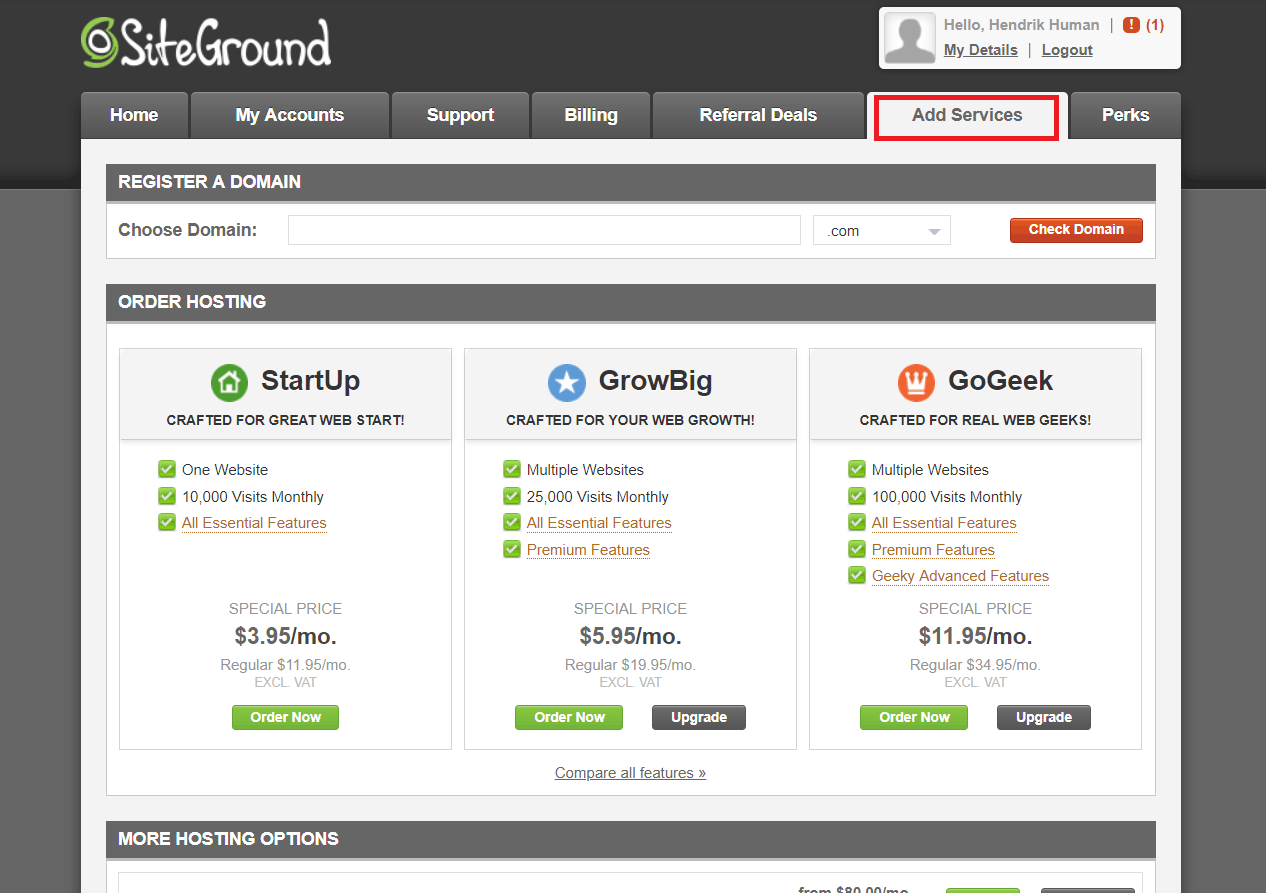
Go to the ‘Services’ tab in your dashboard:
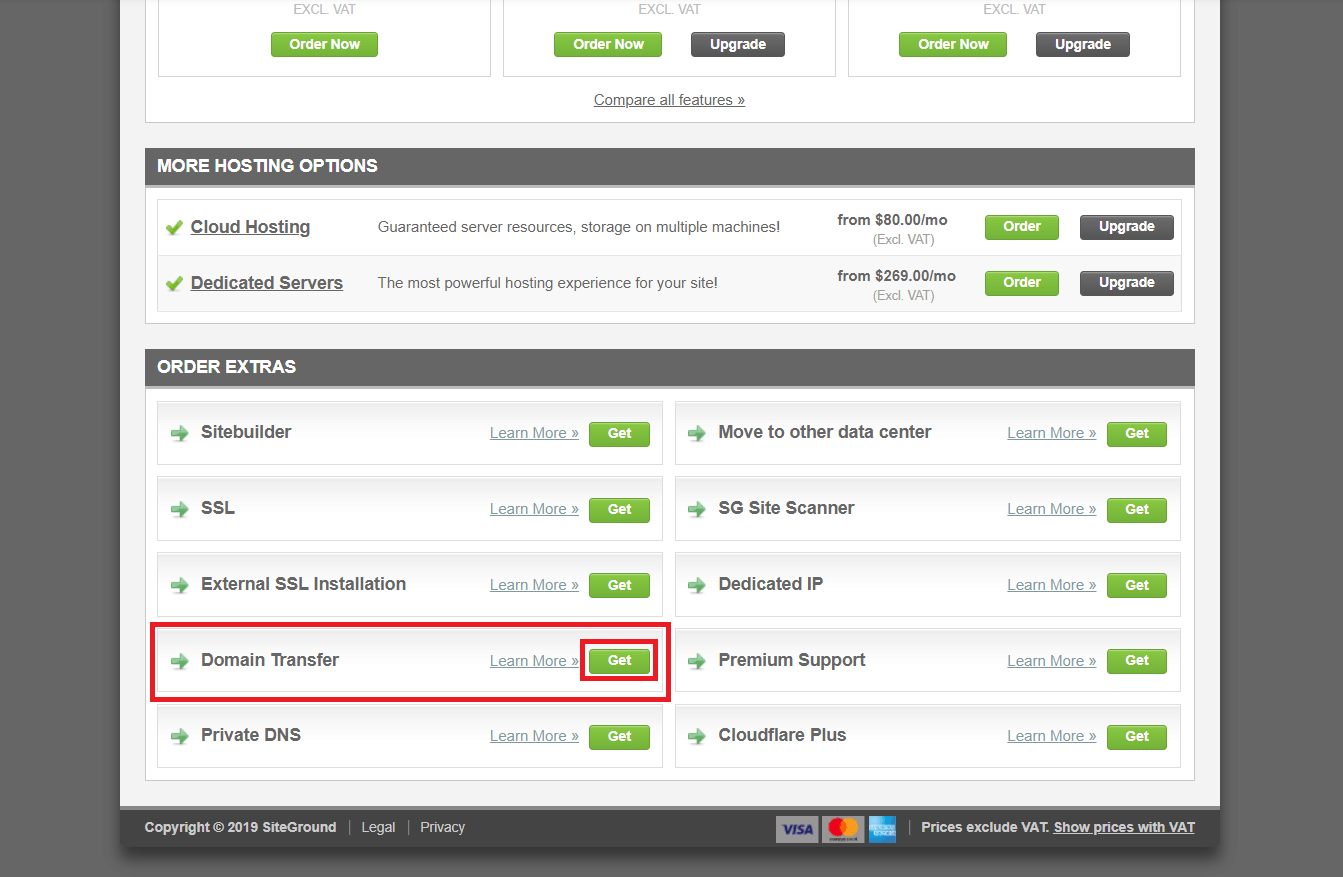
 Then, scroll down to the ‘Order Extras’ section and click ‘Get’ next to ‘Domain Transfer’:
 This will take you to the Domain Transfer page below. Note that transferring your domain to SiteGround does come with a one-time fee if you’re on a StartUp plan. However, renewing your domain will be free for the following year and you’ll get free domain privacy for a year as well:
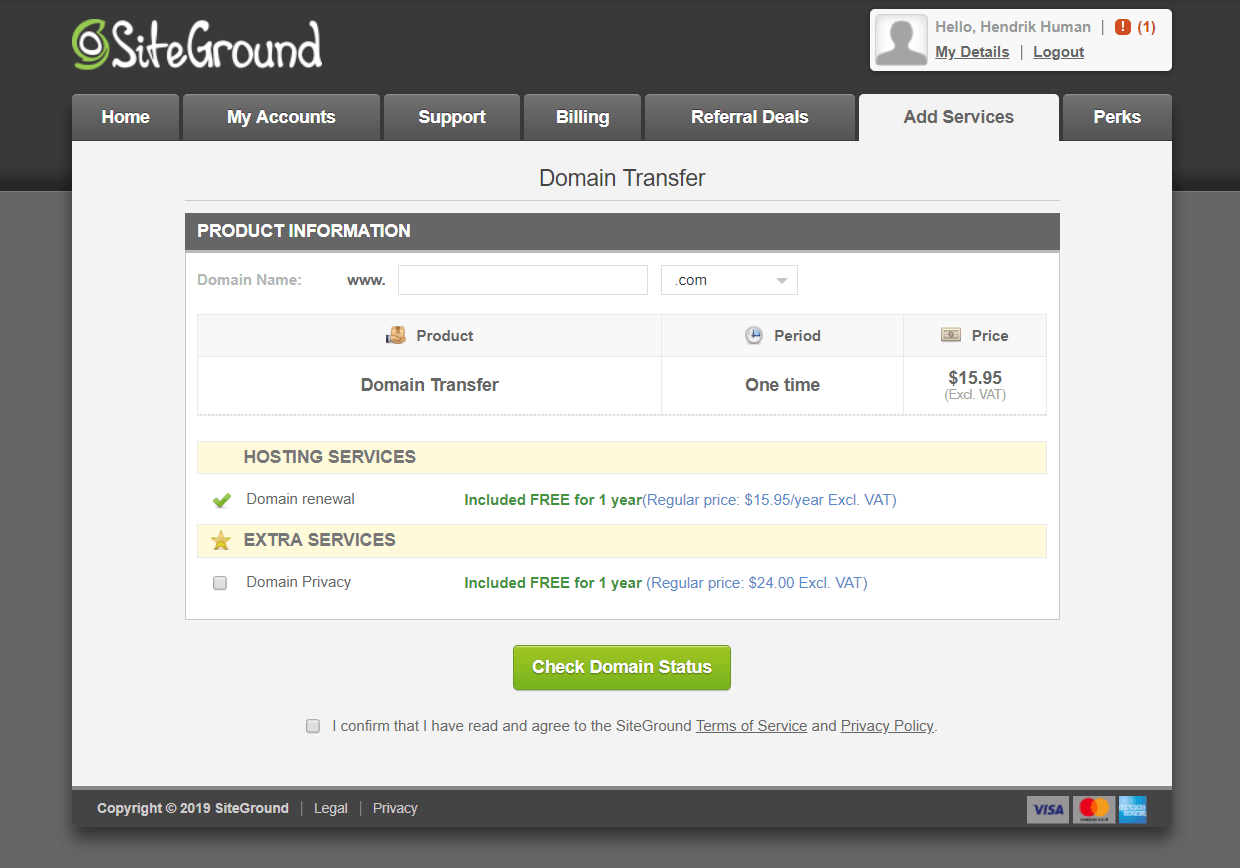 When you click ‘Check Domain Status’, SiteGround will start to transfer your domain. You’ll be informed of any change in status.
Afterwards, all you’ll have to do is enter the EPP code associated with your domain (this is provided by your registrar) in order to verify your ownership of the domain. If you’re not sure how to do this, it’s also covered in the documentation.
Setting Up a SSL Certificate and CDN
SiteGround doesn’t automatically activate your SSL certificate or CDN. You’ll need to set up both manually in via cPanel. The good news is that SiteGround’s support staff will set up your SSL certificate and make sure the two services are working well in tandem for you. The bad news is, it’s quite a lengthy process, and doing everything with the help of a support agent still took me about 30 minutes. First, to access your cPanel dashboard, you’ll need to go to the ‘My Accounts’ tab and then click on the ‘Go To cPanel’ button: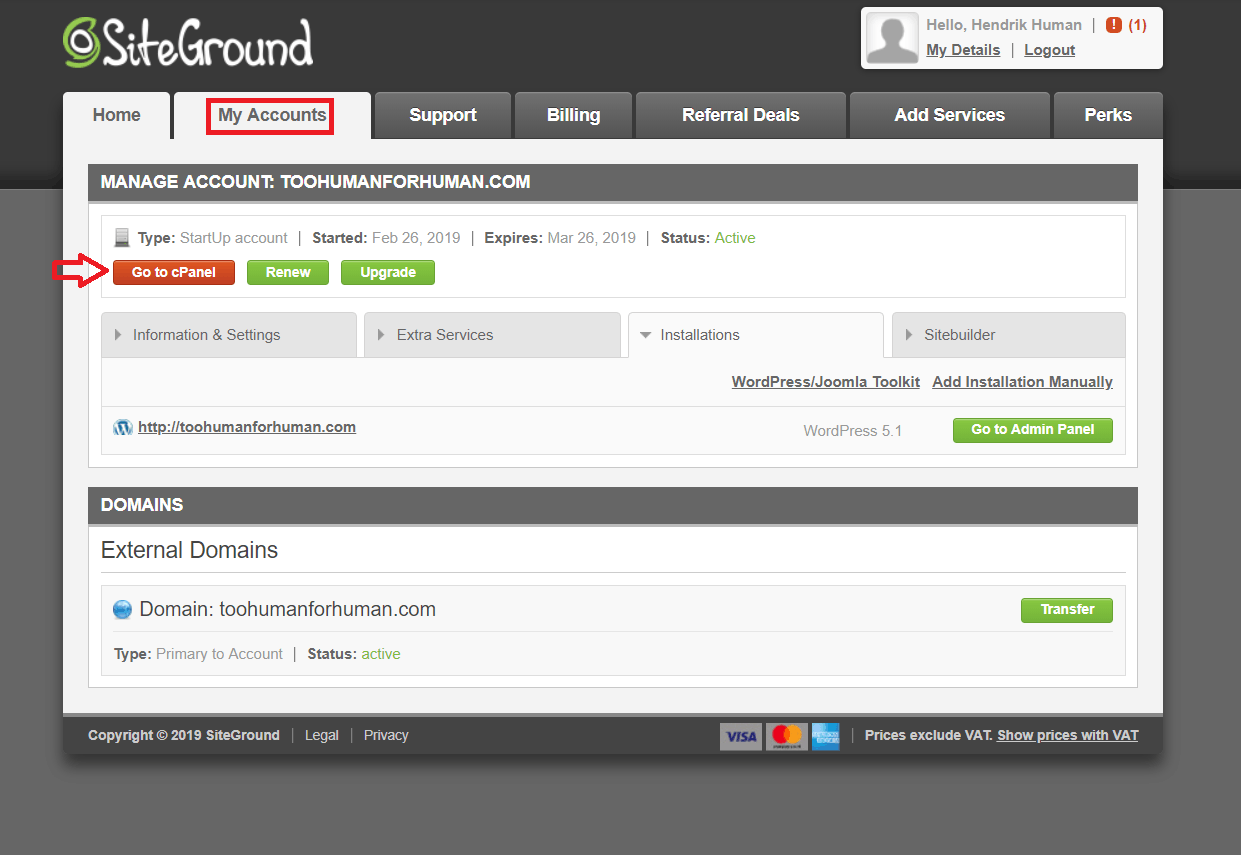 You will get this popup message asking you whether you want to access cPanel securely or not. It doesn’t matter too much which option you pick, but it’s best practice to access it securely:
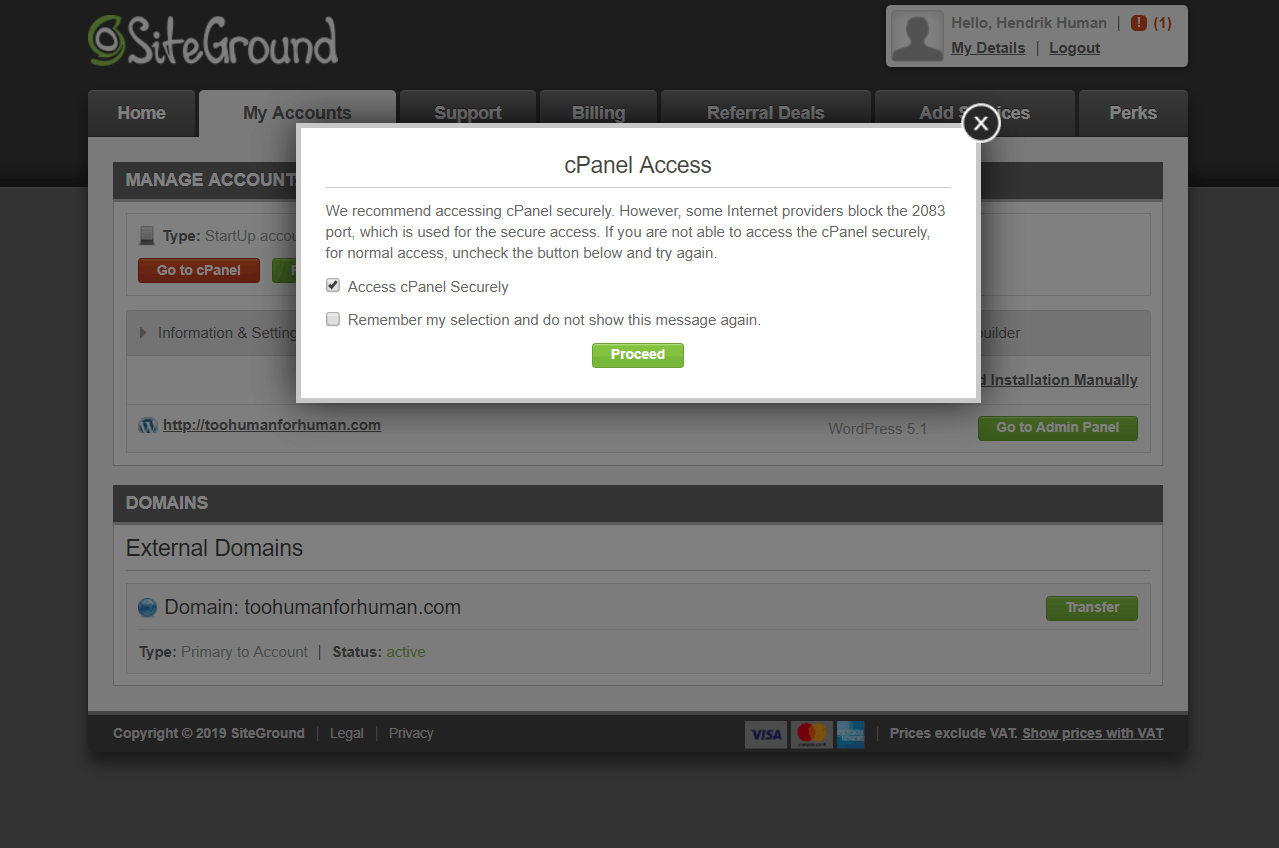 Once you click ‘Proceed’, cPanel will open up in your dashboard.
To access CloudFlare, scroll down to the ‘Site Improvement Tools’ section and click on the CloudFlare icon:
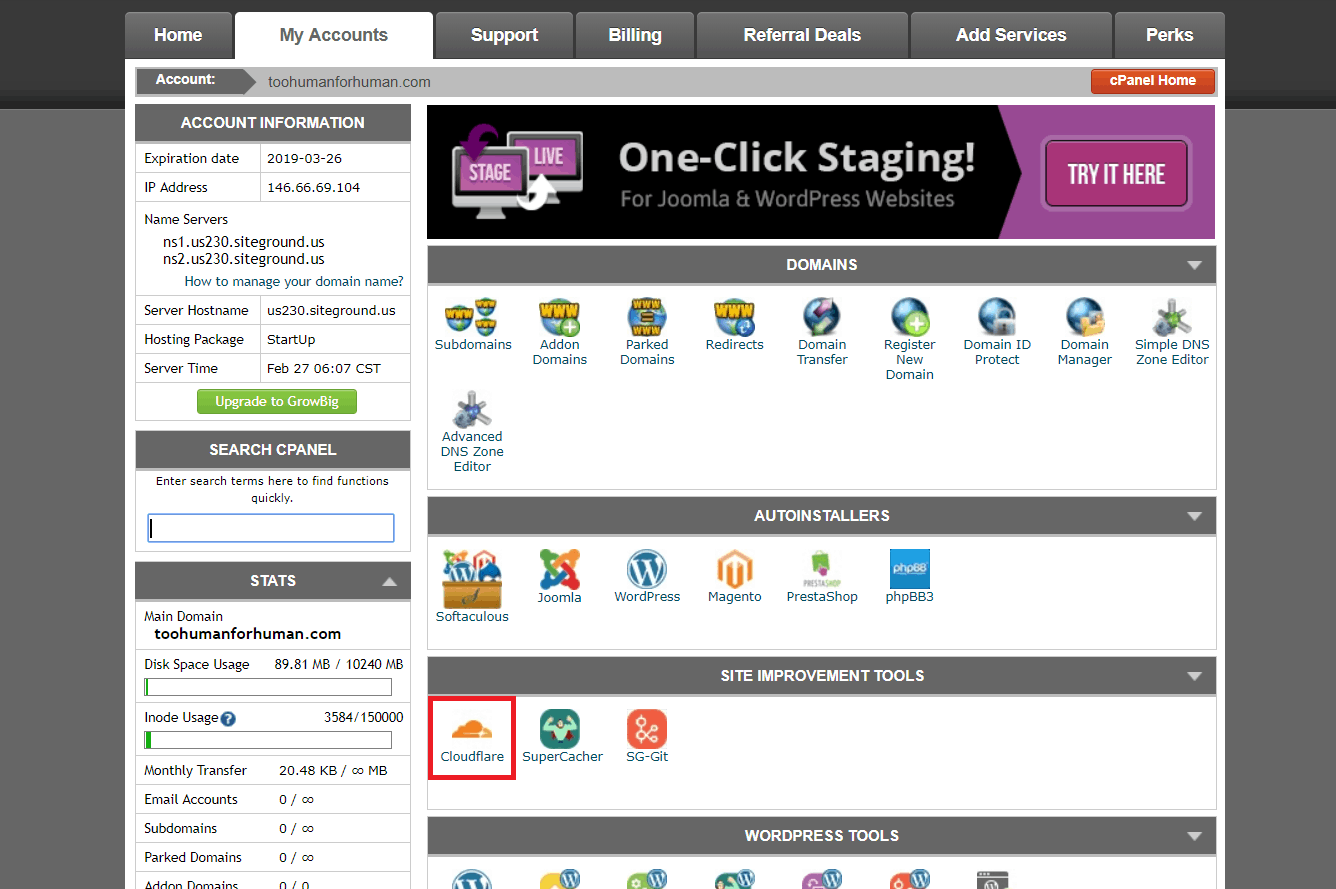 That will open up your CloudFlare management panel:
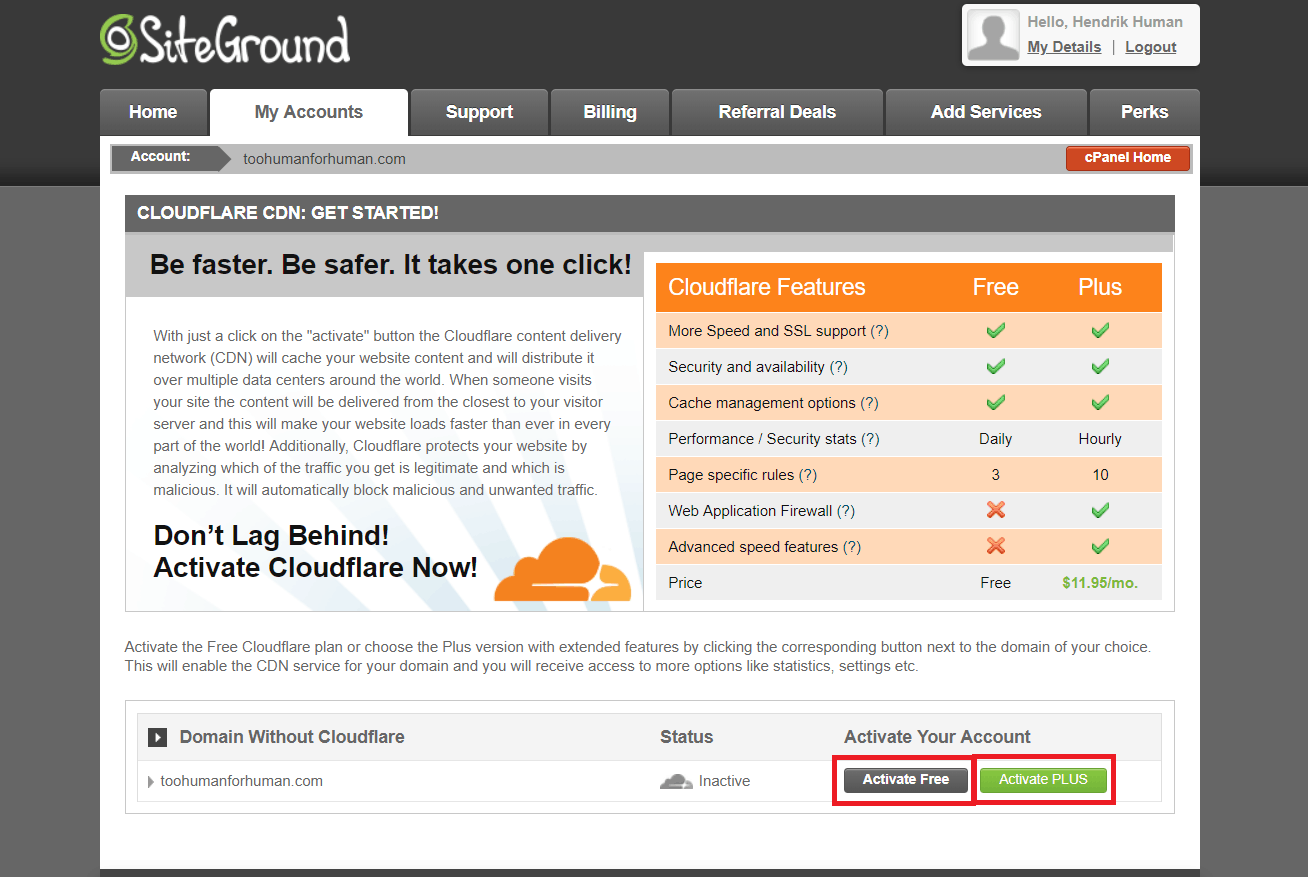 If you click the ‘Activate PLUS’ button, you can purchase a premium CloudFlare plan:
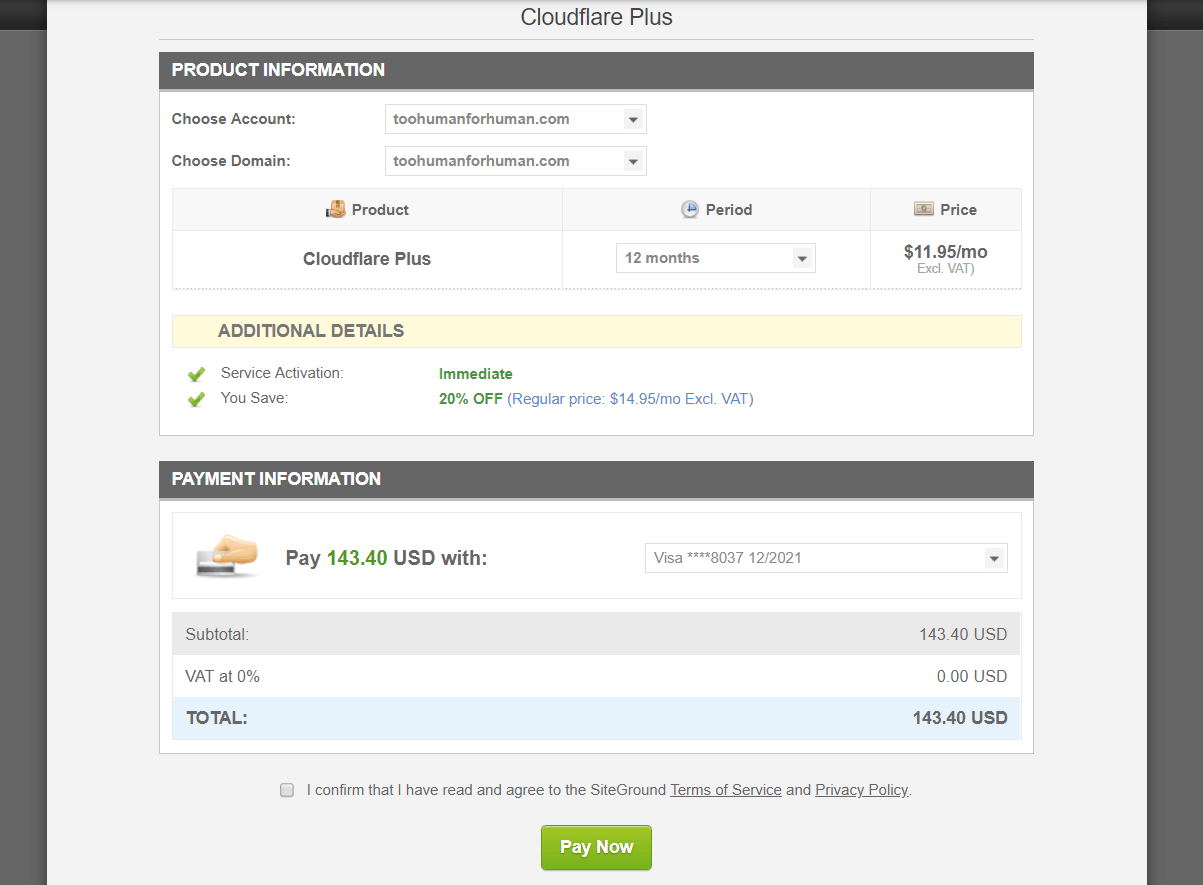 The ‘Activate Free’ button will activate the free version included with your SiteGround hosting. In the popup window, you’ll need to provide an email address, and then you can just click ‘Proceed’:
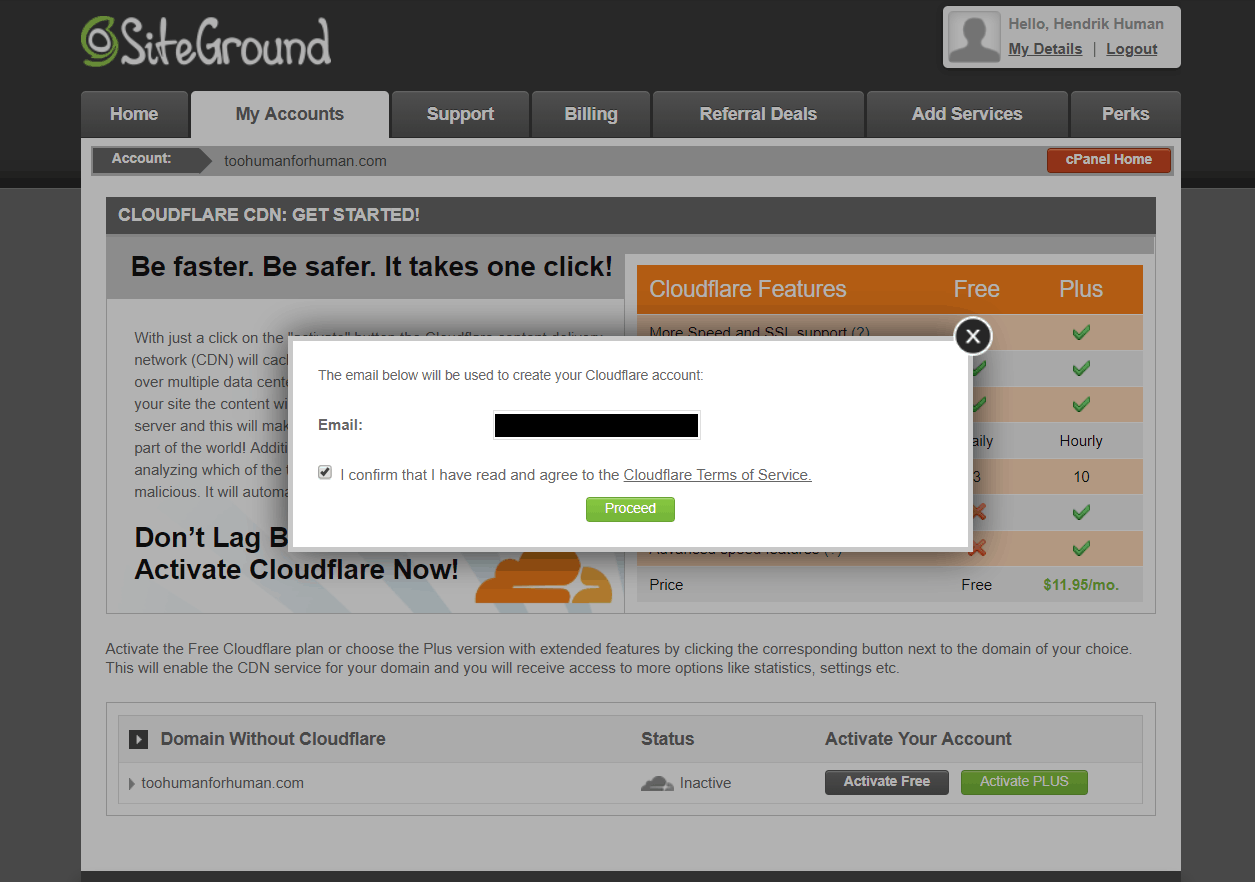 Another box will pop up warning you that your website must be accessible using ‘www’ in order for it to work. Don’t worry about that – even if it’s not, CloudFlare and SiteGround will automatically configure it correctly for you:
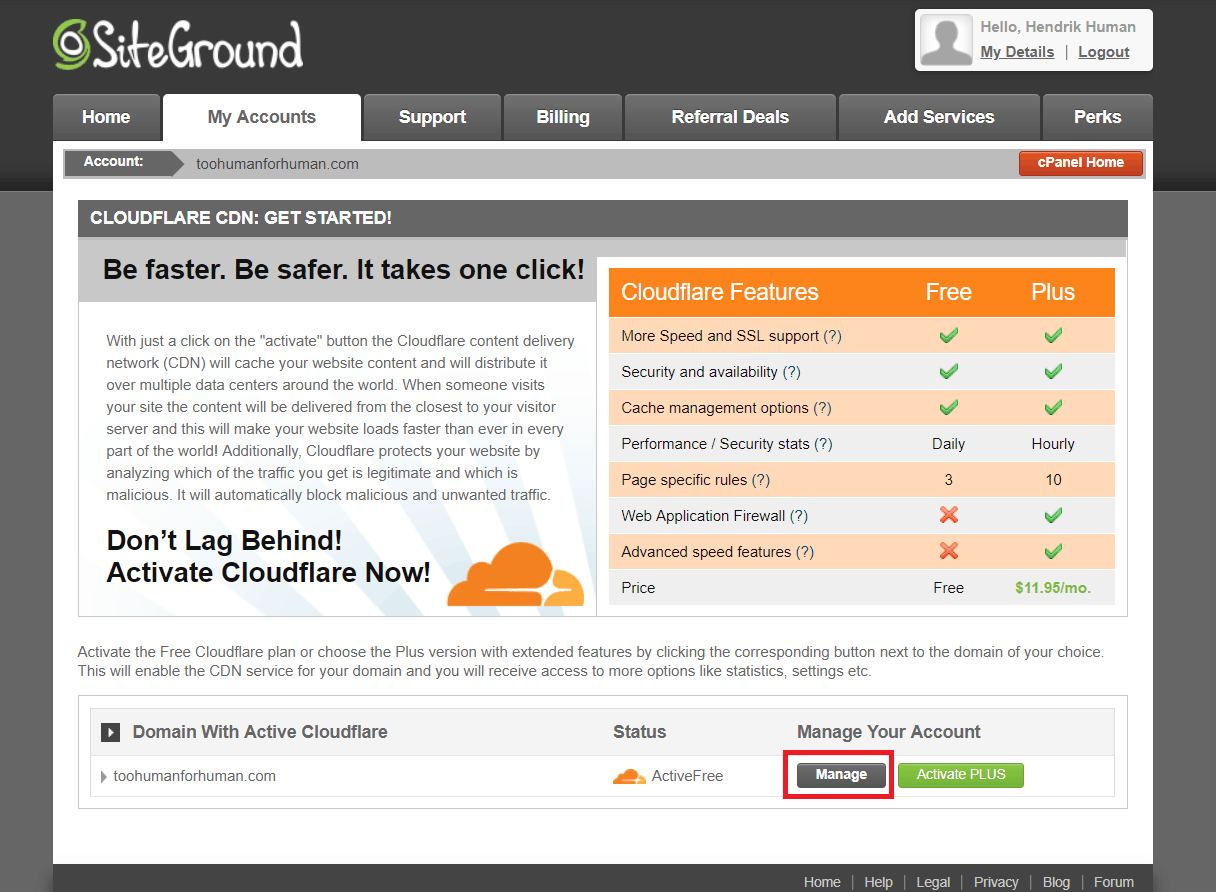
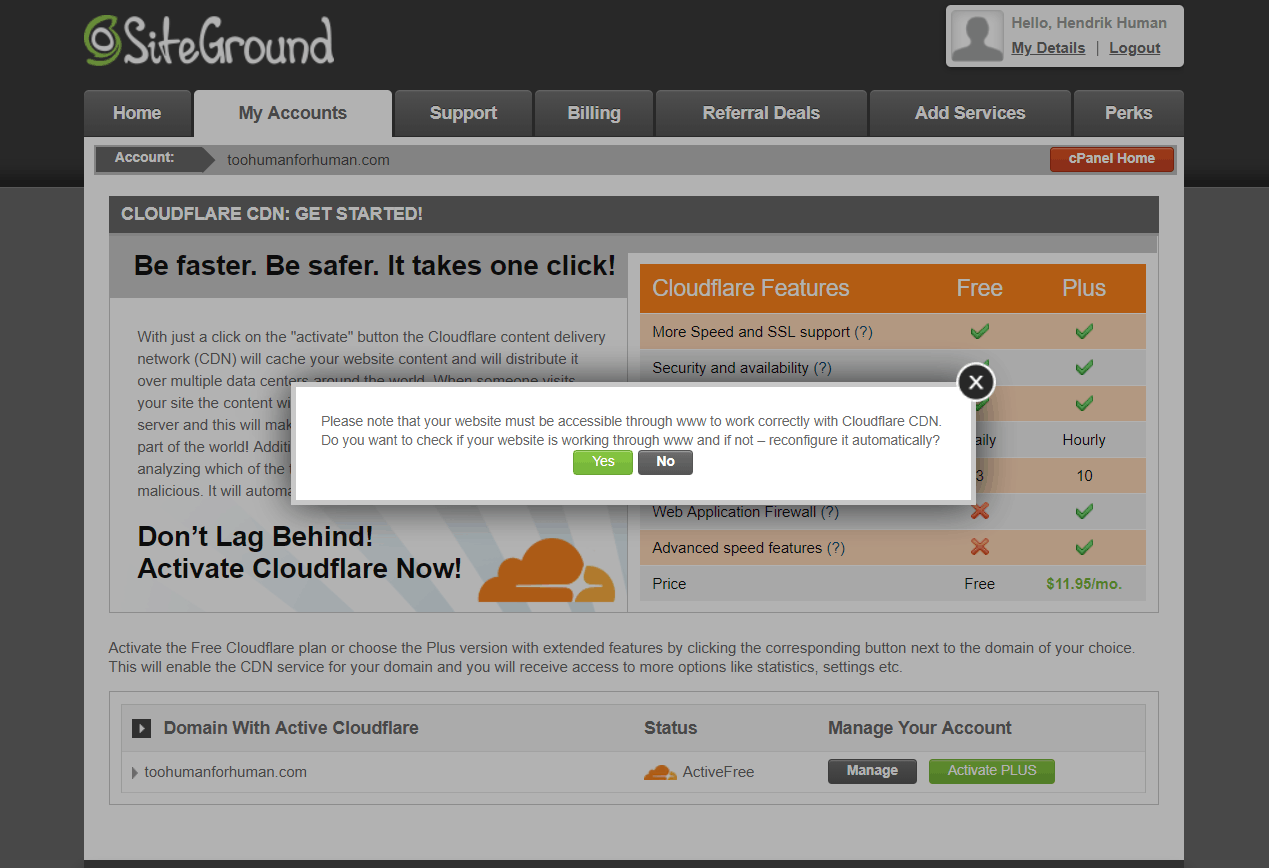 If everything went well, CloudFlare will now be active and the option to activate it will have changed to ‘Manage’:
 You’ll also receive the following emails:
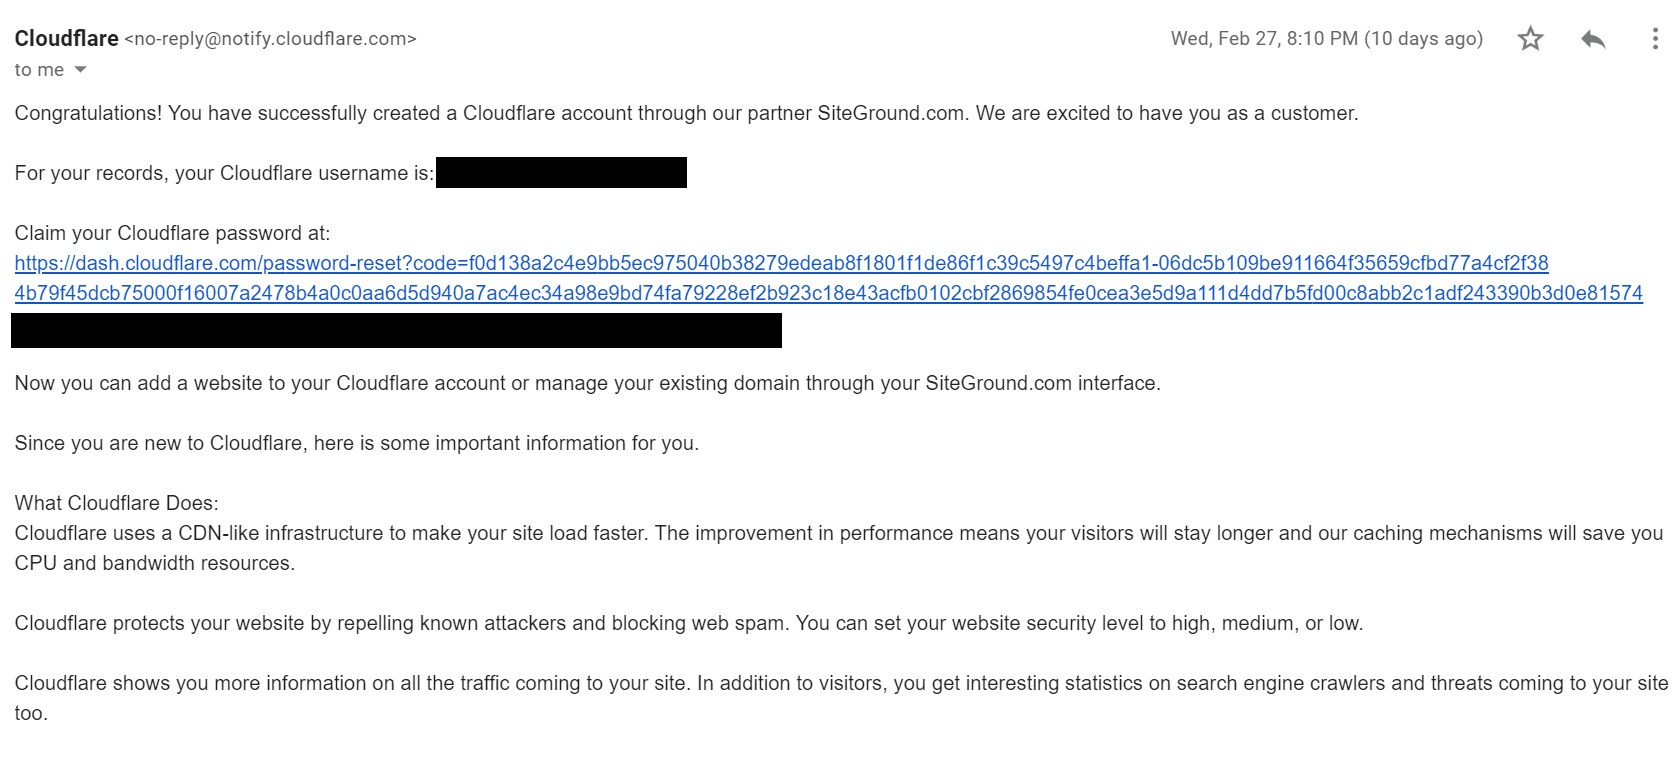
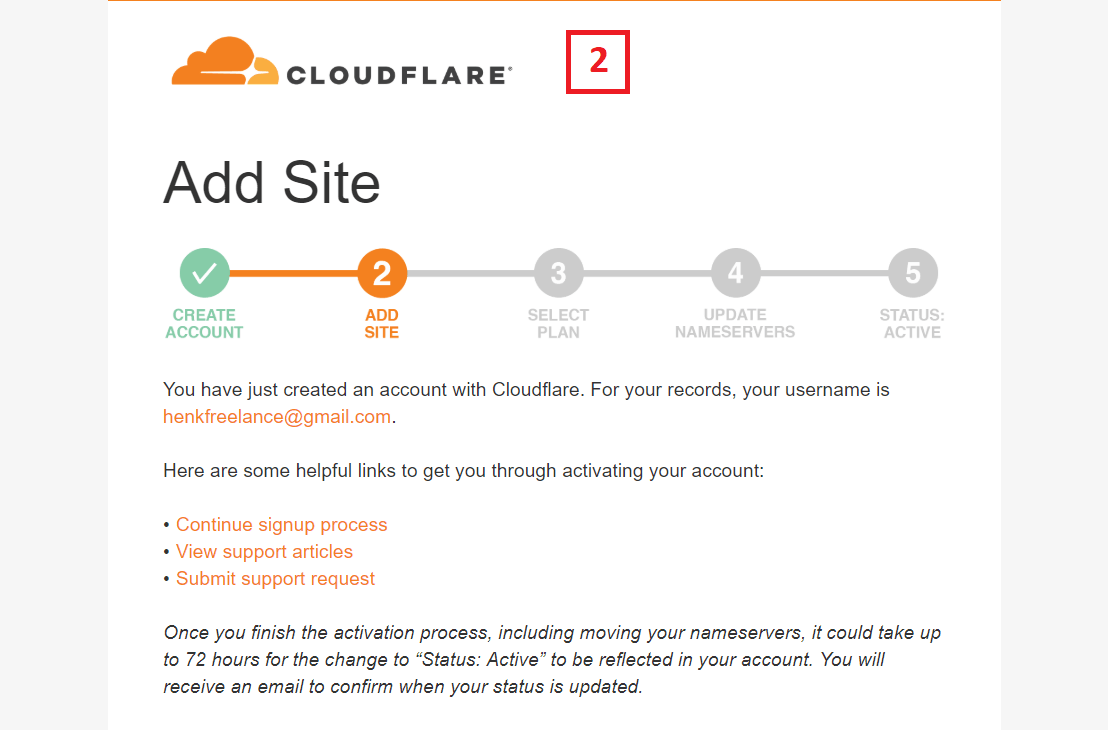
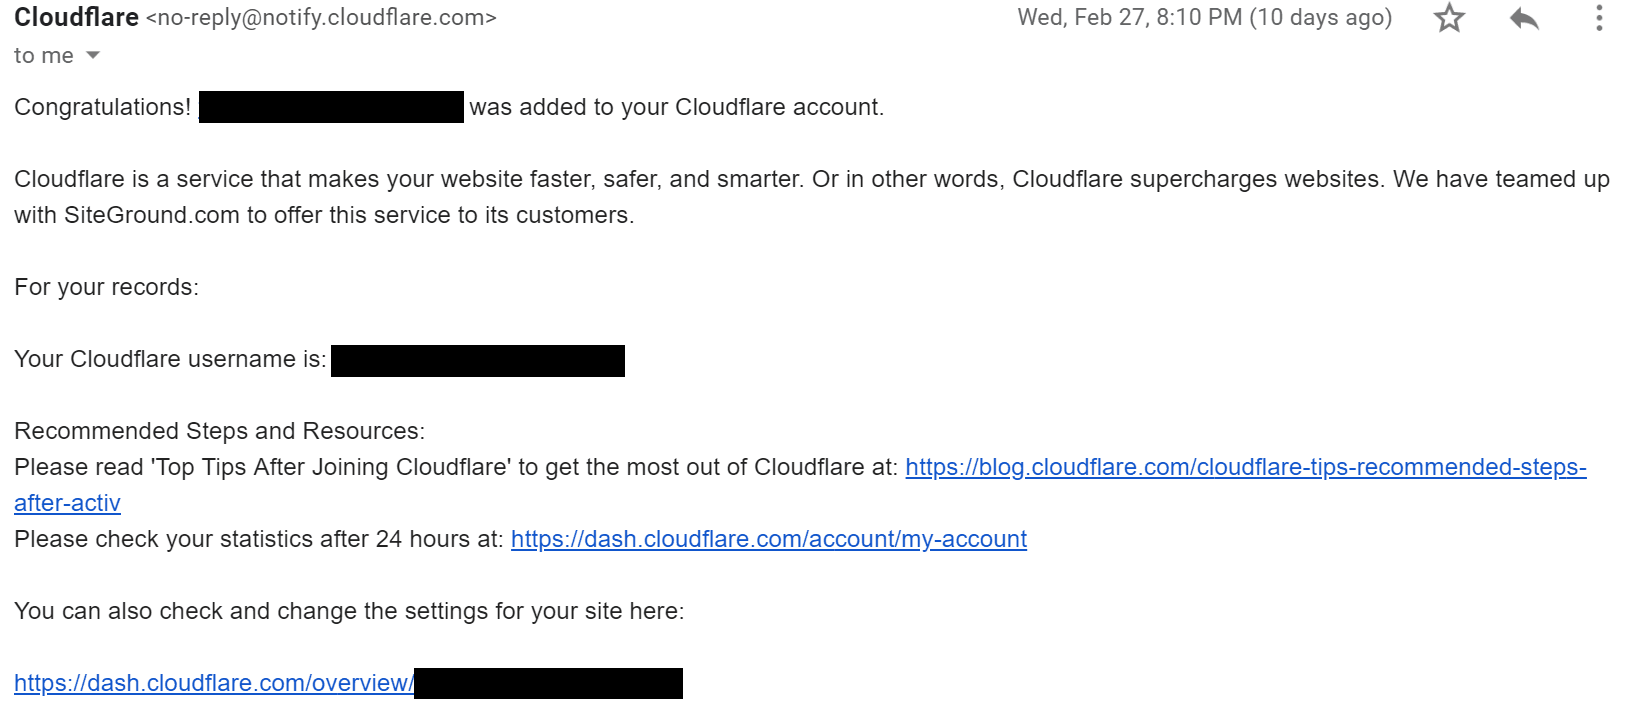 These welcome emails will allow you to set a password for your CloudFlare account.
You should keep in mind that if you now go activate your SSL, your website may not work until the SSL certificate has finished propagating. I was warned by my support agent that this may take up to a day, but it took less than ten minutes.
If it does take longer for you, you can pause your CloudFlare CDN by logging into your account on the CloudFlare website.
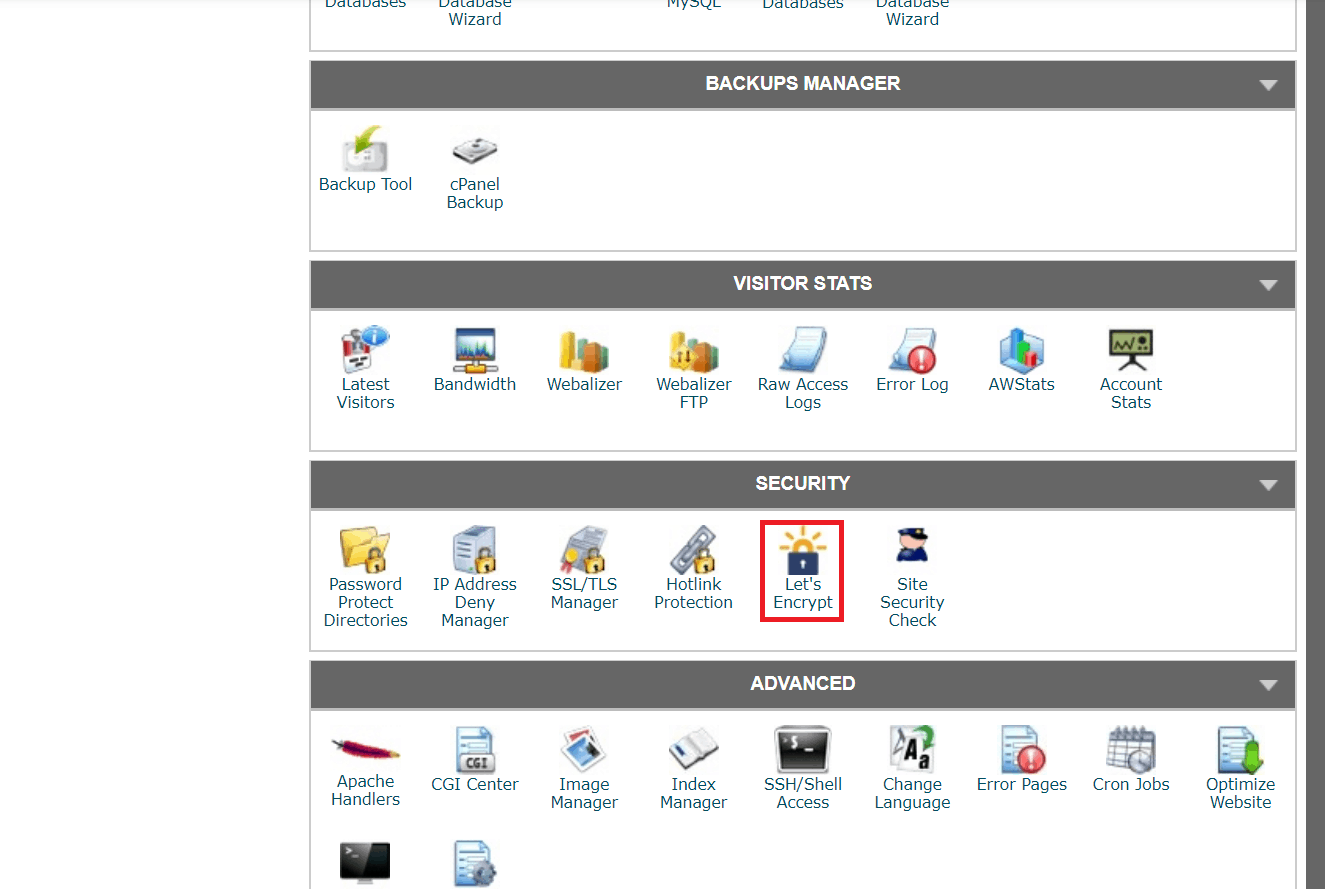
Even though a support agent installed my SSL certificate for me, I’ll show you how to do it. In your cPanel look for the ‘Let’s Encrypt’ icon under ‘Security’:
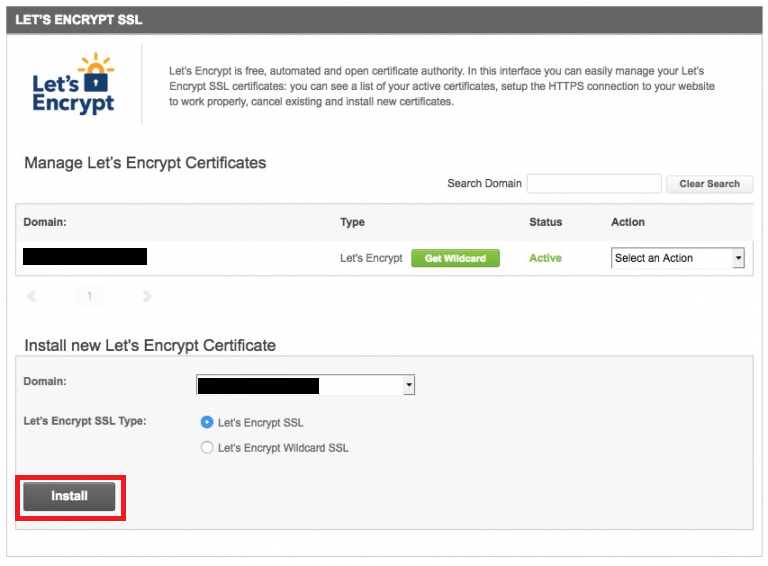
 Make sure the right domain is selected in the drop down, and then click the big ‘Install’ button:
 You now have a fully-functional WordPress website, complete with a CDN and secure HTTPS access.


![8 Best Enterprise WordPress Hosting (Scalable & Reliable) [2025]](https://dt2sdf0db8zob.cloudfront.net/wp-content/uploads/2024/11/Best-Enterprise-WordPress-Hosting-1.png)
![8 Best Enterprise WordPress Hosting (Scalable & Reliable) [2025]](https://dt2sdf0db8zob.cloudfront.net/wp-content/uploads/2023/05/Caitlin-Greyling-150x150.jpg)


