Quick Guide: How To Cancel SiteGround and Get a Full Refund
- Log in to your SiteGround account dashboard.
- Click Services. In the top menu bar, you should see a link to Services. Click on that to be brought to a page with all of your active services.
- Click the three little dots to the right of your hosting plan. This should bring up a context menu.
- Click Cancel. Once you’ve clicked the three dots to pull up the context menu, click the Cancel option.
- Choose when to cancel your service. Before you can continue, you’ll be asked when you want your cancellation to take effect: immediately, or at the time of your plan’s expiration.
- Confirm that your websites will be deleted. If you have any websites up and running, you’ll need to confirm that you understand they’ll be deleted. Click the checkbox, then click Continue.
- Provide a reason. You’re almost at the finish line, but you need to provide a cancellation reason. Choose a reason and then click the Continue button.
- Click Confirm. You’ll be shown a quick screen confirming your cancellation along with the refund you can expect. If you approve, click Confirm.
My Experience: Here’s How I Cancelled My SiteGround Account
Canceling my SiteGround account was honestly even quicker than when I signed up initially. I managed to complete the entire process in about five minutes, and now I want to share the steps with you. The first step is to log in to your SiteGround user dashboard.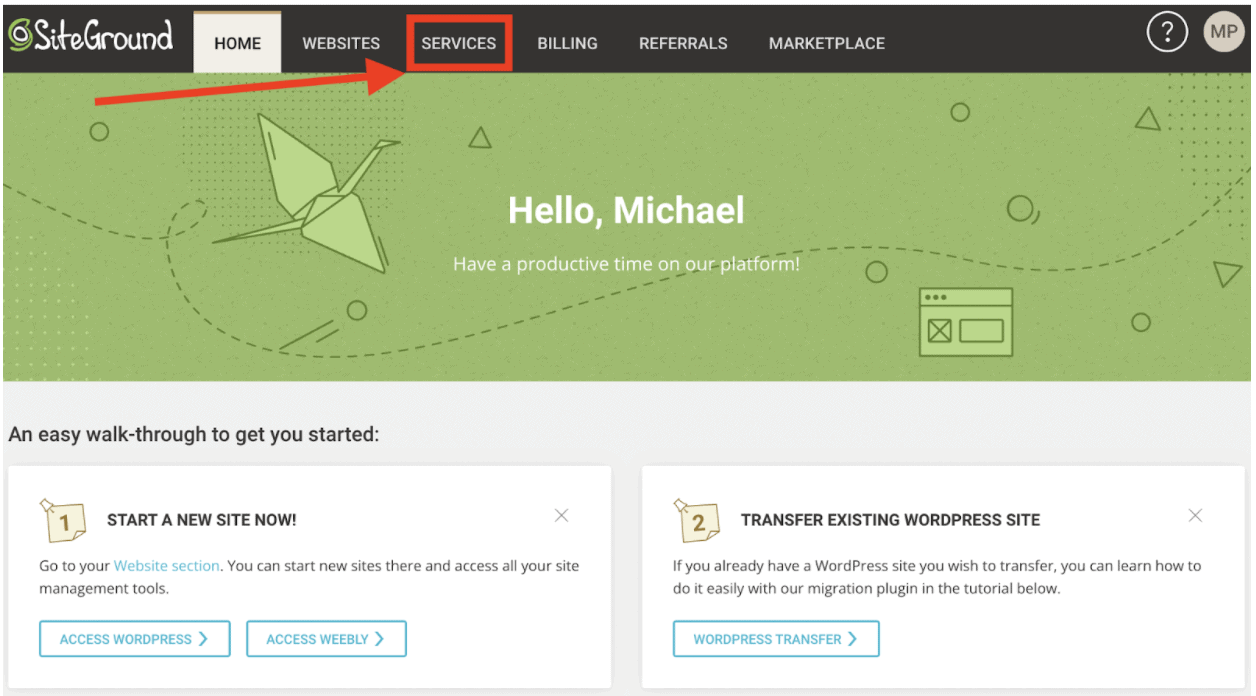 Then, click on Services.
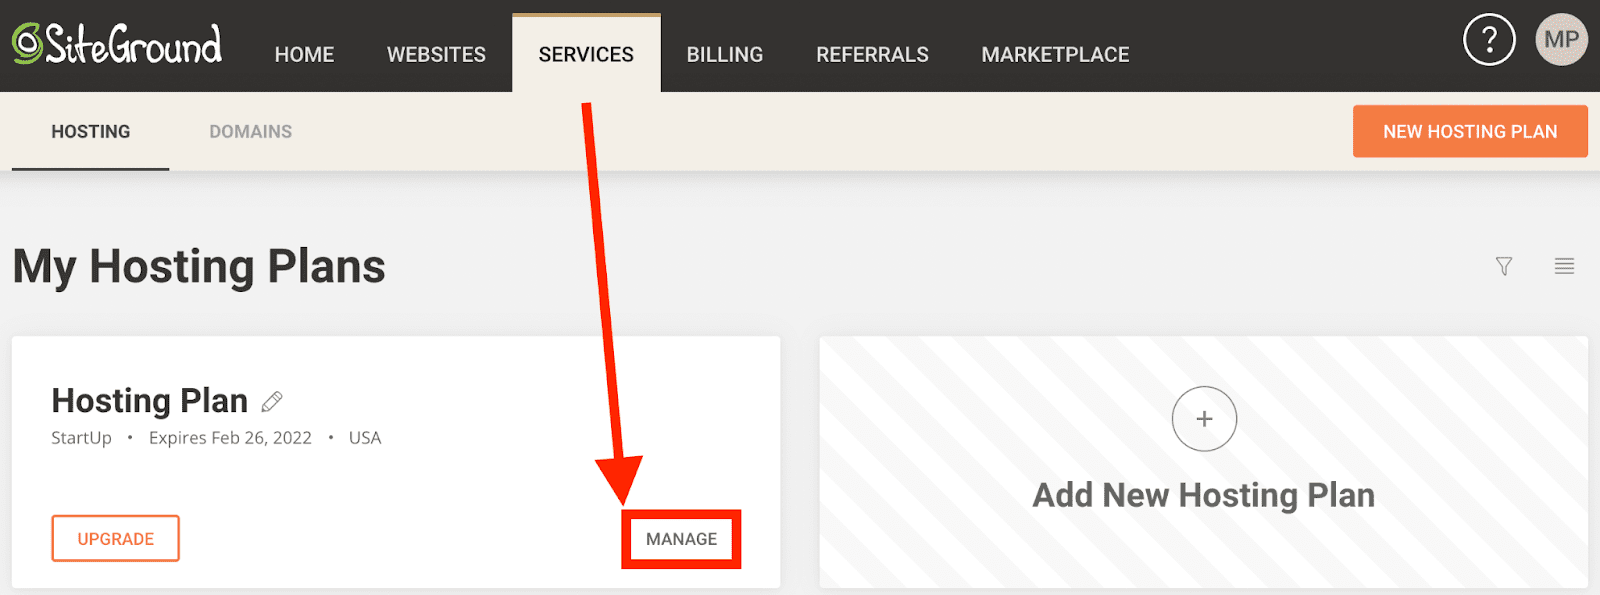 After clicking Services, click the Manage button beside your hosting product.
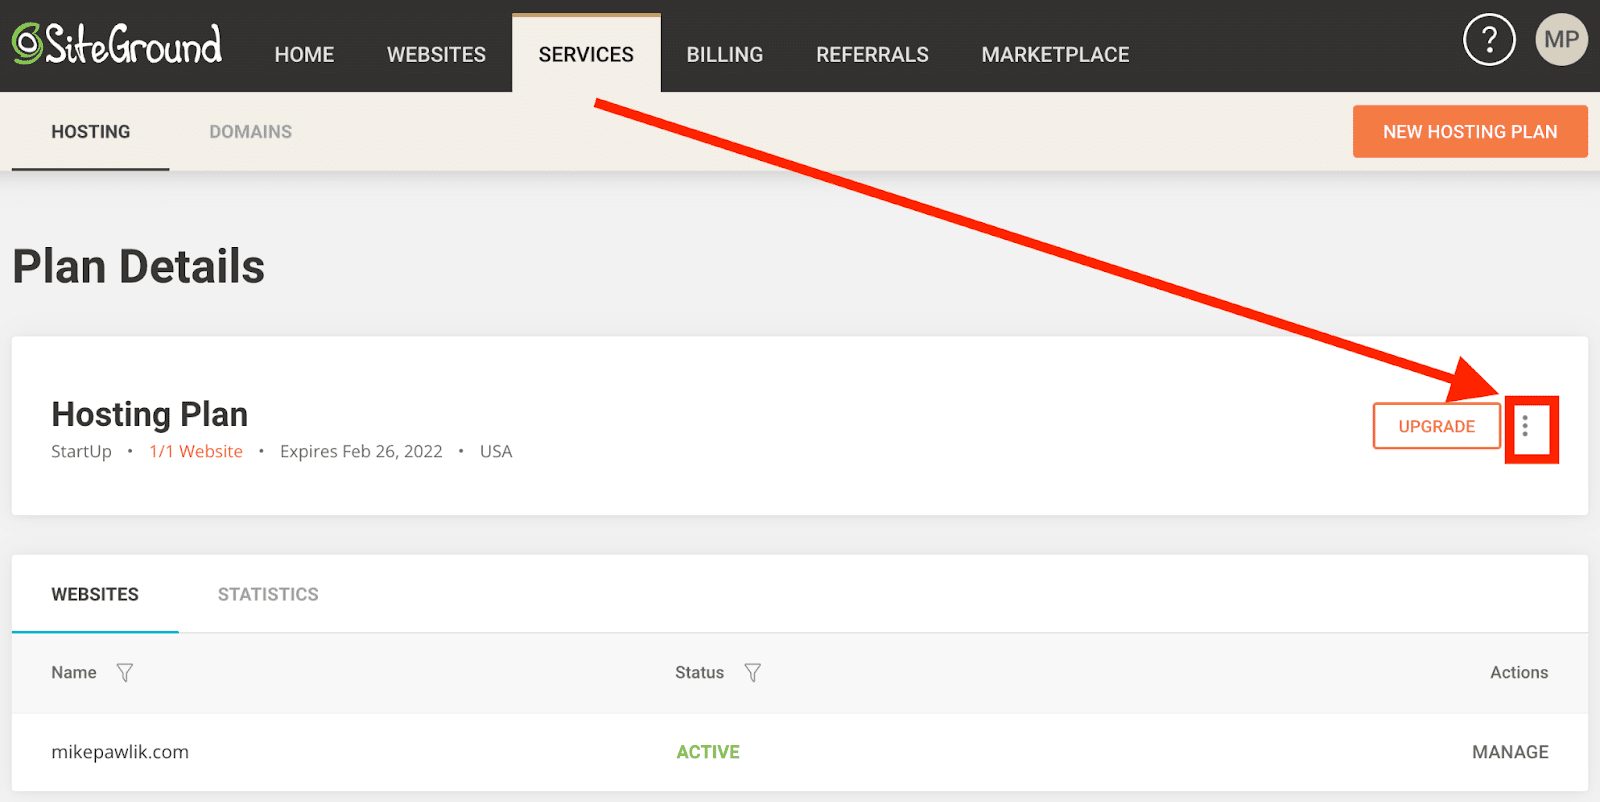 Then, click the three little dots all the way to the right of your hosting plan details, beside the Upgrade button, to bring up a context menu.
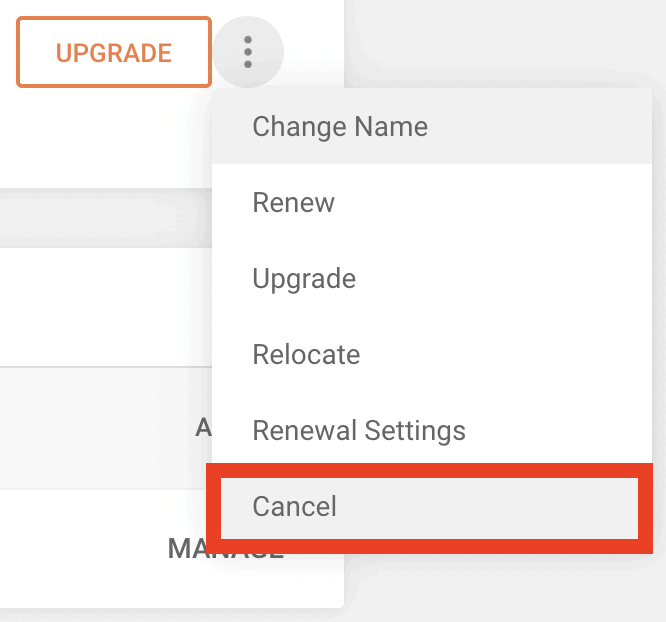 In the context menu, click Cancel to bring up the next screen.
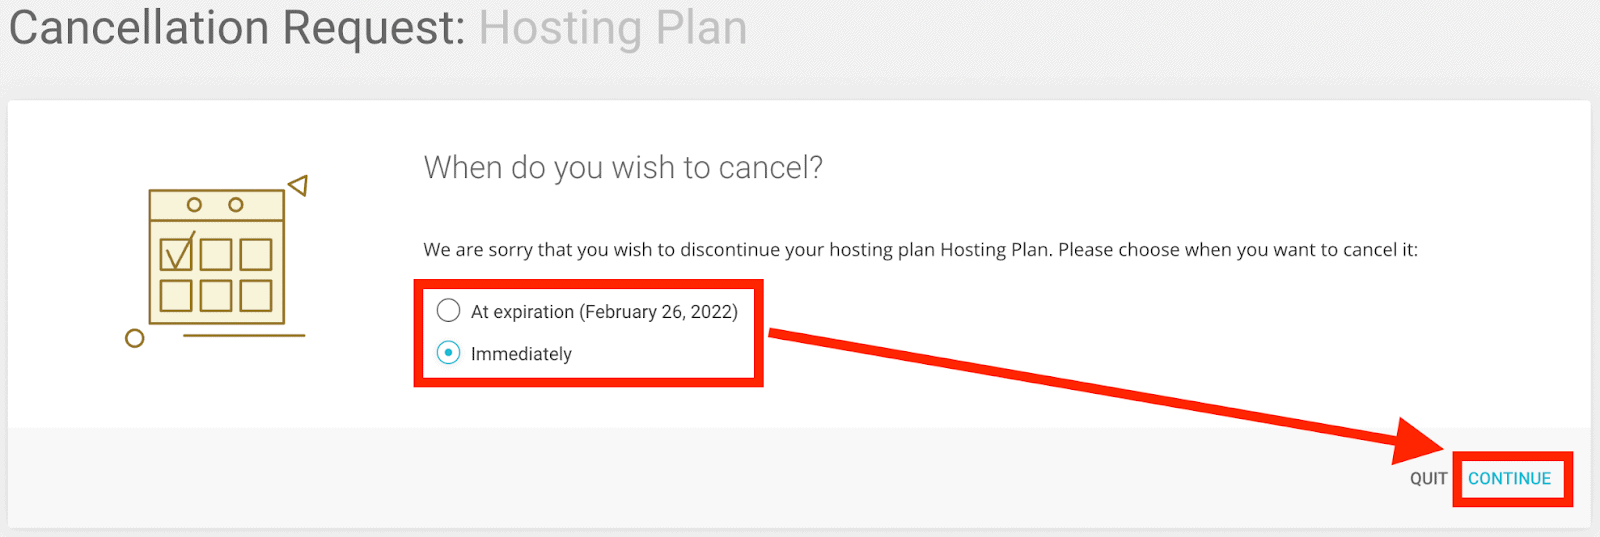 At this point, I was about half way through. Choose when you want to cancel your services, then click Continue yet again. In this case, I chose to cancel immediately in order to receive a refund.
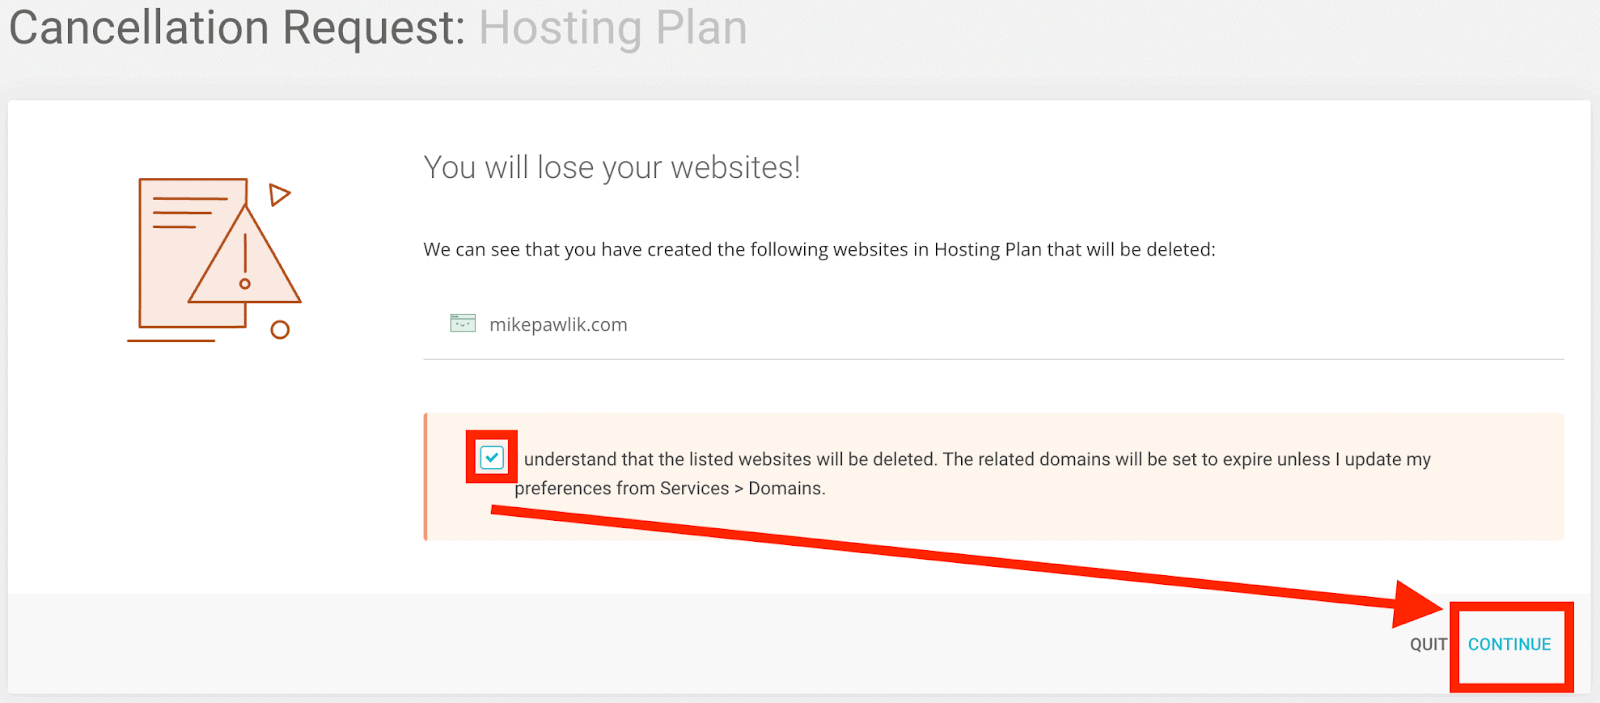 You’ll be asked to confirm that you understand the risk of cancelling your services and account, as your website will be deleted. Accept the risk by clicking the checkbox, then click Continue.
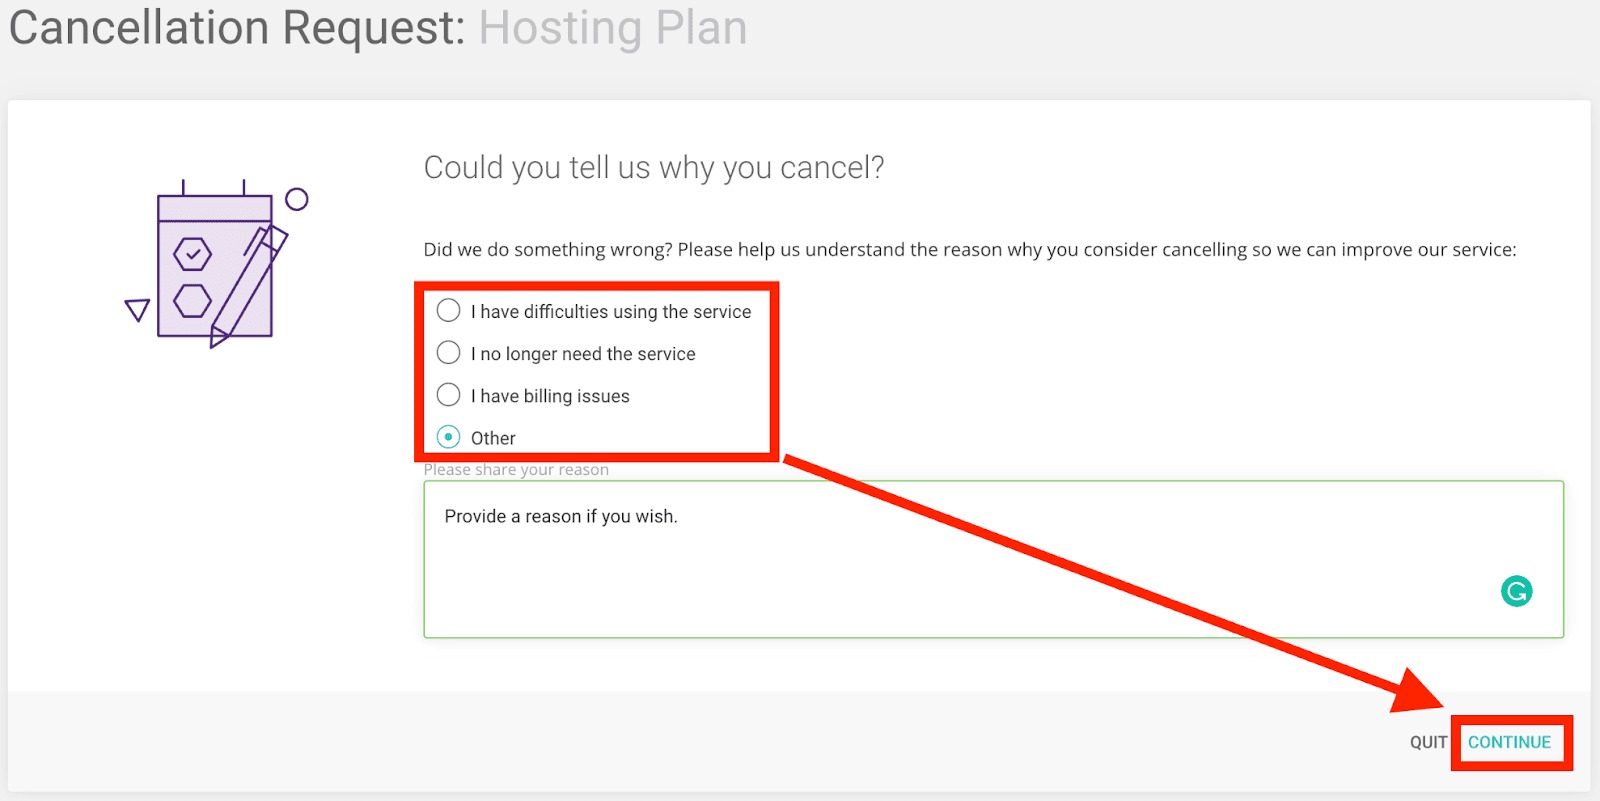 Before you can finalize your cancellation request, you must select a reason, or choose “Other” to specify one of your own (or to opt out). Provide a reason, then click Continue again.
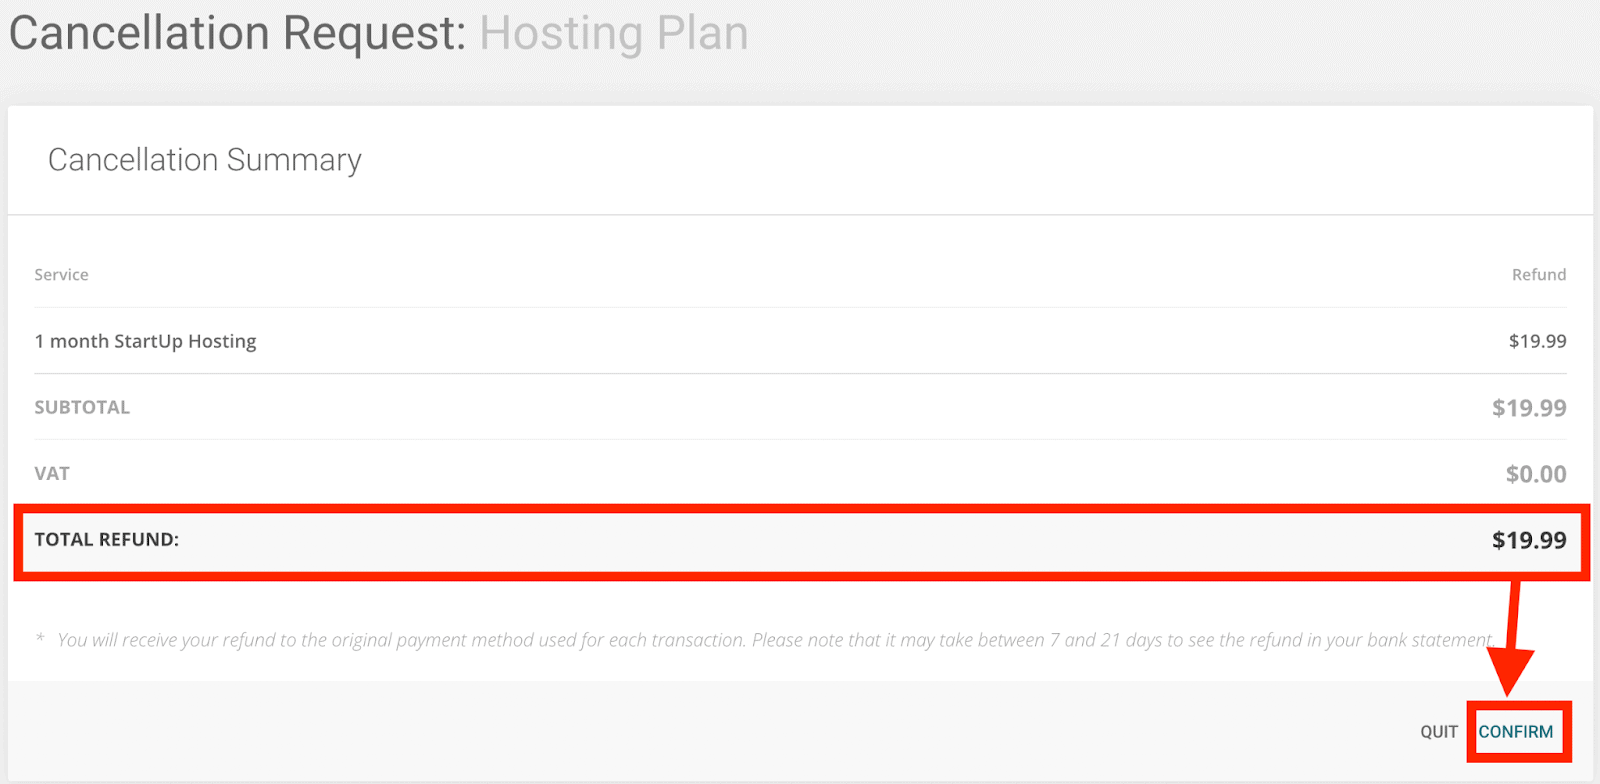 Finally, double-check your refund amount, then click Confirm. And you’re done!
 If your cancellation request was submitted successfully, this is the final screen.
3 Best SiteGround Alternatives for Shared Hosting
Hostinger
When it comes to shared web hosting, Hostinger consistently scores highly in our testing. The good thing is that even Hostinger’s basic Single shared plan offers 30GB of data – which is three times more than the basic SiteGround StartUp plan (and cheaper, too).Save up to 75 % on your Hostinger plan!
Limited-time offer - Don't miss it!
Nexcess
Nexcess presents an excellent hosting choice for e-commerce or WordPress websites, highlighting its prominent managed WordPress service. This service provides you with automatic WordPress updates, continuous malware monitoring, immediate backups, and the added benefit of free website migrations (should you decide to transfer your current site to Nexcess).

Save up to 33 % on your Nexcess plan!
Limited-time offer - Don't miss it!
InterServer
InterServer is an affordable shared web hosting provider with a few features that make it stand out from the competition. All of InterServer’s plans include unlimited storage, bandwidth, email and accounts, with a price that remains the same even if you pay on a monthly basis.
Get your first month of hosting for just $0.01!
Take advantage of this exclusive deal to try out InterServer.


![8 Best Enterprise WordPress Hosting (Scalable & Reliable) [2025]](https://dt2sdf0db8zob.cloudfront.net/wp-content/uploads/2024/11/Best-Enterprise-WordPress-Hosting-1.png)
![8 Best Enterprise WordPress Hosting (Scalable & Reliable) [2025]](https://dt2sdf0db8zob.cloudfront.net/wp-content/uploads/2023/05/Caitlin-Greyling-150x150.jpg)


